Are there 17 steps in the hero’s journey, or 12, or 8? Let’s visit Joseph Campbell’s Monomyth, study some examples of the heroic quest, and find out how you can write memorable heroes. We’ve also added a hero’s journey worksheet to make sure you get some writing practice!
As your editors, we always want you to do your best, and the hero’s journey worksheet is our way to ensure this. But first, what is a hero’s journey?
What is the hero’s journey?
What unites all stories of the world, despite colossal differences in genre and plot, is the fact that their characters will follow a fairly straightforward path. It’s a path that has been taken by everyone from Odysseus and Achilles to Frodo Baggins and Katniss Everdeen.
As an author, you must accept that the success of your story hinges on your hero or protagonist. The challenge here is to write a well-rounded hero who also follows an age-old pattern. If you want to innovate, you first need to understand the source material—the 17 steps in the hero’s journey—inside out.
For starters, here’s a simple definition of the hero’s journey:
The hero’s journey or the monomyth is a universal pattern followed by the main character (hero) in a book or a movie. This pattern usually involves the hero going on an adventure and overcoming a set of different challenges. By the time the hero returns home, they find themselves changed.
Of course, it helps to remember that this formula has different applications in all books. Often, the 17 stages of the hero’s journey adapt to the story and setting of the given book or movie.
It isn’t great if your hero’s journey doesn’t sit right with your setting or the theme of the story. You need to let the story take its own turns and figure out a well-paced arc for the hero accordingly.
The origins of monomyth: a brief history
The concept of monomyth goes back to the last century. Sigmund Freud’s theories led many critics to psychoanalyze heroes and trace similarities between different myths.
The psychologist Otto Rank studied the hero psychoanalytically in his book The Myth of the Birth of the Hero (1909). Thirty years down the line, Lord Raglan used ritualism along with Freudian psychoanalysis to publish his book The Hero, a Study in Tradition, Myth and Drama (1936).
So, more than a century’s worth of study has led to our present understanding of the monomyth. Joseph Campbell’s The Hero With a Thousand Faces (1949), however, deserves most of the credit for this.
Joseph Campbell’s hero’s journey
According to Joseph Campbell, the narrative of monomyth has a fixed pattern:
A hero crosses the threshold between ordinary and supernatural worlds. In this magical world, they encounter monsters, magic, and mysterious forces that test their abilities. The hero wins a decisive victory and returns home with the power to help those around them.
As you’ll soon find in the worksheet, Joseph Campbell lays down the 17 steps in the hero’s journey. However, not all myths follow this cycle accurately. Most stories and myths focus on one particular stage of this journey, while some change the order of these events.
It’s possible to think of Joseph Campbell’s monomyth as a comprehensive hero’s journey template. Its structure is that of a wheel divided into three acts:
1. Departure
The hero leaves his home behind. They not only leave their physical, ordinary world, but also their past self behind. The hero accepts that they must undergo metamorphosis in order to survive and succeed.
2. Initiation
The hero undergoes a series of trials that prepare them for the final battle. These challenges purify them and reveal some key knowledge from the ordinary world that is essential for a victory.
The hero faces all challenges and undergoes significant change. As a reward for their resilience, they’re granted an “ultimate boon”.
3. Return
Once the hero has overcome the obstacles and gained new knowledge, they must return home. The hero is initially reluctant to return, but then finds guidance and divine help on their journey back.
Once they return, the hero becomes a master of both worlds and gains the freedom to live in the moment.
Let’s take a close look at the 17 stages of Joseph Campbell’s monomyth. You can practice writing your own heroic quest once you know all the steps in the hero’s journey!
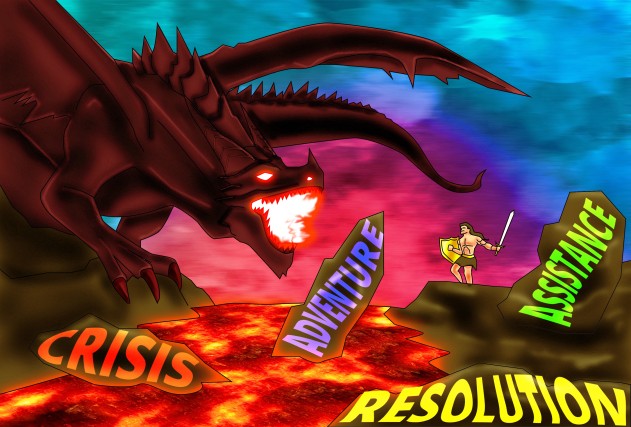
17 steps in the hero’s journey
Departure (stages 1–5)
These steps in the hero’s journey consist of their departure from home. The hero gets a call to adventure, refuses it, but ultimately finds themselves crossing the threshold.
1. Call to adventure
The hero begins in an ordinary world where they have an established place. This situation of normality is interrupted by some omen, letter, or other information that beckons them on the journey.
This information is the hero’s call to adventure. Almost all hero’s journey examples will feature this first call to action. Remember when Katniss volunteers as tribute, or when Gandalf entrusts Frodo with the ring?
If we’re talking classics, how about Achilles getting summoned for the Trojan War by Agamemnon?
For Katniss, the call comes as the ritual of Reaping, where she volunteers as tribute to save her sister. For Frodo, it is an unknown object thrust upon him by an old friend. In the case of Achilles, it’s a literal message that calls him to battle.
All three calls to adventure tell us something about the characters or the main theme of the story. Katniss loves her sister, Frodo is a trustworthy friend, and Achilles is destined to a glorious but short life.
So, you can get creative with the first step in your hero’s journey. Use this moment to solidify some character or thematic aspect.
2. Refusal of the call
It often happens that the hero initially refuses the call to adventure. After all, who likes to have a burden thrust upon them? But the hero may refuse for a number of reasons. They may have someone to provide for or protect, some duty to the king and state, or some anxieties regarding the future.
Frodo doubts whether a lowly hobbit can carry the ring to its destruction. He worries that the task is beyond his capability. Achilles refuses Odysseus’ request because he wants to live a long, ordinary life instead of a short but great one. Katniss, on the other hand, doesn’t refuse the call at all.
As you can see, the steps in the heroic quest are open to interpretation and experimentation. Since Katniss chooses the adventure, she can’t possibly refuse the call. As we have said above, the hero’s journey wheel isn’t a set formula that you must follow at every stage.
Depending on the character, how many possible reasons can you conjure up for the refusal? You can use the hero’s journey worksheet to brainstorm some ideas and jot down the best choice.
3. Supernatural aid
Most myths feature some divine aid being offered to the hero. Often, this help comes only after the hero decides to embark upon the adventure. Once they have committed to the journey, their mentor, guide, or simply a benevolent being offers them some help.
There are many hero’s journey examples of supernatural aid. Our three heroes receive this help as guidance and gifts from their mentors.
Frodo receives many gifts as he embarks on his adventure. Bilbo gives him mithril and Sting, while Galadriel gives him a phial of light.
Achilles becomes invincible thanks to his mother, and Hephaestion makes him strong armor. In the case of Katniss, her mentor Haymitch sends her healing salve through the game sponsors.
Supernatural aid is a great way to show vulnerability and humility in your heroes. It also allows you to symbolize the relationship between the hero and their mentor.
4. The crossing of the first threshold
This is the most important moment in departure, where the hero actually steps into the unknown world. This entry into the supernatural region is a physical marker that the hero has left behind everything they had held certain.
Since the hero leaves behind their known boundaries, they also step away from their old self. From this point on, they begin to be transformed by the unfolding steps in the hero’s journey.
When Frodo reaches the boundary of the Shire, Sam reminds him that they are leaving their known world behind. This realization is Frodo’s crossing of the first threshold. In the case of Achilles, his crossing of the first threshold is open to interpretation.
It can be the moment he first sets sail to Troy with 50 ships. It can also be his first battle against Troy. But his irreversible crossing of the threshold is when he steps into the battlefield after Patroclus dies. From that point, there is no return for Achilles.
Katniss’ crossing of the threshold is a physical boundary like Frodo’s. But it is much more dramatic and intense, because it puts her in an active adventure zone.
As you may have noticed by now, these events don’t have to unfold chronologically. Katniss receives Haymitch’s help after crossing the threshold and not before. You can always switch things up. The worksheet is more of a map that you can customize to create the most fulfilling story for your hero.
5. Belly of the whale
This is the stage in the hero’s journey where they are completely isolated from the world. They are swallowed into the unknown, out of which they emerge a changed person. This ordeal shows the hero’s resilience and their ability to adapt.
Joseph Campbell takes this name from The Book of Jonah, where Jonah is thrown overboard and swallowed by a “great fish”. He is vomited back to the shore in three days, which is a kind of rebirth for him.
So, the belly of the whale has come to represent a period of total separation from the outside world. This separation leads the hero to separate from their old self. Remember this when you go through the worksheet!
In various examples of the hero’s journey, this stage comes as a physical or mental isolation for the hero. For Frodo, this happens when Shelob stings and immobilizes him, covering him up in the spiderweb. Separated from everything and everyone, he reflects upon his own actions.
For Achilles, this stage is in his mourning for Patroclus. He shuns the world and smears ash all over himself. After this, he emerges into battle with the single intention of getting revenge.
Katniss’ belly of the whale stage is when she climbs up a tree to protect herself from the other competitors. As you’ll notice, many things that apply well to Frodo and Achilles are difficult to align with Katniss. This is due to the setting and story of The Hunger Games.
So, Katniss Everdeen can be your example of how to incorporate the templatized heroic quest into your novel while also reinventing the wheel.
Initiation (stages 6–11)
These steps in the hero’s journey pack the thickest action. The hero faces several challenges, overcomes them, and meets the biggest hurdle of their path.
In this act, the hero is initiated into the social order of their world. Let’s see how this happens.
6. The road of trials
The road of trials is the series of obstacles that the hero faces on their journey. Aside from making the story gripping, these obstacles can also add some real substance to your story.
In ancient stories, these trials often come in packs of three. So, the number becomes important for many myths. However, all stories don’t follow this convention.
Often, these obstacles take the shape of monsters or mysteries. They can unlock hidden powers or character aspects of your lead characters. However, they also need to carry some thematic meaning.
Frodo’s trials on the road include Orc troops, the Nazgul, and Gollum. Sparing Gollum’s life serves as an important character point as well as story point in the book.
Achilles’ road of trials can be said to be his rampage on the battlefield. He massacres Trojan soldiers, fights the river God as well as Apollo before he can enact his revenge upon Hector.
Katniss’ road of trials is her struggle within the arena. However, her tests can be said to begin during her training, where she has to garner attention from the sponsors. As always, Collins interprets the hero’s journey loosely.
Examples of the hero’s journey across genres will provide differing versions of a road of trials. On this road, the hero makes friends, allies, and enemies. The story deepens and the challenges they face change the hero.
7. The meeting with the goddess
This is one of the steps in the hero’s journey that have become a bit dated. Joseph Campbell’s study of (mostly male-centric) myths leads him to this stage in the journey where the hero meets the goddess.
The goddess supposedly represents the ideal feminine form. She is beautiful, kind, gentle, and gives hope to the hero. She reminds the hero that he will soon return to the peaceful home where his journey began.
Campbell writes that in the case of a female hero, she finds a “heavenly husband” instead of the goddess. Aside from the misogynistic and male-centric perspective here, we can boil this down to its essential thematic meaning.
At this stage, the struggling hero needs to be reminded of love, hope, and goodness in the world. Whoever they meet in this step of the quest should give them the strength to go on. It’s here that you can pack a stunning emotional scene or two!
Frodo’s visions of Galadriel are a classic example of meeting with the goddess. For Achilles, the Greek goddess Athena serves as a guide and a helper on several occasions.
Katniss’ meeting with the goddess is open to interpretation. Rue guides her in a moment of extreme desperation and they develop a loving relationship. But Katniss also cares for Peeta and forms a bond with him. So, there is more than one way of going about this.
When you go through the hero’s journey worksheet, remember that this is a way to put a spin on a classic model.
8. Woman as the temptress
The misogyny here can’t be completely attributed to Joseph Campbell. For millennia, women in mythology and folklore have been divided into the holy mother and the sinful temptress. They appear in myths as either divine mother figures or as wicked beauties.
Lord of the Rings combines the two figures in Galadriel. She gifts Frodo a maical phial and offers words of encouragement later on in the story. But on meeting her, Frodo is also tempted to give the ring to her.
Of course, this step in the hero’s journey can feature any temptations that make them stray from their path. Even in Iliad, Achilles’ temptress is not a woman. Apollo disguises as the human Agenor to challenge Achilles to a duel, distracting him from his goal of fighting Hector.
Like Frodo, Katniss’ goddess also becomes her temptress. If you consider Peeta as the goddess, he soon becomes the temptress by asking Katniss to kill him. He tempts her to kill him and win the game, but she refuses to do so.
So, you may think of the goddess and the temptress as features of the two steps in the hero’s journey. They don’t even have to be characters! Get creative with this, and put that worksheet to good use!
9. Atonement with the father
In this stage of the hero’s journey, the hero must face the penultimate challenge. They have to face the father figure, which can be anyone or anything that is all-powerful in that specific world. The hero needs to either overcome or reconcile with this almighty figure, to truly become their best self.
This stage initiates the hero into the dominant world order. They let go of their ego to become their purest self, leaving behind the conflicts that defined their childhood. If you can see signs of Freud here, you’re absolutely right.
Of all the steps in the hero’s journey, this is most directly inspired by Freud’s theories. The man must face the almighty father in order to lead a well-adjusted life. For the modern writer, this stage can simply consist of the hero facing the single most powerful entity in their world.
If you can somehow connect this to their past, kudos to you! You’ll do much justice to our hero’s journey worksheet.
Now, for our three hero’s journey examples. Frodo faces the father of power, which is Sauron. He is the single most powerful entity in that world, and Frodo must destroy him.
Achilles’ atonement with the father is a bit different. His atonement with Priam, Hector’s father, helps him move away from mindless brutality.
Katniss faces the makers of the game when she threatens to die with Peeta. She emerges as a victor and goes on to become the Mockingjay.
10. Apotheosis
This is the climax of the hero’s journey. In this stage, the hero achieves some greater understanding of the world. The word “apotheosis” literally means “achieving godhood”, so the hero in this stage achieves perfection.
The hero now attains the abilities that ordinary people don’t have. Their ordeals have purified them to their core, and now their own revelation changes their worldview.
This is the moment where we may have to tweak our hero’s journey examples a bit. Frodo’s Apotheosis, for example, is difficult to pin down while Gandalf presents a much clear instance of it. Gandalf faces the abyss and is reborn as Gandalf the White. His rebirth enlightens him.
Achilles also doesn’t reveal a certain moment of apotheosis. However, when Patroclus dies disguised as Achilles, there is a symbolic death and rebirth of the demigod. After this moment, Achilles fights armies and gods to become a great hero.
Katniss’s revelation that the Capitol is her true enemy, helps her avoid a certain death. She refuses to kill Peeta and wins the game with him, becoming a victor.
What moment of revelation will you write for your hero? Our worksheet has space for your ideas, but you don’t have to limit yourself to it. You’re free to innovate, and in case of apotheosis, innovation is the rule!
11. The ultimate boon
This is the stage in the hero’s journey where they achieve a great bounty. It is a reward for their efforts, or the goal they set out to achieve. In any case, gaining this boon helps both the hero and their world.
They can now go back and help others with this boon. However, this boon doesn’t have to be an object or riches or any abilities. Often, the finishing of the ordeal and the defeat of the “father” is a boon in itself.
Frodo’s biggest boon is permanently freeing Middle Earth from Sauron’s power. Achilles’ boon is winning the Trojan War by killing Hector. However, Katniss’ boon is a different case.
It can be said that Katniss’ boon is being allowed to win alongside Peeta. But a greater boon is her newfound status as a symbol of resistance. It is due to this that she eventually becomes the Mockingjay.
Return (stages 12–17)
The final steps in the hero’s journey map their return from the supernatural realm. There are setbacks, challenges, and chase sequences in the hero’s return journey, too, so let’s get to it!
12. Refusal of the return
Joseph Campbell’s monomyth wheel requires the hero to bring back their trophy to the ordinary world. The cycle must continue, and for that the hero needs to return to their world and share their wisdom with their people.
However, the hero can be reluctant to return, refusing to complete the cyclical diagram of the hero’s journey. This may be for a number of reasons, like the refusal of the call to adventure. The hero may doubt whether other people are ready for their newfound wisdom. They may worry about something or someone in the supernatural world they’re in.
If nothing else, it may simply be tempting to remain in the fabulous world like a human in paradise. In Frodo’s case, it is the exact opposite. He is dismayed at not being able to resist the Ring’s temptation. Even as Sam hopes to return home, Frodo surrenders to death.
Achilles’s refusal to return is, interestingly, the same as his answer to the call. He knows that if he answers the call to adventure, his prophesied death is certain. So, he has no hopes of ever returning to Phthia.
Katniss does not refuse her return. She is actually eager to go home and reunite with her family. So, as we have said numerous times before, not all the steps in the hero’s journey have to be followed. Just make sure you’re doing something interesting with the ones you do end up following!
13. The magic flight
In many cases, the hero’s return is less a triumphant march and more of an escape from the supernatural world. This may be due to magical entities guarding the gates or preventing the hero’s return.
Joseph Campbell writes that the hero’s return can turn into a lively chase sequence. This can be comical or thrilling, depending on the story. What do you think you’ll enter for this stage in the hero’s journey worksheet?
Let’s turn to our hero’s journey examples. Frodo’s return home is a literal magic flight. The eagles save Frodo and Sam as they fall, carrying them away to safety.
Achilles does not get a magic flight. His story is a tragedy, so his death comes at a moment of triumph for him. He does not return home.
Katniss’ magic flight is symbolic. Joseph Campbell writes about the presence of the mentor in the hero’s magic flight. As Katniss imagines Cinna and Haymitch, her supernatural mentors, preparing her wardrobe, this can be considered her magic flight.
14. Rescue from without
Sometimes, the hero may need to be rescued from the supernatural world. In this case, mentors and guides aid the hero in coming back home.
More than the physical danger, these mentors have to help the hero adjust to the ordinary world. The hero may be in a state of shock or disbelief. So, rescue from without can be a mental ordeal, rather than a physical one.
As an example of the heroic quest, we can look at Frodo’s return. He needs time and Gandalf’s guidance to go back to normal. Katniss has Haymitch, Effie, and Cinna to support her, but there is no definite rescue from without.
Will you mix the rescue with the magic flight, or will you leave your hero alone to find their way back? Work it out in the hero’s journey worksheet, and let us know. We’re always eager to help!
15. The crossing of the return threshold
This is the actual moment of crossing the threshold between supernatural and ordinary worlds. The hero comes back a changed person, riddled with questions.
It can be difficult to return to everyday perils of ordinary life after witnessing intense magical events and achieving spiritual perfection. When Katniss returns home, she is filled with the certainty that President Snow and the Capitol are her true enemies.
When Frodo returns to the Shire, he finds it overrun by foreigners. He decides to save the Shire from the ruffians, thus crossing the return threshold.
How will you write this last crossing between the hero’s two worlds?
16. Master of the two worlds
Internal and external conflicts interweave through the 17 stages of the hero’s journey. Even if external conflict gets resolved in the atonement with the father and magic flight, the internal conflict isn’t resolved.
This stage in the hero’s journey resolves their internal conflict. Frodo saves the Shire and becomes a true leader. This doesn’t happen for Katniss, but she comes to occupy both worlds as a victor.
She is moved into the Victor’s Village to live in comfort and luxury. Even though she experiences and embodies both worlds, her internal conflict isn’t resolved. It gets resolved in the later books, after she finally becomes the Mockingjay.
17. Freedom to live
Becoming a master of both worlds frees the hero from his fear of death. This itself gives them the freedom to live fully. They recognize the passing of time, but choose to live in the moment. They are at peace with themselves and the rest of the world.
Different hero’s journey examples will lead the hero to this point in different ways. Even when Frodo goes back to the Shire, he does not find peace there. It is only when he leaves for the Undying Lands that he finds rest.
If the book is a part of a series, it’s likely that this final stage of the hero’s journey isn’t accomplished. The hero may find a temporary rest, but they have to embark on another adventure right after.
This is the case for Katniss. At the end of the first book, she has emerged as a victor and can live freely. There is no imminent danger, and she can lead a luxurious life. However, she doesn’t find peace. She will soon have to leave for the Quarter Quell, and compete in the games again.
What’re you planning to do with your hero? Will they complete their journey within one book or several? How do you plan to divide the 17 stages of Joseph Campbell’s monomyth in your story?
If you’re not certain yet, our heroic quest worksheet is at your service!
Hero’s journey worksheet
In your story, you get to erase the hero’s journey diagram and redraw it as you think best. Pay attention to the demands of your theme, story, and setting.
The hero’s journey worksheet here is a basic template that you can modify as you want. So, let your creative juices flow!
Without further ado, here’s the worksheet:
Good luck on your writing adventure!
After completing your masterpiece, if you need editing services, we’re here to help. Continue reading to add depth to your story!


![Novel Outline: A Proven Blueprint [+ Free Template!]](https://www.papertrue.com/blog/wp-content/uploads/2023/09/How-to-Outline-a-Novel.png)