Newsletter Sign Up

50 Amazing ESL Resources for Students (Free & Paid)

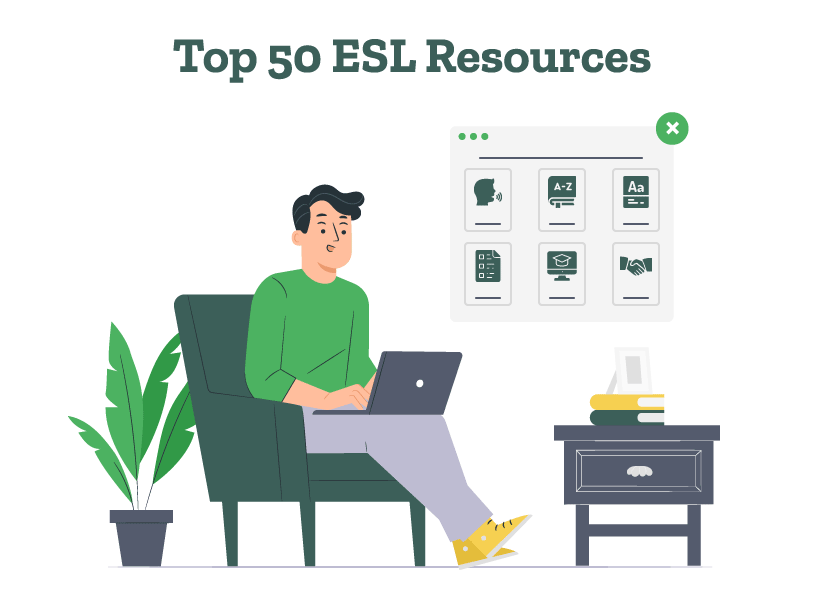
Are you looking to improve your English language skills? Discover the best ESL resources to master grammar, expand your vocabulary, and enhance your communication skills. Whether you’re a beginner or an advanced learner, these resources will help.

We’ve also added free ESL resources for you. The resources listed include a huge variety of exercises, interactive videos, quizzes, games, and guides to help you. So without further delay, let’s jump into the details! 

Eliminate all text errors with our editing expertise!

Here are the top 50 ESL Resources: 

1. BBC Learning English 

Along with detailed guides to learn grammar, vocabulary, and pronunciation, it also has an option to learn business English. Every lesson contains a video, an explanation, and a quiz. BBC English also has a user-friendly interface where you can search for any English concept (e.g. adverbs/adjectives) and get lessons related to that concept. For those who prefer audio learning, it also offers podcasts like Office English, 6 Minute English, 6 Minute Grammar, 6 Minute Vocabulary, English in a Minute, etc. 

2. EnglishClub 

This website provides several exciting, free resources for ESL students such as games, quizzes, songs, and jokes. It also offers lessons to improve vocabulary, listening, speaking, reading, and writing. The games include crossword, hangman, matching homophones, pairing rhyming words, etc. For those who wish to learn B2B writing or prepare for English exams like TOEFL and IELTS, it provides detailed resources. 

3. English Central 

English Central provides 20,000+ video lessons to learn English. Videos are categorized 

into beginner, intermediate, and advanced levels. Depending on your learning level, you can watch a video, learn new words, speak the words considering the context, and converse with a private teacher about a video (Go Live!). The videos are based on various topics like technology, animals, manners, science, health, school, etc. 

4. Dave’s ESL Cafe 

This online resource for ESL students includes grammar lessons, idioms, slang, lesson plans, information about phrasal verbs, and quizzes. There are detailed guides on various grammar topics such as adjective clauses, adverbs, tenses, question tags, articles, nouns, etc. There are various quizzes on idioms, slang, parts of speech, word forms, reading comprehension quizzes, etc. 

5. Wyzant 

This website offers vast academic resources for ESL students to enhance grammar, vocabulary, pronunciation, and reading. It provides detailed explanations of nouns, verbs, adjectives, prepositions, and other parts of speech, reading strategies, and quizzes to test your understanding. From how to combine sentences, and use gerunds and infinitives to understanding passive voice, it covers everything! 

6. ESL Lounge 

This website provides grammar guides explaining nouns, verbs, adjectives, and other parts of speech. With this, it offers reading exercises (where you’ve to read and answer true/false questions, multiple choice questions) and vocabulary exercises (where you’ve to list the nationalities, match the noun phrase with the possessive adjective, etc). It also includes quizzes to test grammar and vocabulary, listening exercises, pronunciation exercises, and games like crosswords, hangman, word search, etc.

7. Oxford Online English 

Oxford Online English is one of the best sites for studying spoken English, business English, grammar, pronunciation, writing, and IELTS preparation. This site provides a range of videos to help students learn formal and informal English, understand spelling rules, make complex sentences, and improve punctuation. This includes YouTube videos to help students learn and understand how to talk in real-life situations in English. For example, how to talk about your emotions, health, family, everyday problems, daily routine, etc. 

8. Purdue Online Writing Lab 

This website consists of an APA guide, an MLA guide, a Chicago guide, a resume guide, and rules for avoiding plagiarism. The style guide also includes an option to fill in the details of your citation and generate a citation as per the preferred style guide. It also consists of exercises to test your knowledge of sentence style, sentence structure, grammar, punctuation, spelling, numbers, and multilingual exercises. 

9. British Council 

British Council not only offers structured lessons on grammar, vocabulary, business English, and general English but also provides online learning courses. It offers various learning formats such as audio, video, story, and magazines to help students learn general English. For professionals who wish to learn business English, it provides corporate training courses and podcasts such as change management, line management, public relations, relationship-building, etc. 

10. Activities for ESL Students 

Grammar quizzes, vocabulary quizzes, and crossword puzzles are included on this website. These quizzes have levels such as easy, medium, and difficult. There are also bilingual quizzes where the questions are asked in another language and you need to answer in English. For example, Arabic-English, French-English, German-English. 

11. Voa Learning English 

This website offers 3 options: beginning, intermediate, and advanced level. Every article topic includes a video and a quiz to ensure that you’ve understood the topic. From teaching pronunciation and correct word choice to helping students learn new words, this website covers everything! 

12. ESL Gold 

Learners can go through ESL Gold’s various resources such as conversational phrases, topics, and situations for conversations, videos, and reading exercises to improve their English skills. To enhance your vocabulary, ESL Gold gives a list of words, and phrases on topics such as animals, food, health, months, nationalities, numbers, etc. With this, to improve your speaking skills, it gives topics for roleplay conversations where you’ve to talk with another person about a specific subject (e.g. leaving, arriving, good news, etc). 

13. Language Guide 

This is one of the best ESL resources to learn vocabulary for beginners. It has various categories such as food, clothing, animals, nature, the house, the body, etc. By selecting a category, you can view images and words related to that category. It also provides you with the pronunciation of every word in the category. This app also includes speaking and listening challenges to enhance English skills. 

14. Breaking News English 

Breaking News English contains 5000+ English lessons on various topics like business English, environment, education, lifestyle, people, technology, world news, etc. Various options are given such as Level 0, Level 1, Level 2, Level 3, Level 4, Level 5, etc. Once you select the level, you have the option to listen, read, match words, spell words, etc. 

15. Learn that word 

This is one of the best websites for improving your vocabulary and spelling. It has a database of 150,000+ words to enhance your vocabulary. Whether you want to learn SAT words or gain vocabulary for TOEFL/IELTS exams, this site is beneficial. The site also includes spelling games, and options to create your word lists for study. This site offers a free trial after which you’ll need to pay $2.49-$9.50 per month for an individual plan. 

16. English Media Lab 

English Media Lab is an interactive website that provides games, puzzles, and exercises to enhance listening, speaking, reading, and writing skills. It helps you understand adverbs, verbs, prepositions, conjunctions, and other grammar concepts through fun games. To understand spoken English topics such as agreeing and disagreeing, apologizing, getting to know someone, apologizing, asking permission, and greeting, it also gives several examples. 

17. English, Baby! 

English, Baby! is a fun website that has several interesting features like chatrooms, forums, quizzes, and the option to download English audio lessons. It offers free English lessons and also gives you the option to learn new vocabulary. Using this site, you can also find friends and practice English with them. To use this platform, you need to create an account. 

18. Funbrain 

Funbrain is one of the best resources for ESL students that helps to improve reading skills. It provides you options to select the grade from pre-kindergarten to 8th standard. Once you choose the grade, it will give you a list of reading resources and games like Word Derby that you can play while understanding grammar. 

19. EngVid 

This website provides English videos on various topics like business English, comprehension, culture and tips, expressions, grammar, speaking, vocabulary, and writing. With this, it also offers videos for students who wish to take TOEFL, IELTS, and TOEIC exams. Once you select the topic, it gives you a list of lessons where every lesson is categorized as per its difficulty level (beginner, learning, or intermediate). 

20. Perfect English Grammar 

Using this website, you can get explanations on various grammar topics, online courses on grammar topics, and exercises to test your grammar knowledge. Whether you want to learn about tenses, verb forms, question tags, relative clauses, adjectives, or adverbs, this website explains everything. The explanation for every concept also includes practical examples. With this, it also offers spoken English courses. 

21. ESL Lab 

This is one of the best ESL resources for improving listening skills. It includes videos on culture, interview videos, and audio clips about people’s life stories. By listening to these audio and videos and solving quizzes, learners can enhance their listening skills. With this, ESL labs also consist of additional activities such as language games, vocabulary lessons, and idioms to make English skills better. 

22. The English Learner Movie Guides

This website provides summaries of famous movies to help students learn vocabulary and enhance reading skills. It allows you to download summaries of the movies as a PDF. In the PDF, complex words and phrases are highlighted and their meanings are explained.  

23. Oxford Learner’s Dictionaries 

This online resource for ESL students contains dictionaries for American English, Academic English, Collocations, and German-English dictionaries. With this, it also contains word lists on various topics like animals, appearance, communication, culture, food, drink, etc. It also explains various grammar concepts with examples and provides tests to practice the concepts learned. 

24. Forvo 

Forvo is one of the best sites for improving pronunciation skills. It gives you the option to search for any word and understand how it is pronounced. Forvo also has categories such as food, verbs, nouns, names, medicine, and adverbs. By selecting a category, you can listen to the pronunciation and learn to pronounce words for that category. 

25. Howsjay 

Howsjay is a free online English pronunciation dictionary. Using Howsjay, you can search for any word, know its definition, and hear its pronunciation. Howsjay also has various categories such as adverbs, chemistry, clothing, etc. You can select a category and pronounce words related to that category. It also is beneficial to learn how to pronounce commonly used phrases. 

26. ReadTheory 

This is one of the best websites to improve your reading skills. It consists of reading exercises, and worksheets to help students read better. From 1st grade to 12th grade, ESL and SPED worksheets, ReadTheory offers vast online resources for ESL students. The reading exercises include reading comprehension where a learner has to read paragraphs and answer questions about that paragraph. 

27. Rong Chang

This website provides resources for beginners and intermediate learners. It includes 200+ conversation topics, reading passages with 50 words, exercises to learn verbs, essays, and short story topics. With this, it also contains 100 dictation exercises and 27 sets of grammar exercises to test your knowledge. 

28. ELLO

ELLO stands for English Listening Lesson Library Online. It has more than 3,000 free listening lessons for learners. Elllo also includes 100+ grammar lessons where you can learn by watching short English conversations. It has various categories such as beginner A1 conversations, beginner A2 conversations, intermediate B1 conversations, etc. 

29. English Page 

English Page offers free ESL resources to learn grammar and vocabulary. It has detailed guides for verb tenses, prepositions, gerunds, vocabulary, articles, conditional forms, subjunctive nouns, etc. For learning irregular verbs, it provides free flashcards. With this, it also offers exercises to test your knowledge about verbs, prepositions, etc. To listen to all podcasts, you need to join by becoming a member. The cost for membership starts from 19 Euros for 3 months. 

30. Podcasts in English 

This website has 680 podcasts to help students improve their English skills. Depending on the difficulty level, the podcasts are categorized into 3 types: Level 1, Level 2, and Level 3. Once you select the level, it gives you a list of podcasts to choose from. 

31. WriteAndImprove 

This website has various workbooks and tasks to practice writing and enhance your writing skills. These tasks are categorized based on their difficulty level into beginner, intermediate, advanced, and business. It gives you various writing prompts for students to encourage you to write. These include prompts for writing emails, paragraphs, letters, essays, descriptions, and stories. It also has options such as IELTS Academic and IELTS Training to help students improve their writing skills for the IELTS exam. 

32. ESL Pod 

ESL Pod provides thousands of podcasts to help students learn English. Every audio lesson is 15- 30 minutes and includes a text learning guide of 8-10 pages. While you can have one free, sample lesson, to continue using it, you need to pay $29 per month. You can learn about speaking in daily life in English (everyday conversations) easily by downloading lessons from their Android or iOS app. 

33. Business English Pod 

From making presentations in English to preparing for job interviews, negotiating, socializing, and talking to customers, this site offers detailed resources. It also has various vocabulary categories like business idioms, business news, human resources, purchasing, and supply chain to enhance business English. While it offers a free trial, the membership cost starts from $75. 

34. English Grammar Online 

English Grammar Online is a simple and user-friendly website. It has various sections to learn grammar, and vocabulary, and improve reading skills. From guides about tenses, prepositions, and adjectives to how to create a CV, it covers a vast range of English topics. To make English learning fun, it also has games, quizzes, and riddles. This website also provides exercises to test the learner’s knowledge of grammar concepts like verbs. 

35. Talk English 

This website provides lessons to learn English speaking basics, business English, listening, idioms, phrases, and how to prepare for interviews. It also includes video lessons and audio files to listen to the entire lesson. With this, it also offers additional lessons to enhance pronunciation and vocabulary. To improve vocabulary, it has lists of commonly used words (e.g., top 1500 nouns, top 1000 verbs, top 500 adjectives. 

36. Ted Talks 

This is a great site to improve speaking skills, listening skills, and vocabulary. You can select an option from various categories such as psychology, leadership, health, AI, sleep, business, motivation, personal growth, etc. The site will display the most recent talks about that topic. You can then select the speaker of your choice.

37. BusinessEnglish.com

This website provides vocabulary exercises, grammar exercises, spelling tests, and verb conjugation practice to learn business English. It also offers valuable ESL resources for students to learn idioms about people, weather, sports, food, etc. With this, BusinessEnglish also includes dictation exercises for general English. 

38. Learn English Today 

Learn English Today includes thousands of free resources for ESL students. From grammar guides and exercises to idioms, proverbs, and vocabulary, it explains various English concepts. To learn English better, it also provides word games like crosswords, jumbled sentences, quizzes, missing words, etc. With this, it also provides resources to learn business English including vocabulary, conversation topics, and word games. 

39. ESL Galaxy 

ESL Galaxy is one of the best websites that provides vast online resources for ESL students (for beginner and intermediate learners). These include communicative board games, grammar and vocabulary worksheets, crossword puzzles, pronunciation exercises, etc. This site also provides English writing exercises on topics such as daily routine, weather, eating out, shopping, etc. 

40. ESL Fast 

This website offers 1,500 ESL conversations on 25 topics. Food, college life, at the library, daily life, dating, shopping, travel, and health, are some examples of English topics. Once you select a topic, you can choose to read a conversation depending on your requirements. From making an appointment, complaining, and reporting a problem to requesting a favor, it includes conversations on various topics. ESL Fast also provides an audio file of how the conversation will sound. 

41. ESL Conversation Questions 

This website helps to improve conversation skills by providing questions on various topics like animals, aging, computers, family, etc. It also includes questions focused on enhancing grammar and vocabulary, encouraging better spoken English at the same time. For example, the question ‘How fast do you eat?’ is included in the adverbs of manner category. 

42. FluentU

This resource includes more than 10,000 videos on various topics to enhance English. All videos are categorized into 6 levels (Beginner-1, 2, Intermediate- 1, 2, Advanced- 1, 2). To use FluentU, you can download its app from Apple’s app store or Google Play store.  It also consists of audio dialogues that you can easily download and listen to offline. 

43. Easy World of English 

Easy World of English contains various free courses to learn grammar, reading, vocabulary, and pronunciation. It consists of picture dictionaries on various topics such as professions, sports, tools and gadgets, etc. For testing reading skills, it gives a paragraph and asks questions related to that paragraph. The courses for reading and grammar are categorized based on their difficulty into levels 1, 2, and 3. To enhance pronunciation, this site offers lessons to understand alphabets, numbers, ‘t’ and ‘d’ sounds, numbers, minimal pairs, and special endings. 

44. Speakspeak

This website offers grammar and vocabulary exercises for beginners, intermediate-level, and business English. The exercises are on various topics like tenses, nouns, adjectives, etc. It also includes general knowledge quizzes on history, pop music, capital cities, countries, etc. 

45. Culips ESL podcast 

Culips contains 800+ episodes to enhance English speaking, listening, reading, and writing. You can listen to these episodes on Apple podcasts, Google podcasts, and Spotify. The podcasts help learners grasp idioms, know more words, and improve listening by hearing more interviews. Culips also assists learners in perfecting their pronunciation and has an option called real talk. This option helps learners how to converse in English in daily life. How to ask for a recommendation, compliment someone, apply for a part-time job, call 911, order flowers, etc are covered for learners. 

46. English-Zone 

English-Zone has detailed guides explaining adjectives, verbs, prepositions, conjunctions, and other grammar concepts. With this, English-Zone includes dictionaries for idioms, phrasal verbs, and prepositional combinations. The website also gives information about spelling rules and reading tips. Along with this, fun games, and activities like “The Evil Lady Conversation Maze” make English language learning fun. 

47. Lyrics training 

Lyrics training helps learners improve their listening skills by encouraging them to hear songs and fill the gaps in song lyrics. This also helps to enhance grammar, and vocabulary and elevate their pronunciation. Once you select a song, it gives you various options like beginner, game mode, advanced, and expert. You can also create a free account to add lyrics for your favorite songs and compete with other users. 

48. Common Errors in English Usage 

This website highlights common word choice and grammatical errors in the English language. It has a list of alphabets. By selecting an alphabet, you can understand how people wrongly use that word and learn about the correct usage. This site also explains the meaning of words, gives examples, and provides any exceptions to the rules. 

49. Cram 

Cram provides thousands of flashcards to study and understand various English topics. It has a user-friendly interface where you can search the topic for which you require flashcards. You can also select from options such as careers, computers, language, military, law enforcement, etc, and view flashcards related to that subject. If you prefer learning from an app, you can download the Cram app from the Google Play store. 

50. Using English 

Using English has various ESL resources for students on English grammar, business communication, gestures, writing advice and tips, formal letter writing, bibliographies, citations, etc. This website also includes 296 exercises and grammar quizzes for learners. You can test your knowledge about parts of speech, spelling, or punctuation through various exercises. For more exercises, you can become a member by signing up for free. 

Now that you know the best ESL resources, you can use them to enhance your English. To improve your written English, you’ll also need to edit and proofread your documents. If you face any difficulty doing so, you can take advantage of our editing and proofreading services. Whether you require editing for your essay, assignment, dissertation, research paper, thesis, or business paper, we can help! 

Here are some other useful resources for you: 

How to Track Changes in Google Docs: A 7-Step Guide

Simplify tracking changes in Google Docs with our 7-step guide! We’ve explained how to use this feature to review edits and accept/reject changes. 

We’ve also answered many questions you might have such as: How to turn on track changes in Google Docs? How to see the version history in Google Docs? How to turn off track changes in Google Docs? So without wasting time, let’s jump into the details! 

Make your Google Docs text stand out with professional editing!

Let’s quickly learn what track changes involve and their benefits! 

What are track changes in Google Docs? 

Track changes is a Google Docs feature that enables you to view and retrieve changes made in a Google document. Using this feature, you can see every set of document changes that are organized by a specific date and timestamp. This feature also makes it easy to make any suggestions or change the document completely. 

Now, let’s see how to track changes in Google Docs in detail! 

7 easy steps to track changes in Google Docs 

1. Access your Google document 

You can open Google Docs from your web browser on your computer or mobile and access your document.  Alternatively, you can download the Google Docs app and open the document from your phone or access it from Google Drive. 

Now let’s see how to turn on track changes in Google Docs. 

2. Turn on the “Editing” mode 

  • Click on the pencil icon on the screen’s top right-hand corner. 
  • Select the option “Suggesting”. 

Turn on editing mode to track changes in google Docs

If you’re collaborating with someone else and have shared your document, you can ask them to turn on the “Editing” mode and recommend editing changes. 

How do you track changes in Google Docs made by other collaborators? 

You can view their suggested comments by clicking the comments icon near the “Share” button. Alternatively, you can use the shortcut Ctrl+Alt+Shift+A to show all the comments. 

3. Make changes in the “Suggesting” mode 

Now, you/any collaborator can perform any edits on the document. However, the original text will not change. Instead, these edits will be visible as suggested changes that are highlighted in green. They will be displayed in comment boxes on the right-hand side. 

Make changes in the “Suggesting” mode, a step in track changes in Google Docs


Now, let’s understand how to view track changes in Google Docs in different document modes 

4. Compare various document modes 

  • Once again, click on the pencil icon on the right side. 
  • Select “View” to read the document without suggested changes. 
  • Alternatively, choose “Suggesting” to browse through the document that includes highlighted suggested changes. 

Can you track changes in Google Docs and compare two Google documents simultaneously?

Yes, you can track two separate Google documents at the same time. To do this, go to the “Tools” menu and select “Compare documents”. Upload the second document from Google Drive and select the option “Compare”. Google Docs will then display magenta color lines where there are changes. 

5. Select options to accept/reject 

Similar to tracking changes in MS Word, you can add and view comments on Google Docs. You have the following 3 options to respond to any suggestion: 

  • Reply to the comment and tag another collaborator with whom you’ve shared the document. By typing @ and the first letter of the collaborator’s name, you can tag them. 
  • Accept the suggestion by clicking on the ✓ icon on the box. 
  • Reject the suggestion by clicking the x icon. 

Note: To accept or reject all suggestions at the same time, select the menu “Tools”. Choose the option “Review suggested edits”. Select “Accept All” to agree to all suggestions and “Reject All” to refuse all edits suggested. 

Now let’s see the next step of how to track changes in Google Docs. 

6. See the document’s version history

This is a useful step to see different document versions organized by various timestamps. Follow the steps given below to do so: 

  • Choose the option “File” on the left side. 
  • Select the option “Version history”. 
  • From the right side menu, click on the option “See version history”. 

See the document's version history to track changes on Google Docs

Now, you’ll see various timestamps and dates when changes in your document were made. You can select a timestamp and date to view the document version for that period. If you want to revert to an earlier version, you can select the option “Restore this version” on the screen. 

Explore the next step to understand how to turn off track changes in Google Docs. 

7. Turn off track changes in Google Docs 

Given below are 3 steps to turn off track changes in Google Docs. These steps will enable you to stop seeing comments for tracking changes. 

  • Select the “View” option. 
  • Choose the option “Comments”. 
  • Click on the option “Hide comments”. All comments will now be hidden. (Alternatively, you can use the shortcut Ctrl+Alt+Shift+J to hide comments.)

Turn off track changes in Google Docs

Now that you know how to track changes in Google Docs, you can review comments and make changes accordingly. You won’t need to Google “Can you track changes in Google Docs?” anymore. 

After making changes, you’ll need to review your document thoroughly and check for any remaining errors. If you need professional assistance, PaperTrue can help! We provide expert editing and proofreading services for authors, students, businesses, and job seekers. Feel free to reach out to perfect your document! 

Here are some useful resources for you: 

What Is an Adjective? Definition, Usage & Examples

Have you ever struggled to find the right words to describe something? This is where adjectives can help! In this article, we’ve explained everything- from the adjective meaning to its types and usage. 

Unlike in other languages, English has specific guidelines for arranging adjectives within sentences, which is crucial for clarity and correctness.

Browse through all the examples of adjectives given to understand them better! We’ve also clarified the meaning of adjective forms. With this, we’ve demonstrated their usage through examples. So without further delay, let’s jump into the details! 

Enhance your text with flawless grammar!

We’ll quickly define adjectives before moving on to the forms. 

What is an adjective? 

An adjective is a word that describes or gives more information about a noun or pronoun in a sentence. Adjectives can be used to highlight the qualities of a person, thing, animal, or place.  

Let’s see some examples to understand this adjective definition: 

I bought a big box of chocolates.  

He said that she looked beautiful. 

They gave him an amazing surprise. 

The above examples accurately demonstrate what are adjectives. Interestingly, the word “adjective” has a unique history that dates back to the Middle Ages. 

This image shows the history of the word “adjective”.

After understanding the basics of adjectives, let’s understand adjective forms in detail. 

Adjective forms 

There are 3 types of adjective forms: absolute, comparative, and superlative. The following table explains these 3 forms: 

To understand these adjective forms better, let’s see examples of adjective forms in sentences.

Examples of adjective forms 

I got a big box of chocolates. (Absolute adjective) 

The box I got was bigger than your box of chocolates. (Comparative adjective) 

I got the biggest box of chocolates. (Superlative adjective) 

Ben is a smart person. (Absolute adjective) 

Mark is smarter than Ben. (Comparative adjective) 

Out of Ben, Mark, and John, John is the smartest. (Superlative adjective) 

Now let’s understand the different types of adjectives in detail! 

Types of adjectives 

1. Possessive adjectives 

Adjectives showing ownership and possession, indicating that something belongs to someone are possessive adjectives. His, her, my, yours, ours, theirs are some examples of possessive adjectives. Let us see how these adjectives can be used in sentences. 

I took his pen. 

This is my watch. 

That bungalow is ours

2. Demonstrative adjectives 

Demonstrative adjectives point out specific nouns within a sentence. This, that, these, and those are some examples of demonstrative adjectives. The following are some sentences that show their usage. 

This is my book. 

These apples are fresh. 

That is my drawing. 

3. Interrogative adjectives 

Adjectives that are used to ask a question are known as interrogative adjectives. What, which, whose, where, and how are some examples of interrogative adjectives. The sentences given below accurately demonstrate their usage. 

Examples of Interrogative adjectives

What is the time? 

Where is the Atlantic Ocean? 

How is your health? 

4. Numerical Adjectives 

Numerical adjectives are those that depict a specific number of nouns. First, second, third, fourth, fortieth, and fiftieth are some examples of numerical adjectives.

Examples of Numerical Adjectives

Here are some sentences that illustrate their usage: 

He came fourth in the race. 

It was her fortieth birthday. 

She came first in class. 

5. Participial adjectives 

Adjectives that are similar to a verb’s participle form (ending with ‘ed’ or ‘ing’) are known as participial adjectives. A past participle usually ends in -ed and describes subjects affected by an action. Some examples with participial adjectives are. 

The excited fans cheered their favorite team. 

The sleeping baby looked peaceful in her crib. 

The singing birds created a delightful melody. 

6. Compound adjectives 

Compound adjectives are those adjectives that are formed by combining two words. Usually, a hyphen is added between the two words.

Examples of Compound adjectives

Here are some examples of compound adjectives: 

John is a detail-oriented employee. 

I know a store that sells eco-friendly products. 

It was a time-consuming process.

7. Denominal adjectives 

Adjectives that are formed by adding suffixes like “ish”, “ly”, and “al”  to nouns are called denominal adjectives. Financial, cowardly, bookish, boyish, and musical are some examples of denominal adjectives. The following sentences explain how to use denominal adjectives: 

Ben manufactured industrial products. 

He was fired for his clownish behavior. 

She loved their friendly gesture. 

8. Nominal adjectives 

Nominal adjectives are those adjectives that play the role of nouns in a sentence. Usually, the word “the” is written before the nominal adjectives. Read the sentences given below to understand nominal adjectives. 

Amy founded an organization for the blind

She took care of the elderly

The rich can manipulate situations to achieve their goals. 

9. Appositive adjectives 

Appositive adjectives are those adjectives that are usually written after the noun they modify and are separated by commas or dashes. The following examples demonstrate how to use appositive adjectives in sentences: 

My sister, a hardworking and intelligent student, won the Maths Olympiad. 

The sea, stormy and turbulent, was visible now. 

The lighthouse, tall and bright, helped to warn many about danger. 

10. Indefinite adjectives 

Indefinite adjectives describe those nouns whose exact quantity/number isn’t mentioned. Some, any, many, few, and several are examples of indefinite adjectives.

Examples of Indefinite adjectives


To understand how to utilize these adjectives, read the following sentences: 

I ate some apples. 

There are many job opportunities in India. 

She knows a few influencers. 

11. Cumulative adjectives 

Cumulative adjectives are two or more adjectives that give information about the same noun. Coordinate adjectives are two or more adjectives modifying the same noun and can be separated by commas or the conjunction ‘and’. The examples given below explain the usage of cumulative adjectives: 

She wore a bright yellow dress. 

The old, rusty car finally got a new look. 

I loved the cozy, warm room with the splendid balcony. 

12. Predicate adjectives 

The adjectives that provide more information about the sentence’s subject are known as predicate adjectives. Usually, they are connected to the sentence using verbs. For better clarity, read the following examples! 

The coffee was cold

I gave him a strong reply. 

She realized that she felt terrible

13. Descriptive adjectives 

An adjective that describes the quality of a noun is a descriptive adjective. Beautiful, scenic, sweet, and dramatic are some examples of descriptive adjectives. The following sentences explain how to use descriptive adjectives: 

She bought a blue purse. 

They gave him a wonderful surprise. 

We went to an amazing hotel. 

14. Proper adjectives 

Proper adjectives are those that are derived from proper nouns. They are often derived from proper nouns, including nationalities and languages. Indian, Marxist, Shakespearean, and Freudian are some examples of proper adjectives.

Examples of Proper adjectives

Here are some examples that clarify the usage of proper adjectives: 

The American soldier was given a secret task. 

He was a strong believer in Darwinian theories. 

She loved the architecture of Victorian times. 

Often, many have confusion between adjective words and one of the most important parts of speech– adverbs. Let’s clear this confusion once and for all! 

Adjectives vs. Adverbs: What’s the difference? 

The difference between adjectives and adverbs is that while adjectives describe nouns, adverbs give more information about the verbs in the sentence. Adverbs modify verbs, adjectives, and other adverbs, while adjectives exclusively modify nouns.

What is the difference between adjectives and adverbs?

The following adjective vs. adverb examples make this clearer:

He ran quickly to win the race.  (Quickly describes the verb ran) 

She participated in an amazing race. (Amazing describes the noun race) 

They reacted immediately to the announcement. (Immediately describes the verb reacted) 

These adverb and adjective examples clarify the difference between adjectives and adverbs. However, there is more about adjectives that you need to know. Let’s see adjectives that are commonly used. Whether you want adjectives to describe yourself or others, this list will help! 

A comprehensive list of adjectives 

You can use the above adjectives to describe a person, thing, animal, or place. After understanding the definition of adjectives and their types, you can construct sentences using them. While structuring sentences, it’s also important to proofread and check grammar for clear communication. 

At PaperTrue, we provide expert editing and proofreading services for students, businesses, researchers, and authors. Whether you want to edit a research paper, essay, dissertation, journal article, or business paper, we can help! 

Here are some articles that you might find interesting: 

How To Write a Murder Mystery Story

A satisfying murder mystery tale is one that’s well-crafted. There’s nothing quite like it, is there? The high stakes, the building tension, and the way the author lures you into rooting for the detective truly take immense skill and attention to craft. What are the things you should consider while crafting a murder mystery story? Let’s get straight into it! 

“Ah, but my dear sir, the why must never be obvious. That is the whole point.” — Agatha Christie 

Turn Your Murder Mystery into a Published Book! Get Started

Introduction to the murder mystery genre

The murder mystery genre is a captivating and enduring form of storytelling that has fascinated readers for generations. At its core, a murder mystery revolves around a crime, typically a murder, and the subsequent investigation to uncover the truth. A good murder mystery should keep readers guessing until the very end, with a surprising twist that is both unexpected and satisfying. To write a compelling murder mystery story, it’s essential to understand the key elements of the genre, including the importance of character development, plot twists, and red herrings. By weaving these elements into your narrative, you can create a story that keeps readers engaged and entertained from start to finish.

Murder Mystery Genre

Understanding the key elements

A well-crafted murder mystery is a complex puzzle that involves multiple suspects, motives, and clues. The key elements of a murder mystery include a murder victim, a detective or amateur sleuth, and a list of potential suspects. The story should be rich with plot twists and turns, as well as red herrings to keep the reader guessing. A satisfying ending that ties up all the loose ends and provides closure is crucial. By understanding these key elements, writers can create a well-structured and engaging murder mystery story that captivates readers and keeps them on the edge of their seats.

A. Write a superior plot

1. Plot the story backward 

You’ve decided who the killer is? Great! But are you sure about how things get there? 

It’s at this point that you work towards tightening the plot. 

The essence of a murder mystery story is that everything should make sense in the end. There can be no loose ends, and no questions can be left unanswered. A strategy to avert this is to work backward. Think carefully about how things got to the moment of the big reveal. Obviously, you don’t get to spell it out in a linear fashion, but it all has to be in your head. 

When a writer plans the story backward, it ensures that every detail aligns perfectly. Plotting meticulously is crucial to ensure all elements of the story fit together logically.

You can do this in a few layers: 

  1. Once you know who the killer is going to be, start thinking about how they committed the crime and what their motivations might have been. 
  2. Then, think about their alibi, who they may have confided in, and how they go about hiding their crime. 
  3. Introduce detectives, police, or investigators in the mix. To make the plot more believable, put yourself in their shoes and start thinking about how you would carry out the investigation. Think about loopholes and missing links that the killer has left. These clues will help you chart the investigator’s path. 

Bonus tip: Bear in mind, if you’re doing this on your own, that you may come to convenient solutions because you know the end already. It’s a good idea to run your story by someone, a friend or a fellow writer, to see if it makes sense logically. 

2. Think about where you’re leaving breadcrumbs 

By ‘breadcrumbs’ we mean clues, of course. 

When a reader gets to the end of the story, they’re not thrown new information. Instead, they reexamine existing information—little hints they hadn’t previously considered—to make sense of what’s happened. Paying attention to the little details is crucial in crafting a believable narrative. What you’re looking to evoke here is an epiphany, not a reveal. 

It is also essential to provide the reader with all the clues necessary to solve the mystery. This ensures they have access to the same information as the detective, allowing them to piece together all the clues and feel like co-detectives.

In other words, clues should be hidden in plain sight. You can do this through two techniques: foreshadowing and misdirection. What are these? 

Foreshadowing is a literary device that is used to hint at significant events or moments that come later in the story. Subtlety is of utmost importance here, and your readers should be curious to unravel its significance. 

Readers are often unsatisfied if something is revealed abruptly, so foreshadowing is your safeguard against a random twist. Once the twist happens, and the reader tries to find out how it happened, they should land on whatever you’ve hinted at. Foreshadowing should be subtle but logical, and overtly obvious in hindsight.

Misdirection is the act of diverting your reader’s attention from an important clue. In magic, misdirection is often used as a technique of deception to keep the audience’s attention elsewhere so that the trick is carried out successfully. 

Likewise, in fiction, writers often use this technique to distract readers from elements that will later gain importance in the narrative. This may happen through the narration or through ‘misguided’ deductions of a character. (The latter, for example, often happens in Holmes stories, where you’re seeing the world through Dr. Watson’s eyes.) Logically speaking, if this character comes to an erroneous conclusion, so will the reader. Instead, drop hints that readers refer to later that are external to what the character is saying or seeing.

B. Write a tension-rich story

3. Begin with action 

What you need here is a killer hook. (Sorry, just couldn’t resist!)

The murder mystery is a genre that’s all about action. So it’s advised that you start writing with an action-packed incident, rather than a description of the setting or a philosophical pondering about the nature of things. Ensure that this event is intriguing, and a reader is compelled to find out what happened and how things came to be. An obvious type of incident is the discovery of a body. Writing a murder mystery can be fun and engaging for both the writer and the reader.

4. Build tension in every scene 

The conflict between the killer and the investigator is at the core of a murder mystery story. Understanding the murderer’s motives can build tension by providing depth to the antagonist’s actions and making the detective’s pursuit more compelling. Even if the two parties don’t actually meet for the majority of the story, the reader should sense the tension of the cat-and-mouse chase between them.

You can do this by having the detective miss clues that you, the reader, are already exposed to, or through instances where the killer is almost caught but manages to slip away. Additionally, leading readers in the wrong direction with cleverly planted clues can maintain suspense and enhance the surprise of the plot twist.

5. Every character should have a rich backstory 

Characters in a murder mystery

In order to make the characters realistic, they should be more than simply stock characters who exist to perform specific actions in your book. The danger with a murder mystery is that a high focus on the plot may lead you to put characters in the backseat. However, developing other characters is crucial as it enriches the story and enhances interactions among characters. But in fact, characters are tremendously useful in fleshing out the details of the whole story. For instance, if you have witnessed interrogations in your story, you can use various characters’ alibis to give multiple perspectives of the same event, situation, or even suspect. 

All characters, including suspects and the detective, should be well-developed to enrich the narrative. Well-developed characters contribute significantly to plot progression and create engaging conflict, ultimately enhancing the reader’s experience and the complexity of the mystery.

6. Craft a powerful twist

A powerful twist is the hallmark of a good murder mystery. It should be surprising yet make perfect sense in retrospect, providing a satisfying conclusion to the story. To craft a powerful twist, consider the murderer’s motives and the clues that have been subtly planted throughout the narrative. The twist should be unexpected but logical, delivering a sense of surprise and satisfaction for the reader. By carefully crafting a powerful twist, you can create a memorable and engaging murder mystery story that will keep readers talking long after they’ve turned the final page.

7. Avoid common mistakes

When writing a murder mystery, there are several common pitfalls to avoid. One significant mistake is introducing too many suspects, which can make the story confusing and difficult to follow. Another is using too many red herrings, which can leave the reader feeling cheated or misled. Additionally, avoid relying on convenient coincidences or contrived plot devices, as these can detract from the story’s credibility and suspense. By steering clear of these common mistakes, you can create a well-crafted and engaging murder mystery story that keeps readers hooked and entertained.

8. The importance of editing

Editing is a crucial step in the writing process, especially for murder mysteries. A good editor can help refine your plot, develop your characters, and ensure that your story is well-structured and engaging. Editing can also help you avoid common mistakes, such as inconsistencies in the plot or characters, and ensure that your story is free of errors and contradictions. By working with a skilled editor, you can create a polished and compelling murder mystery story that keeps readers guessing until the very end. Whether you’re writing a short story or a full-length novel, editing is an essential step in crafting a suspenseful and satisfying murder mystery that leaves readers eager for more.

Some general tips

  • Read as much as you can: To familiarize yourself with the genre, to understand (through analysis) how a murder mystery is crafted, and to gain a sense of how such a tale is written. 
  • Don’t defy basic laws of science (especially medicine), the exception being if it directly makes sense to your plot. Readers can recognize a lapse in logic, and it takes away from realism. 

Here are some more story-writing resources for you:

How to Format a Book in 2025: 7 Tips for Book Formatting

Are you confused about how to format a book for publication? It’s easy to get scared by the many rules and specifics of book formatting, but don’t worry. We’ve included everything you need to know about formatting a book for print and digital formats. Formatting one’s own books can be challenging, but with our experience and solutions, such as free templates and proprietary software, we have overcome these obstacles.

Remember that formatting comes only after the three steps of book editing: developmental editing, copy editing, and line editing. If you start formatting a partially edited book, the process will be messy and involve a lot of rework. But if you’re happy with the edit, it’s time to work on the manuscript format.

But first, let’s answer a basic question: What exactly does book formatting involve?

Transform your book’s look with professional formatting services!

What is book formatting?

Book formatting or typesetting is the process of preparing a manuscript for publication by selecting the right text and layout options. This process tailors your book to the technical specifications and design requirements of print and eBook formats. It involves structuring text, images, fonts, margins, and layout elements using paragraph styles and style-based formatting to boost readability and ensure consistency. Proper formatting can make life easier for authors by streamlining the process.

Book formatting deals with the following parts of your book:

  • Text (font size and style, line spacing, and indents)
  • Page layout (page size, margins)
  • Front and end matter
  • Chapter headings and subheadings
  • Pagination
  • Images, graphics, tables, and charts
  • EBook formatting specifics (responsive design, hyperlinks, and image optimization)

Using style-based formatting, such as character and paragraph styles, is crucial for maintaining consistency and simplifying the layout process across your document.

Why is book formatting important?

Book formatting is important because it enhances your book’s readability and visual appeal, making it polished and professional. Your book format says a lot about its content. Readers will always choose a well-designed and accessible book over an amateurish one.

Even if you put a lot of creativity and effort into writing your book, readers won’t go through it if the layout is shabby. So, bad formatting undermines your work while polished formatting enhances it.

Setting up the book structure

Setting up the book structure is a crucial step in the formatting process, as it determines the overall organization and flow of your book. A well-structured book not only enhances readability but also ensures that all necessary elements are included and properly formatted.

The book structure typically includes three main parts: the front matter, body text, and back matter. Each of these sections has its own specific elements and formatting requirements.

Front Matter: This section includes the title page, copyright page, and table of contents. The title page should feature the book title, subtitle, and author name, all centered and formatted according to industry standards. The copyright page should contain the copyright notice, publication date, and ISBN. The table of contents should be clear and easy to navigate, helping readers find specific sections quickly.

Body Text: This is where the main content of your book resides. It should be formatted with clear headings, well-organized paragraphs, and appropriate line spacing to ensure readability. Consistency is key, so use the same font and font size throughout the body text to maintain a professional appearance.

Back Matter: This section includes any additional information, such as appendices, glossaries, or indexes. These elements should be formatted consistently with the rest of the book to provide a cohesive reading experience.

Using a word processor like Microsoft Word can make it easier to set up the book structure and format the different elements. By setting up the book structure correctly from the start, you can save time and effort in the long run, making it easier to make changes and updates to the book.

Now that we’ve seen what formatting is, it’s time to learn how to format a manuscript. Here are the steps to format a book for printing and/or digital publishing:

  • Select the right formatting software
  • Choose an appropriate page size
  • Keep ample margins
  • Use a readable font style and size
  • Format your text
  • Embellish chapter headings
  • Create front and end matter

Let’s take a detailed look at each of these steps to book formatting:

How to format a book

#1 Select the right formatting software

While typesetting, you’ll have to choose a tool that’s compatible with your needs. If your book consists mostly of text and doesn’t need fancy formatting, you don’t need to use an advanced tool. Even Google Docs, Apple Pages, and MS Word work as great eBook creator tools! In MS Word, you can access text alignment options, such as left justification, through the Home tab.

That said, Draft2Digital’s free ebook creator is a great formatting tool and comes with various premade templates. If you’re comfortable paying for a tool, Atticus and Scrivener are some good choices. Ensure that the software you choose lets you create books in the file format you’ll need for publishing. Take a look:

If you’re undertaking formatting for print books, you’ll need a PDF file. Formatting an eBook is slightly trickier because different online retailers use different file formats. While EPUB is the most widely used eBook format, you’ll have to create a MOBI or KPF file to publish on Amazon.

#2 Choose an appropriate page size

Various genres use different trim sizes according to the intended reading experience. A novel will almost always be smaller in size compared to a magazine or a cookbook. Here are some examples of page sizes in various genres (in inches):

  • Novels: 6 x 9, 5.5 x 8.5, and 8.5 x 11 (The smaller page size is easy to read and cost-effective.)
  • Children’s books: 8 x 10, 10 x 10, and 11 x 8.5 (These larger page sizes accommodate illustrations and larger fonts.)
  • Coffee table books: 9 x 12, 10 x 10, and 12 x 12 (The larger page size showcases high-quality images.)
  • Textbooks: 8.5 x 11 and 7 x 10 (The larger page size accommodates charts, graphs, and other visual aids.)
  • Poetry books: 5 x 8 and 6 x 9 (The smaller page size creates a more intimate reading experience.)

You can choose to defy the genre norms in your manuscript format, but remember that they’re in place for a reason. Readers are used to certain page sizes, and it’s best to prioritize the reading experience over purely aesthetic choices.

#3 Keep ample margins

A one-inch margin on all sides is standard in the publishing industry. The bottom margin is particularly important for placing footers and page numbers, ensuring a professional-looking layout. This helps readers hold the book without obstructing the text and add notes on the page. It also ensures a better reading experience since the text appears ordered and not constrained. 

Even more important, leaving ample margins allows for proper trimming and binding of the pages. Remember reading those books where the text disappeared inside the binding? That inside edge is called the gutter, and you don’t want your precious words to get lost in it. So in the case of longer books, the inside margin of the page may be bigger than the other sides.

A 1-inch margin suffices for most books, but art books and magazines tend to have larger margins. Smaller books like poetry books, on the other hand, have smaller margins (0.625 or 0.75 inches). EBook margins vary according to the platform and device on which they are accessed. You can check the formatting guidelines of the publishing platform and keep the recommended margins.

#4 Use a readable font style and size

You’re probably thinking, “Aren’t all fonts readable?” Well, some are easier to read than others. You can choose an aesthetic, loopy font while formatting a novel, but your book could be about 80,000 words long. 

Font style and size for formatting your book

Now consider font size: If your text is tiny, people will struggle to read it. If it’s too big, you’ll be unnecessarily adding to your page count and printing costs. So, you should choose a standard, easily readable font style with a moderate size. An 11- or 12-point standard font such as Arial or Times New Roman is always a safe bet. For chapter headings, you might consider using a fancy font to add a decorative touch, but ensure it doesn’t compromise readability.

The genre of your book also determines the ideal font. Times New Roman and Garamond are widely used in fiction books, while Arial and Helvetica are popular in nonfiction books. So do your research before you choose your font!

#5 Format your text

Your text should be well-spaced, indented, and organized to create even paragraphs that are pleasing to the eye. Here’s how you can do this:

How to format your text while book formatting.

A. Justify your text

Justifying text is the process of aligning it to both right and left margins, creating straight lines on both sides. This is opposed to ‘ragged’ text, which is only aligned to the left margin. Justifying adjusts the space between your words to create a neat box of text, which is what you’ll find in most published books. 

B. Indent the first lines of your paragraphs

Writers used to web content may wonder if this is strictly necessary, but it’s essential for novel formatting. Whether it’s a print book or an eBook, adding a 0.25-inch indent demarcates new paragraphs, improving the reading experience. It is important to note that the first paragraph, first line of a new chapter, or under a new subheading should typically not be indented, and using a first paragraph style helps maintain consistency throughout your document.

C. Adjust the line spacing

Line spacing is, quite literally, the space between two lines of text in a paragraph. It reduces eye strain and helps the reader keep track of the sentence. A line spacing of 1.3–1.5 is standard, but you should also consider your genre and target audience. You can have relative spacing for eBooks that adapt to reader preference and device settings. 

D. Insert scene and page breaks 

Scene breaks and page breaks are crucial for readers to reorient themselves while reading your book. Insert a scene break whenever there’s a significant change in the point of view, time, or location. This can be a simple flat line or an elegant little design, based on your preference.

Page breaks help you start each new chapter on a new page, acting as visual buffers. They’re integral to the structural organization of your book, so don’t forget them! Additionally, section breaks can be used within chapters to indicate different sections without starting a new chapter.

#6 Embellish chapter headings

Like page breaks, chapter headings are an important visual marker for your readers and play a crucial role in the layout of chapter pages. They should be set apart from the other text, and there are several ways to achieve this. You can use a different font that’s still coherent with your body font, genre, and theme. A good idea is to use your title font from the cover design, but that doesn’t work in every case.

Naturally, you’ll be using a larger font size for the chapter titles. You can additionally embellish them with graphic and design elements, but keep it simple. It is important to balance decorative elements with simplicity to ensure that chapter pages enhance the reading experience without becoming distracting. Start your text a few lines below the heading so it has some room to breathe. If your genre and theme permit it, you can start each chapter with drop caps, where the first letter is enlarged and ornate.

#7 Create front and end matter

The front and back matter of your book are the pages that appear before and after the main content. Roman numerals are often used to number these initial pages, such as the title page and table of contents, as well as to distinguish sections like the foreword or introduction in nonfiction works. This matter contains important supporting information that adds context to your book. Here’s what they contain:

Front matter

  • Title page (book title, subtitle, and author name)
  • Copyright page (copyright notice, publication date, and ISBN)
  • Table of contents
  • Dedication (allows the author to dedicate the book to someone)
  • Foreword (an introduction written by someone other than the author)

Back matter

  • Acknowledgments
  • About the Author (a brief biography of the author)
  • Appendix (additional information that supports the book’s content)
  • Index (lists the book’s topics and page numbers for easy reference)
  • Bibliography (lists the sources used in the book)

Various countries and genres have their own rules about book manuscript formatting for the front and back matter. Make sure to check these while you’re creating the pages!

Specific guidelines for print book formatting

Maintaining professionalism in printed books is crucial, especially when considering layout features like odd-numbered pages and footnotes.

Here’s how to format a book for printing:

  • Consider whether your trim size, margins, and gutters are practical.
  • Add headers and footers so you can place the page numbers, book titles, and chapter titles in them.
  • Check the justification of your text and adjust the hyphenation accordingly.
  • Add a bleed wherever images reach the edge of the page. 
  • Avoid widows and hyphens in your pages.

Bleed: A small border that stretches past the actual page to prevent a thin white line along the edge.

Widow: A paragraph-ending line that gets cut off from the rest of the paragraph and appears at the top of a new page.

Orphan: A paragraph-starting line that appears at the bottom of the page, cut off from the rest of the paragraph that’s on the next page.

Specific guidelines for eBook formatting

Here’s how to format an eBook:

  • Ensure that the text is responsive so it can adjust to different device settings.
  • Add hyperlinks to the table of contents, notes, and references to create an interactive experience.
  • Optimize images and graphics so they’re adjustable and clear. Any non-design-related text edits made after the initial upload might incur an additional cost.

How to format a novel

Follow these steps for a polished novel manuscript format:

  • Use scene break embellishments that fit your story and theme. Ensure that chapters always start on the right page to maintain reader engagement.
  • Employ consistent indentation and punctuation for the dialogues.
  • Highlight flashbacks, dreams, letters, or inner thoughts through font variations (such as italics) and use page breaks to ensure proper layout.
  • Optionally, use specific formatting variations to denote different perspectives.

Best practices for formatting a book

1. Consistent font and size: Use a uniform font and size of font throughout the book. This consistency helps maintain a professional look and ensures that the book is easy to read.

2. Clear heading structure: Use a clear and concise heading structure to organize the book. This makes it easier for readers to navigate and find specific sections.

3. Proper line spacing and paragraph formatting: Line spacing and paragraph formatting are essential for readability. Format these elements according to standards to reduce eye strain and improve the reading experience.

4. Use professional tools: Tools like Microsoft Word or Adobe InDesign can make formatting the book easier and more efficient. These tools offer features that help ensure consistency and professional quality.

5. Proofread carefully: Proofread the book carefully to catch any errors or typos. A well-proofread book reflects your attention to detail and commitment to quality.

6. Consider a formatting service: Using a professional formatting service can help ensure that the book is formatted correctly and consistently. A professional service can provide an extra layer of quality control.

7. Reader-centric formatting: Format the book with the reader in mind. Use clear headings, well-organized paragraphs, and appropriate line spacing to enhance readability.

8. Appearance: Use a professional font and font size throughout the book. This helps ensure that the book is taken seriously by readers and industry professionals.

By following these best practices, you can create a book that is not only visually appealing but also easy to read and professionally formatted.

We hope you’ve learned how to format a book now. It’s a time-consuming, tedious process, so buckle up! But if you’d rather focus on writing and marketing than formatting your novel, our self-publishing services are at your disposal.

If you’d like to keep reading about the self-publishing process, here are some articles that could help:

How to Write a Children’s Book: An Easy Step-by-Step Guide

Writing a children’s book comprises a lot more than just elaborating on a story idea and adding attractive images. It involves developing an age-appropriate story that fascinates kids and enthralls them till the end. So, how to write a children’s book that captures the short attention span of your young readers?

Well, there are twelve steps to writing a children’s book:

  • Target the right age group
  • Find an idea that’ll work
  • Creating a story outline
  • Develop your idea into a story
  • Create kid-friendly characters
  • Keep the story fast-paced and exciting
  • Create catchphrases
  • Think graphically
  • Add an attractive title
  • Revise the draft
  • Getting feedback and critique
  • Look for editors and illustrators

Your Book. Our Expertise. Let’s Publish It! Get Started

Let’s take a closer look at these tips for writing children’s books.

1. Target the right age group

You may be surprised to know that the children’s book category includes books for all ages from 0 to 18! This includes diverse sub-genres from board books for newborn babies to fiction and non-fiction for young adults (Y/A). So before you begin writing books for kids, you need to determine your target audience’s age category.

Understanding your target audience is also essential to marketing your book effectively. The first thing that publishers, educators, and parents will check is the age group your book caters to. You’ll have to be quite specific about your readers if you want your book to do well in the market.

Here are the different age categories and the types of children’s books for them:

  • 0- to 4-year-olds: Board books
  • 2- to 5-year-olds: Early picture books
  • 4- to 8-year-olds: Activity books, novelty books
  • 5- to 8-year-olds: Early reader fiction
  • 6- to 9-year-olds: Chapter books
  • 8- to 12-year-olds: Middle grade books
  • 12- to 18-year-olds: Young adult books

Note that the age categories for children’s books may vary slightly based on your source. There are always some overlaps in these categories, so you’ll have to undertake some hefty research!

2. Find an idea that will work

It’s important to know your readers before you explore ideas for your children’s book-writing endeavor. At the same time, you must also figure out what their parents seek.

Wondering where to look for ideas and how to start a children’s book? You can begin by interacting with kids of the age group you’re writing for. Consider visiting popular bookstores to notice the themes that attract kids belonging to your target age group. This will help determine what may work and what may not when you’re writing a kids’ book.

To determine whether an idea can work, try answering the following questions:

  • What’s the basic theme of my story?
  • Why do I want to tell this story?
  • Is this idea unique?
  • Are my theme and idea relatable to kids?

By taking the time to brainstorm and conceptualize, you can create a solid foundation for your story. This increases your chances of writing a successful children’s book that will captivate young readers and stand out in the market.

3. Creating a story outline

Creating a story outline is a critical step in writing a children’s book. An outline helps you organize your ideas, structure your story, and ensure that your plot flows logically. A good outline should include the story’s beginning, middle, and end, as well as key events and character developments.

Consider your story’s pacing, tone, and themes, and ensure that these elements are consistent throughout the outline. A well-structured outline can save you time and effort in the writing process, helping you create an engaging and effective story.

Additionally, an outline can help you identify potential problems and make revisions before you start writing. By creating a detailed and well-structured outline, you can ensure that your story is cohesive and captivating for your young readers.

4. Develop your idea into a story

When exploring how to write a children’s book, the next step would be developing your idea into a compelling story. Make sure to do your research for fiction writing before embarking on this journey. 

The idea is to begin your story with a hook, which is one of the effective ways to catch readers’ attention. It will infuse excitement and drama in your writing to engage your young readers. 

As you go about writing the story, pay attention to the story structure. Organizing the story effectively is crucial to keep young readers engaged. Stop for short intervals, read out what you have written, and listen carefully. Ask yourself if the storyline is gripping enough to hold your interest and that of your young audience.

Furthermore, remember the importance of crafting a satisfying conclusion that ties up all the loose ends when writing children’s books. A well-written conclusion will leave a lasting impression on young readers and leave them eager for more adventures.

5. Create kid-friendly characters

When seeking tips for writing children’s books, one essential aspect to consider is the stock characters available to you. Develop these archetypes into lovable, memorable, and relatable characters.

As the story progresses, let your protagonist develop wisdom, skills, and strength. Introduce obstacles in your story and allow your protagonist to overcome them and learn from these experiences. Such a character arc fascinates kids and enables them to learn valuable life lessons.

Creating kid friendly characters while writing a children's book.

Creating unforgettable characters is crucial. These characters should be memorable, relatable, and unique, resonating with young readers through real emotions and relatable experiences. Take a few examples of children’s books that have iconic characters. You can opt for books like Pippi Longstocking or Matilda by Roald Dahl. Analyze them to understand how to create relatable characters with depth, and then proceed to create your own characters.

6. Keep the story fast-paced and exciting

When delving into how to write a children’s book, maintaining a quick-paced and thrilling narrative is crucial. You have to ensure that the story progresses at a fast pace as well. This helps to keep the excitement level high among young readers.

One trick to apply here is to use short and crisp sentences for your narrative. By using shorter sentences, you can infuse a vibe of urgency into the story. There’s another advantage to this: Children need less time to read shorter sentences. This helps to grasp their concentration and retain it on the page.

You can also introduce dramatic subplots when you write a children’s book. This is another effective idea to make your story an exciting read. But make sure to stay away from unnecessary descriptions for maximum effect. Create an exciting journey for your characters, as engaging plot arcs captivate readers and make the story memorable.

7. Create catchphrases

Have you ever wondered why writers create catchphrases for their characters? The simple answer is to lend a unique voice to a character and ensure that it stands out.

Use captivating catchphrases with simple words to bring out your characters. Catchphrases and memorable lines are your key to creating a lasting impression on the minds of your young readers.  

But when it’s a question of how to write a kids’ book with catchphrases, you need to remember two points.

  • Always limit your catchphrases to just a few characters and select those characters wisely.
  • Make sure that you don’t use the catchphrase of a character too much or too often.

8. Think graphically

As an author, you need to think about how to make a children’s book come alive visually. This is where graphic elements and vibrant illustrations can help you.  These elements and captivating imagery can elevate your narrative and take it to the next level.

But make sure to write your first draft without using images. This is important since it will allow you to bring alive your imaginary world with the help of words. Once this is done, you can add images to complement your story.

Graphic elements and illustrations while learning how to write a children's book

Remember that you should depend on the imagery to create a visual roadmap for your narrative. You should not use it to do all your storytelling work.

9. Add an attractive title

The title of your children’s book carries a lot of importance. It creates the first impression of the book and sets the tone for the story.

To come up with an impressive title when writing books for kids, identify the most important theme or moment in your story. You can then convert it into a catchy title. Another idea that almost always works is to use the name of the main character as the title. Take the help of book title generators to advance your brainstorming process.

Just remember that the title you pick should resonate with your young audience. It should invite them into a world of wonder and imagination. Creating your own children’s book is a fulfilling journey, especially when you see young readers engage with your work.

10. Revise the draft

Once you’re done writing the first draft, it’s time to turn it into a more polished version. For that, you need to reread and revise it. Sometimes you may need a couple of revisions before being satisfied. Ultimately, having a professional editor review the final version is crucial to ensure your manuscript is polished and ready for publication.

As you go about revising your draft, pay attention to the following points:

  • Do the story and the characters appeal to you?
  • Are there plot holes in the story?
  • Is there a need to rewrite any part of the content?

Be open to seeking feedback from others, such as fellow writers, teachers, or editors. Their perspectives can help you refine and elevate your draft further. 

11. Getting feedback and critique

Getting feedback and critique is an essential step in writing a children’s book. Share your work with beta readers, writing groups, and professional editors to get constructive feedback and suggestions for improvement. Join online writing communities, attend writing workshops, and consider hiring a professional editor.

Feedback and critique can help you identify areas for improvement, strengthen your writing, and ensure that your story is engaging and effective. Be open to feedback and willing to make revisions. This will help you create a high-quality children’s book that will resonate with your target audience.

Additionally, feedback and critique can help you develop your writing skills and style. By seeking and incorporating feedback, you can increase your chances of success in the competitive world of children’s book publishing.

12. Look for editors and illustrators

You need a talented illustrator who can enrich your story through their artistic talent. If you’re self-publishing your book, it’s your job to hire an illustrator who can elevate your story visually. Go through online reviews and recommendations while you’re selecting an illustrator and make sure to clearly communicate your ideas to them.

The work of a book editor involves reviewing your manuscript thoroughly to mark out errors. These can be errors in your language or formatting errors. They also suggest how to improve your story further.

Unless you’re extremely talented and with lots of time to spare, you’ll certainly require professional help while editing and illustrating a children’s book. So, opt for an editing or self-publishing service that has expertise in publishing kids’ stories.

So those were the ten steps to writing a children’s book. You’ll have to invest a lot of your imagination and creativity, streamlining your book-writing efforts, so you can create a fantastic story. So, go ahead, allow your imagination to flow freely and enjoy your kids’ book writing journey!

As your favorite literary editors, we have some more resources that will help you out. Take a look:

10 Best AI Essay Writing Tools in 2025

How helpful would it be to have a smart assistant who can create essays, articles, and all sorts of content using artificial intelligence? AI essay writers are changing the game for authors and writers who want to enhance their work with a mix of efficiency and creativity. An AI essay writer is a software tool that uses artificial intelligence to generate essays and written content automatically, acting as an essay helper by providing personalized assistance to students and ensuring their assignments meet academic standards.

These AI essay generators bring together the best of creativity, research, and writing and empower writers in ways we could only dream of before. In this blog, we’re diving into the top 10 AI essay writers out there, giving you the lowdown on each one. We have mentioned the top AI essay generators, free and paid, so you can pick the perfect tool to make your creation process smoother!

Get an A+ with our expert essay editing services!

We will begin by quickly understanding what essay AI writers are:

What is an AI essay writer?

An AI essay writer is a sophisticated tool designed to assist in the creation of essays and written content by leveraging artificial intelligence and machine learning algorithms. These platforms understand language patterns, conduct research, and generate coherent, well-structured texts in a fraction of the time it would take a human. 

AI essay generators offer a range of functionalities tailored to the needs of today’s writers, embodying capabilities such as the AI essay writer free models for beginners and more advanced features for professional use. Whether you’re looking for a free AI essay writer or the best AI essay writer with more advanced capabilities, the digital landscape is teeming with options.

Writing an essay with AI

AI essay generation refers to the use of artificial intelligence (AI) tools to generate high-quality essays, research papers, and other written content. These tools utilize advanced algorithms and natural language processing to create well-structured, coherent, and engaging essays. With the help of AI writing tools, users can simplify the process, reduce the time spent on research, and produce essays that meet their specific needs.

In the next section, let’s explore a list of the top 10 best AI essay writers.

Top 10 best AI essay writers

1. EditPad

EditPad is one of the best free AI essay writers, known for its user-friendly interface and robust writing assistance capabilities. It provides authors with essential tools like grammar checks and stylistic suggestions, making it easier to polish and perfect their writing.

Editpad essay writer tool

Benefit: Benefit: Editpad’s simplicity and comprehensive editing tools make it an excellent choice for writers looking for a quick, efficient way to improve their essays. The plagiarism checker offers further assurance of quality writing to academic writers. EditPad also serves as a free essay generator, providing users with immediate assistance in creating essays without the need for registration.

Pricing: EditPad is one of the best AI essay writers for free. Its Premium version costs USD 7.99 per month and includes an Essay Writer along with a Paraphrasing Tool, Story Generator, Article Rewriter, and Text Summarizer.

2. Copy.ai

Copy.ai is one of the best AI essay writers. This platform uses advanced AI to generate ideas, outlines, and complete essays based on minimal inputs.  It is quite effective in crafting engaging introductions and conclusions.

Copy.ai essay writer tool

Benefit: Copy.ai stands out for its ability to generate creative content quickly. It’s an excellent tool for overcoming writer’s block and enhancing the creativity of your essays. The quality and undetectability of the essay generated by Copy.ai ensure that it meets high standards and remains indistinguishable from human-written content.

Pricing: Copy.ai gives an AI essay writer trial for free. There are also premium packages starting at USD 36 per month.

3. Writesonic

As a good AI essay writer, Writesonic is designed to assist with various content creation needs, from marketing copy to academic essays. This essay generator AI boasts an array of templates for different types of writing. Writesonic can generate article ideas, outlines, and entire sections of content efficiently. It can also create various types of essays, including argumentative and narrative essays.

Writesonic ai essay writer

Benefit: The strength of this AI essay writer lies in its versatility and quality of content generation, making it ideal for both students and professional writers looking for inspiration and efficiency. 

Pricing:

Writesonic provides a free trial. Subscription plans for ChatSonic, a tool with more features than the free version, start at around USD 12 per month (if billed annually).

4. The Good AI

The Good AI is an AI essay writer focused on academic and professional writing, offering tailored solutions for writing essays. This AI essay writer provides tools for research, summarization, and citation generation, alongside essay writing assistance. This makes it a comprehensive tool for academic writing.

The Good AI essay writer

Benefit: Its focus on academic integrity and research support makes The Good AI an invaluable tool for students and researchers needing assistance with essays and papers. It is also highly effective in producing high-quality research paper assignments, as noted by satisfied customers.

Pricing:  The Good AI essay writer has a free version (called the Basic Plan). However, the premium features are available through a subscription of USD 5 per month, where you can write an essay of up to 2500 words.

5. Jasper.ai

Jasper.ai is a highly versatile AI writing assistant, capable of producing content across a wide range of formats, including essays. It excels in generating high-quality content based on minimal input, supporting creative and academic writing styles. This free essay writer AI also offers features for tone adjustment and content optimization.

Jasper.ai essay writer

Benefit: The tool’s ability to adapt to different writing styles and its high-quality content output make it a favorite among professionals and students alike. 

Pricing: Jasper.ai offers a free trial of 7 days for an AI essay generator. The paid subscriptions start at USD 39 per month. 

6. MyEssayWriter.ai

MyEssayWriter.ai is an AI essay writer specifically designed for academic essay writing, providing a streamlined solution for students. This AI tool focuses on generating structured essays, including thesis statements, arguments, and conclusions, based on user-provided topics and research.

myesssaywriter.ai essay writing tool

Benefit: Its specialization in academic essays makes it a powerful tool for students looking to improve their writing and produce well-structured essays. As an essay writing service, MyEssayWriter.ai offers comprehensive support, including plagiarism checks, data safety, editing services for completed works, and customizable order details to cater to client needs, ensuring client satisfaction and privacy.

Pricing: MyEssayWriter.ai offers a free AI essay writing generator version with limited features. For USD 29.99, you can access advanced features like AI Essay Writer and AI Essay Outliner.

7. Rytr

Rytr is an AI-powered writing assistant designed to make content creation easier across different formats, such as essays. It offers a user-friendly interface with customization options for tone, style, and content type. Rytr can generate content from blog posts to detailed essays.

rytr AI essay writing tool

Benefit: Rytr’s versatility and ease of use make it an attractive option for writers seeking a flexible tool to assist with a broad range of writing tasks. Also, Rytr provides comprehensive writing tools, catering to various needs from essays to research papers, ensuring high-quality and responsive assistance.

Pricing: The version with basic features is free to use. The “Unlimited” plan for access to generative artificial intelligence tools starts at USD 7.5 per month.

8. EssayGenius.ai

EssayGenius.ai specializes in generating and improving academic essays, utilizing AI to streamline the process. It offers features such as topic suggestion, outline creation, and full essay generation, focusing on academic and research-based writing. EssayGenius.ai stands out as a reliable and professional paper writing tool, ensuring originality, user-friendliness, and client satisfaction.

essaygenius.ai essay writer

Benefit: EssayGenius.ai is particularly beneficial for students needing assistance in structuring and fleshing out their essays, providing a solid foundation for academic writing.

Pricing: The platform offers a free AI-generated essay writer trial. Subscription plans start at USD 14.99 per month.

9. Eduwriter.ai

EduWriter.ai caters to educational and academic writing needs, offering specialized support. This tool helps in writing essays, from brainstorming and outlining to drafting and revising academic essays. EduWriter.ai is proficient in handling any academic task requested by clients, showcasing its reliability and versatility.

eduwriter.ai essay writer

Benefit: EduWriter.ai’s focus on educational content makes it an excellent resource for students and educators seeking to enhance the quality and efficiency of their writing.

Pricing: This essay writer AI includes a free version with basic functionalities. The paid version, called EduWriter Premium, costs USD 19 per month and offers extensive support, including 3 plagiarism reports.

10. Conch

Conch is an AI essay generator designed to assist with a variety of writing needs, emphasizing feedback and improvement for academic essays. Beyond generating content, it offers critical feedback on written work, suggesting improvements in sentence structure, style, and argumentation.

Conch.ai essay writer

Benefit: The unique feature of providing constructive feedback makes Conch stand out, offering writers a tool not just for writing but for refining their essays.

Pricing: Conch offers a basic free version and a premium subscription for access to advanced feedback and editing tools starting at USD 12 per month.

Apart from the above-listed AI essay writers, you can always use an OpenAI essay writer, like the ChatGPT AI essay writer. The latest version of ChatGPT 4 has better essay writing plugins and extensions than the AI essay writer GPT-3.5

Which AI essay writer is best for me?

Let’s compare the top 10 AI essay writers by organizing their key features, benefits, and pricing in a table. This will make it easier for you to see what each offers and help you find an essay writer for your needs.

Who needs an AI essay writer?

An AI essay writer can benefit a wide range of individuals who need help developing good content. The best AI writing tools enable users to generate, organize, and refine their content. An AI essay writer might prove to be specifically useful to the following people: 

1. Students

Students at various educational levels (high school, college, and university) can use essay writers to help generate ideas, create outlines, and draft essays. This can be particularly helpful when they struggle with writer’s block or need assistance structuring their work.

2. Researchers

Researchers who need to write literature reviews, abstracts, or summaries can benefit from AI writing tools to organize their findings and produce first drafts of their theses or other assignments. 

AI writing assistants can help researchers refine their writing for clarity and conciseness, especially if English is not their first language. PaperTrue is a leader in this domain, too.

3. Professional writers and bloggers

Essay professional writers, bloggers, and content creators can use AI essay writers to quickly generate ideas and content outlines. They can even produce full drafts to meet deadlines or content calendar requirements. AI tools can help online professional essay writers overcome writer’s block by suggesting content ideas, headlines, and angles.

4. Educators

Educators can use expert essay writers and AI writing assistants as teaching aids to show students different approaches to writing. They can even provide examples of well-structured essays or paragraphs. AI writing tools can help in creating assignment prompts, outlines, and templates.

5. Businesses and marketing professionals

Businesses can use AI writing tools to create marketing content, white papers, or reports quickly and efficiently. AI tools can also help generate SEO-friendly content for digital marketing endeavors.

6. Non-native English speakers

AI essay writers can help non-native English speakers write well by providing grammar and stylistic corrections. Such tools can also give suggestions for vocabulary improvement, grammar corrections, and sentence structure changes.

In general, anyone facing writer’s block can employ these tools to create interesting content for specific target audiences. 

Types of essays that can be written with AI tools

AI essay writing tools can be used to write a wide range of essays, including argumentative essays, persuasive essays, narrative essays, and descriptive essays. These tools can also be used to generate research papers, article reviews, and other types of written content. Additionally, AI essay writing tools can assist users in writing essays for various subjects, including computer science, psychology, history, and more. With the help of AI essay writing tools, users can produce high-quality essays that meet their specific needs and requirements, regardless of the essay type or subject. Whether you need to write a college essay, a university essay, or a professional essay, AI essay writing tools can be a valuable resource to help you achieve your goals. These tools offer the flexibility and support needed to tackle any writing task with confidence.

Benefits of an AI essay writer

There are many advantages to using AI essay writers. Using an AI essay writer can significantly speed up the writing process by generating content quickly and efficiently. Additionally, it can enhance creativity by suggesting diverse perspectives and ideas that authors might not have considered.

The advantages of integrating an essay writer into your writing process are numerous and transformative. Here are some key benefits:

  1. High productivity: AI essay writers can significantly speed up the writing process by generating drafts, suggesting edits, and organizing content. This allows you to produce more work in less time, particularly when working with tight deadlines.
  2. Improved writing quality: With advanced algorithms that understand grammar, punctuation, and style nuances, AI essay writers can elevate the quality of writing. They often offer useful suggestions that enhance clarity and readability.
  3. Availability: AI essay writers provide support to those who may struggle with traditional writing methods for various reasons. By offering real-time feedback and assistance, these tools make high-quality writing available to everyone.
  4. Creativity boost: Many tools offer relevant ideas and perspectives. With such useful features, AI essay writers can spark creativity. Rest assured that you can develop engaging content using them. 
  5. Cost-effective options: Since many free tools are available, AI essay writers are a cost-effective alternative that offers significant quality improvements.

As AI continues to evolve, we can expect AI essay writers, AI essay graders, and essay checkers to become even more sophisticated, offering deeper insights, more personalized feedback, and even greater ease of use. For authors and writers, this means an exciting future where creativity and technology work hand in hand to push the boundaries of what’s possible with words. 

So, explore these AI essay writers, embrace the potential they offer, and take your writing to new heights. You can also opt for professional editing and proofreading services like Papertrue to perfect your essays and make them shine!

Here are some more useful resources:

Best Fonts and Sizes for Books: A Complete Guide

When it comes to book design, one of the most important considerations is font choice. The right font can make a significant difference in the readability and aesthetic appeal of a book. Book designers play a crucial role in selecting typefaces that align with the emotional tone and message of a book. They emphasize the importance of font choice in enhancing that a suitable typeface can create a seamless reading experience, while an inappropriate one can disrupt the intended mood.

Want to enhance your book’s readability by selecting the best fonts? Explore our guide and learn everything about the best fonts for books. Whether you’re searching for a book title font or the best font for book covers, we’ve included everything. 

For readers wondering what font size books are written in, we’ve explained all you need to know. Dive in to explore the best font sizes and book fonts for nonfiction and fiction! 

Select the best book fonts with professional typesetting!

Let’s begin by understanding the popular fonts for print books. 

What fonts are most books printed in?

Serif fonts are a popular choice for print books that are heavy on text and aim to create a formal, coherent, and lucid impression. When selecting a font family, it is important to consider both serif and sans-serif options to maintain a professional appearance. Some of the widely used Serifs are:

  • Garamond 
  • Times New Roman
  • Century
  • Georgia
  • Palantino
  • Merriweather

On the other hand, sans-serif fonts feature a simplified, clean, and easy-to-decipher outlook. Some of the best choices are:

  • Helvetica
  • Arial
  • Futura
  • Roboto
  • Myriad

Additionally, some of the best fonts for book covers include Garamond, Baskerville, and Bodoni.

Wondering what the font size is for a book that goes into print? Large text blocks in traditional printing use a novel font size of 10–12 points.

The font size for headlines strikes an essential balance between the standard practice of maintaining headlines to one or two lines and the desire for large text. The margin between subheadings and body text should be roughly 10 points.

For print book title fonts, you can usually use three-point sizes like 48 and above.

Understanding body text

Body text is the main text of a book, and it is essential to choose a font that is readable and comfortable to read. A good body text font should have a clear and consistent style, with adequate letter spacing and word spacing. The font size should be appropriate for the book, with larger point sizes used for children’s books and smaller point sizes used for adult fiction.

Some popular fonts for body text include serif fonts like Garamond and Bodoni, which are known for their readability and classic appeal. Sans serif fonts like Arial and Calibri are also excellent choices, especially for digital formats, due to their clean and straightforward design. When selecting a font for body text, it is essential to consider the genre and tone of the book, as well as the target audience. For example, a font with a more formal tone, such as Times New Roman, may be suitable for non-fiction books, while a font with a more casual tone, such as Comic Sans, may be suitable for children’s books.

Best fonts and font sizes for eBooks

You need to adhere to standard fonts when choosing the best font for eBooks. It is crucial to obtain the correct licenses to embed fonts for ePub distribution to avoid legal issues. Additionally, understanding the distinction between book fonts and web fonts is important, as many typefaces are versatile enough to be used in both print and digital formats. Follow these seamless steps to choose the ideal font for your eBooks:

1. Selecting the ideal font for eBooks

The best fonts for eBooks are mostly the standard fonts that enhance readability across all devices. Some standard fonts that ensure maximum readability across a variety of eReaders and screen sizes are:

  • Arial- It belongs to a highly versatile group of typefaces that is lucid and fits well into an easy-to-read design.
  • Times New Roman- Its clear, uncomplicated structure facilitates reading the letters.
  • Courier- Courier is a monospaced font with horizontal space occupied by each character. It exhibits a uniform and well-organized look.

Although fancy serif fonts can have an amazing visual appeal, they frequently convert into cluttered characters and symbols. This may directly mar the comprehensive quality of the text. 

Additionally, some fonts are specifically designed to provide optimal readability on e-readers and various digital devices. Choosing fonts that meet specific requirements for both print and eBook formats is crucial for user experience across different platforms.

2. Pay attention to font attributes

Check out the format font menu or the toolbar buttons to add additional elements, such as bold, italics, or underlining.

When using characters that aren’t available on the keyboard, remember to select them from the menu that has the same name as your font. Avoid using Wingdings, symbols, or special characters instead.

3. Best font size for eBooks 

While choosing the best fonts for eBooks, you need to keep in mind the book is drafted in a way that ascertains seamless conversion. Best font sizes for eBooks in the case of chapter titles should be between 14–18 points, while body text should use 12 points.

However, the reader ultimately selects the font they’d like to read your eBook in after the file is converted to EPUB format. This happens irrespective of what font you select while drafting your eBook manuscript.

Best fonts and font sizes for children’s books

Typically, picture book manuscripts for children have a word count of 500 words or less and are organized into 32 pages. You will have roughly 14 double-page spreads for the story plus the final page 32, along with a title page, half-title page, copyright page, and dedication page. Understanding the unique design requirements of a children’s book, such as appropriate typography and visual presentation, is crucial.

You can usually use a font size of 18 points or greater if you adhere to that standard format. Every page should have the same font size unless you intend for it to become an integral part of the artwork.

Setting a font at a certain point size can be confusing, and it frequently is. However, following are some useful recommendations: 

  • Books for younger readers: typeset in 24-point
  • Ages seven to twelve: Font size 14–24 points
  • 12-point font for those over 12

In a children’s picture book, both serif and non-serif font styles are appropriate, but non-serif fonts might be more appropriate if the text is extremely brief. While no two books are precisely alike, the following suggestions for  best fonts for children’s books are a useful place to start:

Serif fonts

  • Myriad Pro
  • Georgia
  • Plantin Infants
  • Alegreya
  • Garamond Pro
  • Crimson
  • Baskerville Old Face
  • Century Schoolbook.

Sans Serif fonts

  • Andika (free Google font)
  • Helvetica
  • Gill Sans
  • Quicksand
  • Century Gothic
  • Avenir Next
  • Lato

Best fonts and font sizes for nonfiction books

The standard book font size is typically 12 points, but most nonfiction novels range between 10 and 14 points. The word spacing is ideal for comprehension at this size, and your book will look consistent with other works in the same genre. Additionally, the book’s genre plays a significant role in font choice, as different genres may require distinct approaches to design and typography to align with the intended tone and emotional impact.

Some of the most recommended and best fonts for nonfiction books

  • Garamond
  • Baskerville
  • Minion 

Best font and font sizes for poetry books 

The best fonts for poetry vary depending on the book’s size and genre. In general, sans-serif fonts with point sizes of 10 to 12 work best for most books. Poetry books look more adept with a moderately bigger font size of 12 to 14, as they have less writing on each page. A perfect book font for poetry should have qualities like readability, versatility, and character neutrality to enhance the reading experience.

You can use any typeface that you think best captures the essence of your poem, but the following fonts are frequently found in books and poems that you might want to check out for size:

  • Baskerville
  • Garamond
  • Palatino
  • Janson
  • Verdana
  • Optima
  • Helvetica

You can also refer to The Font Book by Jack Font to know about fonts in detail. After understanding what font are books written in, let’s see how to buy fonts for your book. 

How to purchase fonts for your book?

You can seamlessly buy a font or a font family by initiating access to licenses. This can be free for personal use or chargeable instances of commercial use. However, you can consider the following factors when choosing to purchase the best fonts for book covers or utilize a typeface to ascertain the perfect match for your textual requirements:

The number of variations (bold, regular, and matching italic versions)

  • The accessibility of tiny caps
  • OpenType fonts
  • Ligatures
  • Variations on a single glyph
  • Accents

You can directly buy book fonts from some of the popular companies that design and curate them. Some of the key players in the industry are:

1. MyFonts

One of the most extensive font resources available online is MyFonts. This website offers a wide selection of typefaces, from constructed foundries to promising designers. 

2. FontShop

FontShop blends expertise in design requirements with high quality. It’s a forum where type designers can peruse instructional guides and tools rather than just a market.

3. Adobe Fonts

Adobe Fonts provides unparalleled workflow compatibility with your design process and is available as a subscription service through Adobe Creative Cloud. With an extensive library at your disposal, you can explore and refine your ideas without worrying about the price of individual fonts.

Now that you know what font are books written in, you can start your typesetting journey! At PaperTrue, we help you choose the best fonts and select the best font for books (depending on the genre and requirement). We streamline requisite typesetting for your book, enhancing your book’s readability and visual appeal. Our self-publishing services also comprise editing, securing an ISBN, curating a copyright page, and designing a book cover.

Here are some interesting articles for you: 

Top 10 Book Title Generators of 2025

Your book’s title is a powerful hook that entices a reader to your book. It’s not necessary that you have thought of a title for your book. This is where the book title generator comes in! Book title generators are tools to help you generate different titles for your books based on their theme and story, offering practical book title ideas that capture readers’ attention.

Crafting creative and varied book titles using book name generators can make your book stand out from the crowd. Thinking about using a title generator for books? Let’s check out the top 10 best book title generators together!

Found a Fantastic Book Title? Publish Your Book Today!

Introduction to book titles

A book title is the first impression of a book, and it plays a crucial role in capturing the reader’s attention. A well-crafted title can make a significant difference in the book’s success, as it can entice potential readers to pick up the book and explore its contents. With the help of a book title generator, authors can create titles that are not only engaging but also relevant to their genre and audience. In this section, we will explore how AI-powered title generation can help authors create the perfect title for their book.

To make things easier, let us first understand what book title generators are:

What is a book title generator?

A book title generator is a tool or software designed to create potential titles for books. It uses algorithms and databases of words, genres, and literary tropes to generate creative and relevant title suggestions. You simply input keywords, themes, or genres related to your story, and the generator churns out a variety of title suggestions.

A title generator for books is particularly handy when you’re stuck trying to come up with a catchy and fitting title for your book. While the suggestions might not always be perfect, they can definitely kickstart your creativity and lead you to that perfect title.

Let’s not wait any longer and look at the top 10 book title generators list!

1. Capitalize My Title

Capitalize My Title is more than just a random book title generator. It’s a comprehensive tool that caters to a wide array of genres, including specialized ones like fantasy and romance. Its interface is intuitive, making it accessible for both novice and experienced writers. Whether you are searching for a fantasy book name generator or a romance book title generator, this tool offers a plethora of options, ensuring your title resonates with the theme of your story and the mood of your book.

Capitalize my Title book title generator

Here are some examples of book titles from Capitalize My Title’s book name generator:

Enchantments: A Tale of Love Across Realms

Dino Explorers: Adventure into the World of Dinosaurs

Fatal Echoes: Unraveling the Mysteries of a Cold-Blooded Killer

2. Reedsy

Reedsy’s Book Title Generator is renowned among authors for its genre-specific precision. It’s particularly effective as a fantasy book name generator and romance book name generator. The platform understands the nuances of each genre, offering suggestions that align with the genre’s conventions and reader expectations. It’s an indispensable tool for authors who wish to find a title that truly represents the spirit of their story.

reedsy book title generator

Here are some examples of book titles from Reedsy’s title generator for books:

Prison of Winter

The Blade in the North

An Inconvenient Attachment

3. Imagine Forest

Tailored for the imaginative minds writing for children, Imagine Forest excels as a children’s book title generator and random book title generator. Its whimsical and user-friendly design aligns perfectly with the creative needs of children’s book authors. This generator goes beyond generating titles; it inspires creativity, making it an excellent resource for those seeking a title that captures the innocence and wonder of children’s stories.

Imagine Forest book title generator

Here are some examples of book titles from Imagine Forest’s book name generator:

Who Took My Book?

Captain’s Lost Treasure

Back in Time

4. ToolBaz

Toolbaz is a versatile and user-friendly option for authors across various genres. Whether you need a horror book title generator or a poetry book title generator, Toolbaz provides an array of creative suggestions. Its simplicity and broad genre coverage make it a go-to tool for authors who prefer a straightforward, no-frills approach to title generation. It can help writers break out of their creative ruts, enabling them to generate unique and engaging book titles.

ToolBaz book title generator

Here are some examples of book titles from Toolbaz’s book title generator:

The Devil’s Playground

Ink and Emotions: A Journey Through Poetry

The Last Stand of Hope

5. Writerbuddy

WriterBuddy is an excellent choice for authors looking for a more AI-driven approach. This tool is especially useful as a comic book name generator and romance book title generator, offering unique and compelling suggestions. The AI technology behind this generator ensures that each title is not only genre-appropriate but also fresh and perfect for book marketing, providing a unique perspective that combines AI-generated ideas with personal insights.

Writerbuddy book title generator

Here are some examples of book titles from Writerbuddy’s book title generator:

Mastering the Craft: A Guide on How to Become a Successful Writer

The Unsettling Case: The Enigma of a Missing Man

Exploring the Unknown: A Tale of UFOs and Aliens

6. Selfpublishing.com

The book title generator by Selfpublishing.com stands out for its tailored approach. It serves exceptionally well as a random book name generator, providing a wide range of options. Authors seeking a diverse selection of titles, from mainstream to niche genres, will find this tool immensely useful. Additionally, as a story title generator, it helps authors create catchy and marketable titles based on genre and brief descriptions, making the process of finding an appealing title easier and more inspiring.

Selfpublishing.com book title generator

Here are some examples of book titles from Selfpublishing.com’s book title generator:

The Quantum Paradox

Journey of Resilience: A Refugee’s Autobiography

The Forgotten Symphony: Unearthing the Secrets of a Lost Masterpiece

7. BookRaid

Bookraid offers a unique AI-driven experience. It’s particularly effective for genres like science fiction and fantasy. The generator’s AI technology adapts to genre-specific trends, making it a valuable asset for authors looking to create a title that is both innovative and genre-relevant. Whether you’re writing a sci-fi epic or a fantasy adventure, this tool can help you craft the perfect title.

BookRaid book title generator

Here are some examples of book titles from BookRaid’s book title generator:

Campus Chronicles: Tales of College Friendships

Beyond the Grave

The Tapestry of Time: Tracing the Threads of History

8. Scalenut

Scalenut’s book title generator is a robust tool designed to cater to a wide range of genres, including niche markets. Its ability to generate specific and engaging titles makes it an excellent option for authors looking for a comic book title generator or a children’s book name generator. The tool’s intuitive design ensures a seamless experience for users.

Scalenut book title generator

Here are some examples of book titles from Scalenut’s book title generator:

Laugh Lines: A Hilarious Journey

Tiny Tales: The Adventures of an Ant

The Power of Small Habits: Mastering Your Daily Routine

9. Copylime

CopyLime’s book idea and title tool is a modern, AI-powered solution for authors seeking innovative titles. It stands out as a fantastic option for genres like fantasy, crime, adventure, and romance, making it a go-to fantasy book title generator and romance book title generator. The AI technology ensures that each title suggestion is not only unique but also resonates with current literary trends and reader preferences. Providing a detailed and concise summary of your story helps the AI generate suitable titles that capture the core elements like conflict, characters, and emotional nuances of the narrative.

Copylime book title generator

Here are some examples of book titles from Copylime’s book title generator:

Tales of Boundless Courage: Confronting Fear in Distant Lands

Beyond the Edge of Fear

Quest for the Dragon’s Eye: An Epic Adventure

10. Fantasy Name Generators

Fantasy Name Generators is a treasure trove for authors delving into the realms of fantasy and science fiction. It provides an extensive range of imaginative and evocative titles, making it an excellent fantasy book name generator. Additionally, its versatility extends to other genres, offering creative inspiration for writers across the literary spectrum.

Fantsy Name Generators book title generator

Here are some examples of book titles from Fantasy Name Generators’ book title generator:

Defenders Without Hope

Confinement of Glory

The Puzzle of Laughs

Tip: To maximize the potential of these generators, it’s important to approach them with a clear understanding of your book’s theme and target audience. Experiment with different genres and keywords to see how varied titles can change the perception of your book.

The journey to finding the perfect title is as unique as the story you’ve written. With these top 10 book title generators, authors have a wealth of resources at their fingertips to help them find the perfect title for their masterpiece. 

As an expert self-publishing service provider, we understand that a great title can make all the difference in the success of a book. Whether you’re writing fantasy, romance, horror, children’s books, or any other genre, there’s a title generator out there for you!

Here are some resources for you:

How to Copyright Your Book?

If you’ve thought about copyrighting your book, you’re on the right path.

Explore more