Newsletter Sign Up

How to Find an Editor for Your Book in 8 Steps (+ Costs!)

No writer can reach their full potential without an editor that sharpens their words. A professional editor makes the difference between a bestseller and a flop, so you need to find the right person to work with. But how to find a book editor that is a perfect match for not only your manuscript but also you, the writer?

That’s precisely the question we’ll be answering.

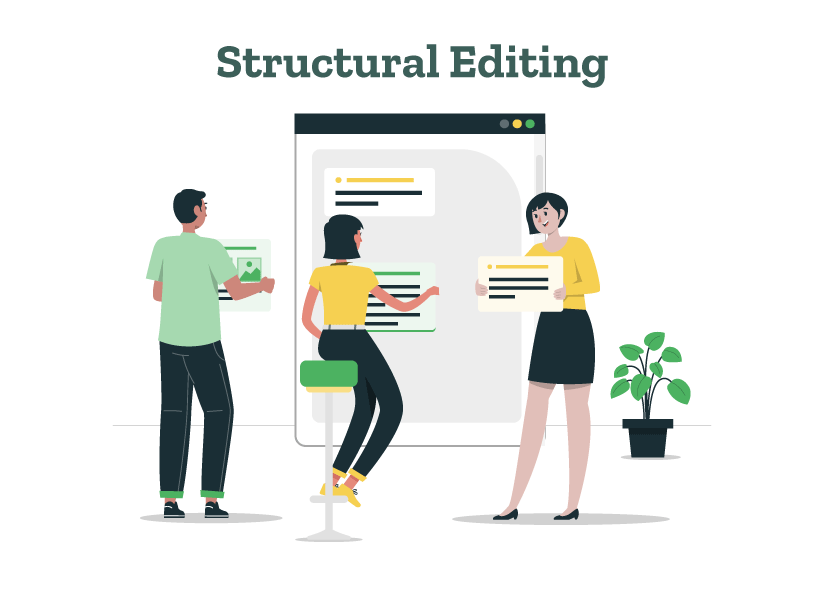
Book editing is a long and layered process. So if you think you need to hire one person and be done with it, you’re in for a surprise! Professional editing for any book is handled by a team of book editors who perform different types of edits on your manuscript.

Unless you find a superhuman editor who can handle it all, you’ll have to decide what type of book editor you’re looking for. Most writers end up finding a team of book editors to work on their book, comprising four editors:

  1. Developmental editor
  2. Copy editor
  3. Line editor
  4. Proofreader

But let’s not stray from our question: how to find a book editor to work on your manuscript?

There are eight steps to finding the right book editor. Follow them well and you’ll have an editorial team that can refine your book to perfection!

Polish and perfect your book with professional editing!

1. Understand the types of editing

There are four types of editing: developmental editing, line editing, copy editing, and proofreading. Let’s quickly understand them! 

      • Developmental editing: Developmental editors rectify any problems with structure, pacing, character development, plot, and themes. It is the first step of editing a book. 
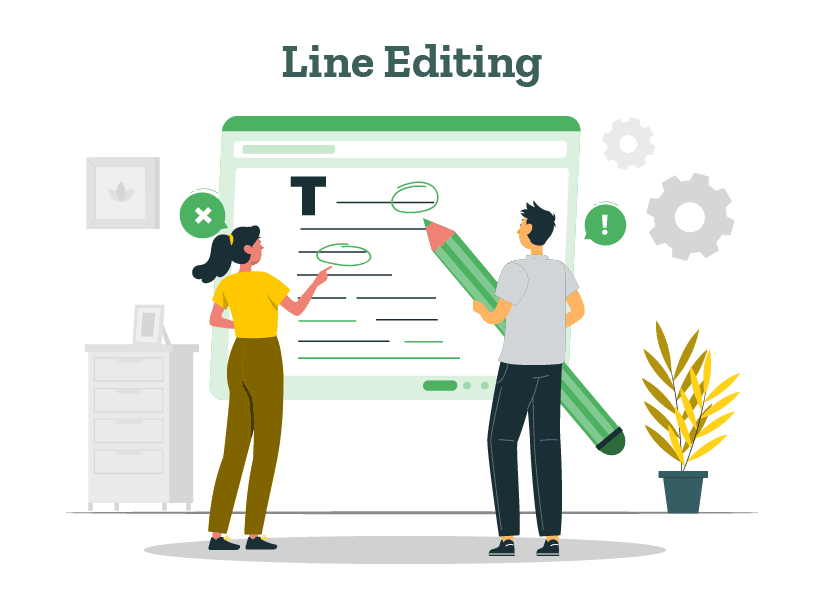
      • Line editing: Line editors concentrate on paragraph and sentence-level corrections, improving clarity, flow, and writing style. They’ll help you tighten up your prose, get rid of any awkward phrasing, and make sure your voice shines through. 
      • Copy editing: Copy editors address grammar, punctuation, spelling, and consistency errors. They’ll also make sure you stick to the style guidelines for your genre or publishing house. 
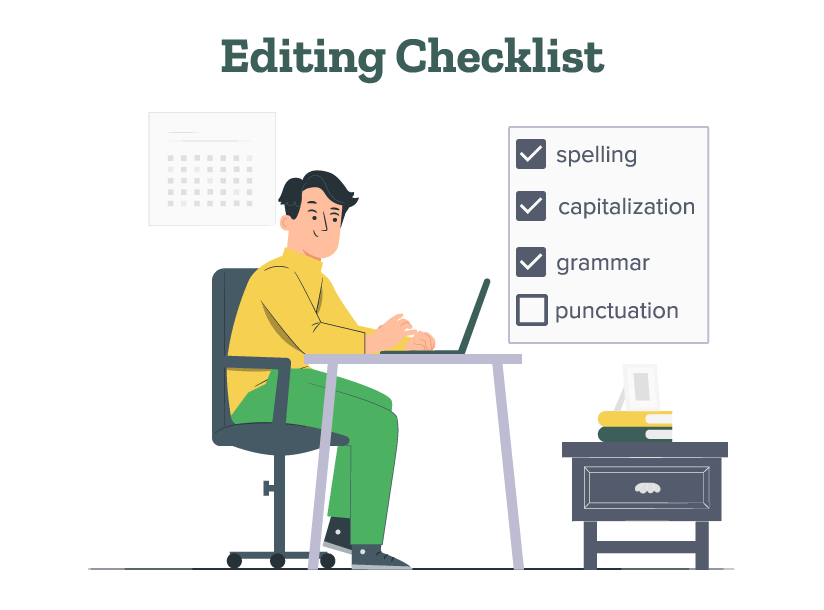
      • Proofreading: This is the final step where the remaining errors in grammar, punctuation, spelling, capitalization, and formatting are corrected. 

Now, you can determine your editing needs. If you’ve just finished your first draft and are unsure about the plot, structure, pacing, and characters, opt for developmental editing. However, if you’re confident about your story but unsure about the language used, choose line editing. 

Alternatively, if your manuscript has a solid structure, engaging content, and polished writing style, skip developmental and line editing. In this case, you can proceed directly with copyediting and proofreading services.

2. Gather recommendations from personal and professional networks

Reach out to fellow writers, authors, and writing community members for editor recommendations. You can also research websites like Reedsy, Editorial Freelancers Association, Upwork, and Freelance Editors’ Network to find editors. 

Plus, joining online writing forums, book review clubs, and social media groups is a fantastic way to get editor suggestions. The following is a list of online writing forums, book review clubs, and social media groups you can join:

          • Writer’s Digest Forum
          • Scribophile
          • Goodreads
          • Andrew Luck Book Club
          • Reese’s Book Club
          • The Oprah Winfrey Book Club
          • The Write Life Community ( Facebook) 
          • Writers Helping Writers  (Facebook) 

Another insider tip? Attend writing conferences, workshops, and events to gather editor referrals. Also, don’t forget to ask your writing mentors, teachers, or any other industry gurus you know for editor recommendations. 

The next step of how to find editors is optional. If you’ve not chosen a literary agent, you can skip this and directly see the next step of comparing services. 

3. Consider referrals from literary agents

If you’re going the traditional publishing way, don’t be afraid to ask your literary agent for editor recommendations. Agents are pros at this stuff and usually have worked with several skilled editors before. They can easily find an editor who’s a perfect fit for your book.

It’s crucial to communicate with your agent throughout the process. Don’t just take their editor’s suggestions blindly. Make sure you’re constantly keeping them in the loop about your editing journey.

An important step of how to find a book editor is to compare the services provided by editing firms and freelancers. Let’s understand this step!  

4. Compare editing services: firms vs. freelancers

When it comes to editing firms vs. freelancers, it’s all about finding your perfect match. This involves comparing the types of editing provided, turnaround times, the software they use, pricing, communication style, and personal rapport.  

Also, review the editor’s or firm’s contract terms, including confidentiality, intellectual property rights, and termination clauses. With this, check if the editor or firm provides any additional services like book cover design, eBook conversion, book marketing, and distribution.

If you want to self-publish your book, check whether they provide self-publishing services like uploading it on self-publishing platforms.

Reviews are also your best guide to choosing the right book editing service. PaperTrue, for example, has a rating of 4.6/5 on Reviews.io and 4.8/5 on Google Reviews

Do your research and trust your instincts. Schedule a call or a meeting to decide if the editor is a perfect fit for your book. 

5. Analyze their experience in your genre

Channel your inner Sherlock Holmes to uncover every detail of your editor’s professional history. Investigate their background and see if they’ve worked on books similar to yours. Have they edited anything in your niche before? Do they have a track record of success with stories like yours? 

Check if they’re a part of online writing communities, groups, and book clubs related to your genre. Plus, ask for references for authors they’ve worked with before. Also, read their reviews and testimonials on their author’s website, social media platforms, and other online platforms. 

If they organize workshops related to editing in your genre, this also demonstrates their passion for your genre. 

The next step of how to find an editor for your book is equally crucial. Let’s explore this in detail!

6. Understand the costs involved

It’s crucial to have a clear understanding of the costs involved. While some editors charge by the word, others may charge by the hour or offer package rates. Here are estimated rates for a 50,000-word novel: 

              • Developmental editing: $0.03 to $0.08 per word

Estimated cost: $1,500 to $4,000

                • Line editing: $0.02 to $0.06 per word

Estimated cost: $1,000 to $3,000

                  • Copyediting: $0.01 to $0.05 per word

Estimated cost: $500 to $2,500

                    • Proofreading: $0.01 to $0.03 per word

Estimated cost: $500 to $1,500

However, editing rates can vary significantly based on factors such as the editor’s experience, the level of editing required, and the manuscript’s complexity and length. 

Request detailed quotes from multiple editors and carefully review what’s included in each package. Consider your budget and the value you place on the editing process. 

A vital step of how to find an editor for a book is requesting a sample edit. Let’s quickly understand this step!

7. Request a sample edit

To get a firsthand sense of an editor’s style and approach, request a sample edit. For a sample edit, include manuscript sections that need improvement or areas where you struggle with clarity, pacing, or flow. 

To test an editor, you can also add intentional errors in the sample you send and see if they can spot them. Some strategies you can use to test editors at this stage are: 

                        • Create a sample that incorporates multiple writing styles, such as descriptive prose, dialogue, and action scenes, all within the same excerpt. Ask the editor to analyze and provide feedback on each style separately
                        • Introduce subtle inconsistencies in character descriptions, motivations, or behaviors within your sample. Analyze if the editor can understand these inconsistencies. 

Communicate your expectations for the sample edit, including the desired type of editing. Also, clarify the format in which you’ll be sending the sample (e.g., Microsoft Word, Google Docs, or PDF.) After this, set a deadline for receiving the sample edit. 

Once you receive the sample edit, analyze the editor’s editing style, the depth of their feedback, and how well they enhance your unique voice. 

Now let’s see the last step to finding a book editor! 

8. Assess their communication and compatibility

You’ll be collaborating closely with your editor throughout the editing process. Hence, it’s essential to find someone who is responsive, professional, and easy to work with. 

Pay attention to how promptly they reply to your inquiries, how clearly they communicate their services and expectations, and whether they take the time to understand your goals and concerns. 

Now you can begin your journey of finding a professional editor. While you can still Google “How to find an editor for my book?”, rest assured that this guide can help you right up to publishing. For readers searching for “How to find an editor for your novel?”, the steps remain the same.

Checklist to find the perfect book editor

We’ve made a checklist of questions to help you find the right book editor. You can use these questions to narrow down your search or prepare your own checklist based on this model!

If you require high-quality book editing services, consider contacting PaperTrue. Our trained team provides all types of editing, eliminates errors, and offers in-depth feedback.

With this, we also offer additional services like creating a book cover design, audiobook, and copyright page, book printing, eBook conversion, formatting, book distribution, and marketing. We can also draft a query letter, book summary, blurb, and author profile for you. 

What did you think about this article about how to find an editor for a book? Share your thoughts in the comments section! 

Here are some useful resources for you: 

What Is a Subject of a Sentence? Meaning, Examples & Types

Subjects are like the main characters in a story. They’re the ones doing the action or being discussed in the sentence. In this article, learn everything about the sentence’s subject in detail! 

We’ve also answered many questions like: How do you identify the subject of a sentence? What are the rules for using subjects in sentences?  What are the different kinds of subjects? So, let’s begin! 

Make your writing impactful with professional editing!

What is the subject of a sentence? 

The subject is the main focus of the sentence. It is usually the noun or pronoun that performs the action in the sentence. For example: 

He went to the market. (He- pronoun) 

Anne traveled to Paris. (Anne- noun) 

In the above sentences, the subject comes before the verb in the sentence. While this is common, the subject comes after the verb in interrogative sentences. For example: 

Are you tired? (are- verb, you- subject) 

What is she doing? (is-verb, she- subject) 

In some cases, the subject does not perform the action. Instead, it is affected by the action. For example: 

The window was cleaned yesterday. 

Here, the window is not performing the action. Instead, it is impacted by the action “cleaned”. Let’s quickly see another example of a subject in a sentence! 

The box was thrown in the dustbin. 

In this sentence, the box is not performing the action. Instead, it’s impacted by the action. 

Now let’s see how to identify the subject of a sentence. 

How to find the subject of a sentence? 

To identify the subject of a sentence, find out the verb in the sentence. Then ask “Who is performing the action?” or “What is performing the action?” This gives us the subject. For example: 

Anne walked into the garden. (Who walked? Answer- Anne) 

The lion chased the deer. (What chased the deer? Answer- lion) 

Now let us understand the different types of subjects in detail! 

Three important types of subjects 

1. Simple subject 

Many times, the sentence has only one noun/pronoun. This noun/pronoun is known as the simple subject of a sentence. For example: 

The girl was happy. 

James was worried. 

2. Complete subject 

A complete subject consists of the simple subject along with other modifiers (parts of speech (e.g., adjectives, adverbs, prepositions) that help to describe the sentence. It provides additional information about the subject. For example: 

The old, rusty bike in the shed belongs to my uncle. 

Here, the article “the”, the adjectives “old”, “rusty”, and the prepositional phrase “in the shed” give a detailed description of the bike. This makes it a complete subject. 

Another example of a complete subject is: 

The tall, majestic oak tree in the center of the park. 

In this sentence, the words “tall”, “majestic”, and “oak” describe the tree in detail. 

3. Compound subject 

A compound subject usually includes 2 or more simple subjects connected by conjunctions like “and”, “or”, “nor”, etc. For example: 

Mary and Jane visited their brother. 

Neither the coach nor the team were happy with the team’s defeat. 

Important pointers about the sentence’s subject 

1. Subject-verb agreement: This means that the subject and the verb must refer to the same number, meaning either both should be singular, or, both should be plural. 

For example: 

The apple is ripe. (apple- noun, is- verb) 

Here, both “apple” and “is” are Singular, referring to one apple. 

The books are old. (books- noun, are- verb). 

Here, both “books” and “are” refer to many apples. 

2. Collective nouns can be treated as both, singular and plural subjects: The nouns that refer to a group of people, or things are known as collective nouns. “Government”, “team”, and “staff” are some examples of collective nouns. 

For example: 

The government is introducing a new tax. (American English) 

The jury are divided in their opinion. (British English) 

Note: While in American English, collective nouns are treated as singular, in British English, nouns can be singular or plural depending on the context. 

3. A dummy subject can be added to complete the sentence: Also known as an expletive, a dummy subject can be added to fulfill the requirement of having a subject. For example: 

It is raining outside. 

In the above sentence “it” doesn’t perform any action. However, “it” is added as the sentence needs a subject to make sense. 

4. A gerund or infinitive can also be used as the sentence’s subject: While a gerund is a verb that functions as a noun, an infinitive includes to + the main verb. Let’s see examples of this rule. 

Swimming is a useful skill. (Swimming- gerund) 

To learn a new language is not easy. (To learn- infinitive) 

How to use a subject in a sentence correctly? 

  1. Identify the subject: Determine who or what the sentence is about. 
  2. Place the subject: Place the subject before the verb in declarative sentences (e.g., She runs). In interrogative sentences, place it after the verb (e.g., What are you doing?). Omit the subject for imperative sentences (e.g., Close the door). 
  3. Use clear pronouns: Ensure pronouns clearly refer to the correct subject (e.g., John said he would call).
  4. Avoid misplacements: Place the subject correctly to avoid confusion For example: 

Incorrect: Running down the street, the car hit the man. (Meaning- The car was running.) 

Correct: Running down the street, the man was hit by the car. (Meaning- The man was running.) 

You may have also heard the term “object of a sentence”. There is a difference between the subject and object of a sentence. Let’s quickly understand this! 

Subject vs. object of a sentence 

While a subject performs the action, the object receives the action of the verb. The object can be a noun or a pronoun. Usually, it is written after mentioning the subject. For example: 

He read a story. (Subject- He, Object- Story) 

Here, the “story” directly receives the action of reading. Hence, it’s a direct object. 

She gave her friend a gift. (Subject- She, friend- Indirect Object, gift-Direct Object) 

In the above sentence, “friend” is the indirect object. Usually, the indirect objects are mentioned before the direct object in a sentence. 

We hope the above examples have clarified the difference between object vs. subject of a sentence. This concludes our guide about the subject of a sentence! Now you can easily identify and use subjects while creating content. 

After writing, it’s important to edit and proofread the text for spelling and grammatical errors. If you find editing challenging, consider selecting Papertrue’s expert editing and proofreading services

You can bookmark this article about “What is a subject of a sentence?” for future reference! 

Here are some other useful resources for you: 

What Is Climax Of A Story & How To Craft A Gripping Climax

Every story takes us on a journey, and at the heart of this journey lies the climax—the pivotal moment that keeps readers on the edge of their seats. The climax is not just a part of the story; it’s the moment where the tension peaks, choices are made, and fates are sealed. 

What will happen now? Will the hero die or the villain? Will the truth prevail, or will evil win? The climax of a story has our interest piqued!

Understanding what is the climax of a story is crucial for any writer aiming to craft compelling narratives. In this article, we will delve into the essence of the climax of the story, and explore various types of climaxes in a story. We’ll also offer practical advice on how to write the climax of a story that will blow your readers’ minds!

Beginning with a short climax of a story definition will set the pace for us.

Make your climax intriguing with in-depth editing!

What is the climax of a story?

The climax of a story is the part where the narrative’s tension peaks and the central conflict heads toward resolution.  The climax of the story is its turning point. The climax is like the big showdown in a story, where the protagonist faces their greatest challenge and the outcome is most uncertain. 

Often misunderstood merely as a plot point, it is more accurately the emotional high point of the narrative. This is why understanding what climax means in a story is essential for creating engaging and emotionally resonant stories.

Importance of the climax of the story

A well-crafted climax does more than entertain. It ensures that the narrative’s build-up pays off and leaves the audience satisfied. What is a climax in a story if not the fulcrum on which the entire narrative pivots? The climax is the point of major change in a story.

Let’s see some popular examples of climax in a story to solidify your understanding.

Story climax examples

1. The Lord of the Rings: The Return of the King by J.R.R. Tolkien

  • Climax: The climax occurs at the Battle of the Black Gate and Mount Doom. As the forces of Middle-earth engage Sauron’s army at the Black Gate as a distraction, Frodo and Sam reach Mount Doom. Frodo, overwhelmed by the Ring’s power, claims it for himself. However, Gollum attacks him, bites off his finger, and inadvertently falls into the lava with the Ring, destroying it.
  • Impact: This climax resolves the central conflict of the Ring’s destruction and leads to the defeat of Sauron, liberating Middle-earth from his tyranny. It brings closure to the epic quest and begins the process of healing and restoration for the characters and their world.

The Lord of the Rings story climax scene.

2. Pride and Prejudice by Jane Austen

  • Climax: The climax occurs when Lady Catherine de Bourgh confronts Elizabeth Bennet, demanding she renounce any intention of marrying Mr. Darcy. Elizabeth’s refusal to promise away her future happiness demonstrates her integrity and resolve. Unknown to Elizabeth, this defiance convinces Darcy that Elizabeth has feelings for him, prompting him to propose again.
  • Impact: This moment is pivotal as it leads directly to the resolution of the main romantic conflict. Elizabeth’s steadfastness and Darcy’s subsequent second proposal, which she accepts, resolve their misunderstandings and culminate in their engagement. It brings together the themes of love, social status, and personal growth.

3. The Godfather by Mario Puzo

  • Climax: The climax of The Godfather occurs during the baptism scene. As Michael Corleone stands as godfather to his nephew, renouncing Satan and all his works, his orders are simultaneously carried out to assassinate all rival mob leaders across New York City.
  • Impact: This scene cements Michael’s complete transformation into the new Godfather, consolidating his power over the family and the city’s underworld. It dramatically resolves the conflict of power struggles within and outside the Corleone family, marking Michael’s full embrace of his criminal destiny.

The Godfather story climax scene.

These story climax examples show how climaxes are crafted to bring a significant transformation, impacting both characters and readers alike.

Just as different stories have different types of characters, they also have different types of climaxes. Different types of climaxes bring out different emotions in the audience and also have different impacts on the stories.

Types of climax in a story

Here are the types of climaxes in stories with examples:

1. Emotional climax

An emotional climax focuses on the intense feelings and internal transformations of the characters rather than on external actions. It is where the emotional tension that has been building throughout the story reaches its peak. 

This type of climax is often used in romance, drama, and literary fiction. It aims to evoke strong emotional responses from the audience, such as joy, sadness, or catharsis. The emotional climax helps in character development and emphasizes the thematic depth of the story.

Example:

 The Fault in Our Stars by John Green

The emotional climax of this story occurs when Hazel and Gus share a profound and heart-wrenching conversation in Amsterdam, understanding the full weight of their love and the inevitability of their loss due to terminal illness.

Impact: This climax deepens the emotional resonance of the story, bringing the themes of love, mortality, and meaning to their fullest expression.

2. Action climax

An action climax is characterized by high-energy, physical events, often involving conflicts such as battles, chases, or other forms of physical confrontation. It is where the plot’s tension is resolved through action.

Commonly found in action, mystery, adventure, thriller, and superhero genres, the action climax aims to excite and entertain the audience through spectacle and resolution of the central conflict. It often involves a final showdown between the protagonist and antagonist.

Example: 

Die Hard, directed by John McTiernan

The climax in Die Hard is a high-octane sequence where John McClane faces off against Hans Gruber and his henchmen in a desperate attempt to save the hostages, including his wife, in the Nakatomi Plaza.

Impact: This climax resolves the main conflict through physical action and strategy, emphasizing themes of heroism and survival.

3. Mystery or revelation climax

This climax occurs when a significant revelation or twist changes the perspective of the entire narrative. It often resolves the central mystery and redefines the audience’s understanding of preceding events.

Used in mystery, thriller, and some speculative fiction genres, this climax hinges on the strategic disclosure of information. It seeks to surprise the audience and provide a satisfying resolution that ties together seemingly disparate plot threads.

Example:

The Sixth Sense by M. Night Shyamalan

The climax comes when Dr. Malcolm Crowe (played by Bruce Willis) realizes that he has been dead throughout the movie, a fact that reshapes every interaction and event that viewers have seen.

Impact: This type of climax provides a sudden and profound revelation that forces the audience to reconsider everything they know about the story, enhancing its depth and emotional impact.

4. Philosophical or ideological climax

This climax involves a pivotal moment where the story’s deeper philosophical or ideological messages are foregrounded. Characters might face moral dilemmas or make decisions that align with the work’s thematic concerns. 

It is often utilized in dramas, literary fiction, and stories with a strong thematic focus. This climax encourages the audience to think deeply about the issues presented, challenge their beliefs, or appreciate a moral insight offered by the narrative.

Example:

To Kill a Mockingbird by Harper Lee

The climax occurs during the courtroom scene where Atticus Finch delivers his closing argument, asserting the importance of racial equality and justice in a deeply segregated society.

Impact: This climax doesn’t just resolve the storyline of the trial; it also brings the novel’s themes of justice, morality, and human dignity to a head, challenging both the characters and readers to reflect on these issues.

5. Tragic climax

A tragic climax is marked by irrevocable loss, failure, or death, often resulting from a fatal flaw in the protagonist or an unavoidable fate. The emotional and narrative stakes are at their highest.

Central to tragedies and some dramatic stories, this climax underscores themes of fate, destiny, and human frailty. It evokes pity and fear in the audience, leading to a cathartic experience.

Example:

Romeo and Juliet by William Shakespeare

The tragic climax occurs when Romeo, believing Juliet to be dead, drinks poison. Juliet awakens, finds Romeo dead by her side, and then kills herself with his dagger.

Impact: This climax concludes with the ultimate sacrifice, sealing the fate of the star-crossed lovers and underscoring the themes of love, fate, and the destructiveness of familial feuds.

6. Comic climax

The comic climax typically involves a humorous resolution of misunderstandings, mistaken identities, or complex situations built up throughout the story. 

Essential in comedies and some romantic comedies, this climax resolves conflicts in a way that maximizes humor and often leads to a happy or at least satisfactory resolution for the characters. It uses humor to celebrate human nature and the joy of resolution.

Example: 

A Midsummer Night’s Dream by William Shakespeare

The climax involves the play within a play performed by the craftsmen which is hilariously bad, leading to much confusion and amusement.

Impact: This climax resolves the various romantic entanglements and misunderstandings in a humorous and light-hearted manner, celebrating human folly and the joy of reconciliation.

Excited to write a climax for your story? We’ve listed down some tips on how to write the climax of a story. 

How to write the climax of a story

Writing the climax of a story is a delicate art. Here are some steps to guide you:

1. Establish the stakes and tension

Ensuring the stakes are crystal clear and rising as the story progresses is crucial. These stakes are what the main character has to win or lose and should matter most to them.

  • Visualize the worst-case scenario: Clearly outline what your protagonist stands to lose if they fail. This could be a tangible loss (like losing a loved one or a crucial battle) or something more abstract (like losing their self-respect or a chance at redemption).
  • Remind the reader: Throughout your story, subtly remind the reader of these stakes. This could be through internal monologues, dialogue, or through the actions of the antagonist.

Leading up to the climax, use rising action to build tension. This can include smaller conflicts, hurdles, or complications that hint at the big showdown to come.

  • Incremental obstacles: Gradually increase the size and difficulty of the obstacles your protagonist faces. Each should be harder to overcome than the last, building tension as the climax approaches.  Mix physical, emotional, and intellectual challenges to keep the narrative interesting. 

For example, after a physical fight, the next challenge could be a moral dilemma or a complex puzzle. This variety can test different aspects of your protagonist’s character.

  • Pacing: Manipulate the pace of your narrative leading up to the climax. Short, sharp sentences can increase tension, as can switching between scenes and viewpoints to keep the reader on edge.

2. Define the central conflict

Clearly define the central conflict of your story from the outset. Whether it’s a conflict with another character, society, nature, or within the protagonist themselves, this conflict must be addressed head-on in the climax.

  • Conflict evolution: Allow the conflict to evolve throughout the story as the characters and situations develop. This keeps the conflict dynamic and prevents the story from becoming static.
  • Use writing tools: You can use writing apps like Plottr, Scrivener, etc., to create a timeline for your climax and how it will evolve.

3. Character arc integration

The climax should be a make-or-break moment for the main character’s personal journey. Everything they’ve learned, feared, and wanted should come into play.

  • Showcase character flaws and growth: Before the climax, ensure that you’ve demonstrated your protagonist’s flaws and the growth they’ve undergone. The climax should test this growth.

For example, a fearful and unconfident hero steps up and shows courage to save his friends in the climax.

This is the point where the protagonist should make a significant decision or take an action that demonstrates their change (or lack thereof).

  • Decisive actions: Design the climax so that the protagonist must make a choice or take an action that epitomizes their character development. This decision should be difficult but reflective of the journey they’ve undergone.

For example, a protagonist has to kill his best friend after learning that they were an accomplice of the villain. 

4. Optimal setting and timing

The climax needs the right backdrop to hit home emotionally. Pick a setting that amps up the tension and reflects the story’s core themes. 

  • Symbolic setting: Choose a setting for your climax that symbolizes or mirrors the protagonist’s internal conflict or the story’s themes. You can use setting generators like Donjon, Chaotic Shiny, etc. to make your work easier.

For example, In a novel centered on a protagonist overcoming their fear of failure, the climax takes place on a precarious, windswept mountain peak. As they battle fierce winds and treacherous paths to reach the summit, the setting mirrors their internal struggle to conquer their doubts and insecurities.

  • Sensory details: Use rich sensory details to make the setting vivid. This not only helps the reader visualize the scene but also amps up the emotional intensity. Include details about what they hear, smell, taste, and touch. Use figurative language to draw comparisons that evoke sensory impressions.

For example: Instead of saying “flowers,” specify “sunlit daisies with dewdrops glistening on their petals.”

And make sure the timing feels just right—not rushed, not dragging, but a natural progression from the buildup.

  • Check the build-up: Ensure that the events leading up to the climax logically set it up. There should be a natural progression to the climax that feels neither rushed nor drawn out. Each major event should have a plausible reason rooted in earlier actions or decisions made by the characters. Characters should have well-defined motivations that drive their actions, contributing to the buildup of the plot.
  • Narrative peaks: Time your climax to coincide with the peak of your narrative arc. This is typically when all elements are at their most intense. Build tension gradually so that it reaches its peak right before or during the climax, creating a natural lead-up that feels intense and unavoidable.

5. Execution of the climax

As the action heats up, so should the pace. Descriptions should be punchy and vivid, especially in action scenes. 

  • Clarity in action: Write action scenes. Use active voice and avoid overly complex sentences that might confuse the reader during fast-paced moments.
  • Vary sentence structure: Short sentences can quicken the pace, but intersperse them with longer ones to allow for moments of reflection and tension building.

Don’t forget about the emotional side—show how the characters are feeling as the stakes reach their peak.

  • Internal monologue: Use internal monologue to convey the protagonist’s emotional state during the climax. This adds a layer of depth to the action.
  • Show, don’t tell: Show emotions through actions and reactions rather than simply stating them. This makes the scene more powerful and engaging.

Use dialogue sparingly but powerfully. What characters say in these crucial moments can reveal a lot about who they are.

  • Impactful dialogue: Make each line of dialogue during the climax count. Dialogue should reveal character, add to the tension, or push the action forward. During the climax, every line should carry weight not just through its literal meaning, but through what it implies or suggests.

For example: A character might say, “Is this what you wanted?” which on the surface asks a simple question but beneath it could question loyalty, express betrayal, or challenge a moral choice, depending on the context provided by the narrative.

  • Avoid exposition: Keep dialogue sharp and relevant; this isn’t the time for lengthy exposition or unrelated discussions.

When you’re crafting the climax of a story, it’s not just about arranging events—it’s about bringing together all the threads of the narrative into a powerful and emotionally fulfilling moment. Whether you’re exploring the climax meaning in a story or experimenting with different types of climax in a story, what matters is how deeply it connects with the reader.

If you’re looking to polish your manuscript to ensure your climax—and every part of your story—hits just the right note, consider the expert editing and proofreading services of PaperTrue. Our professional editors can help refine your narrative, ensuring your story’s climax is not only powerful but also flawlessly executed!

Here are some more useful resources to help you:

11 Best Story Structures for Writers (+ Examples!)

One of the reasons why the Harry Potter series and Cinderella are so famous is their engaging story structure. Explore 11 different story structures and learn how to use them! Whether you’re writing a book, screenplay, or short story, these structures can help create engaging plots. We’ve also given exciting story structure examples! 

The following story structures are explored in this article: 

If you think that a story structure always follows a logical sequence of events, this isn’t always true. So what is a story structure? Let’s see the story structure meaning very quickly. 

Polish your story structure with comprehensive editing!

What is story structure? 

Story structure is the way events are arranged in a story.  They help to organize the plot, giving a direction to the story. To understand better, let’s see its broad types: linear and non-linear story structures! 

1. Non-linear structures

In many stories, the story structure is like a maze where the events are not presented in the order they occur. For example, events that took place later can be mentioned first, or any events from the past can be highlighted afterward. 

This non-linear structure can be seen in stories like The Night Circus and The Girl with the Dragon Tattoo

2. Linear structures 

In some stories, like a straight road trip, the story starts with the first event that took place, followed by events that happened next. This is the linear structure. 

Hansel and Gretel, Snow White and the Seven Dwarfs, Little Red Riding Hood, and The Fault in Our Stars are some examples of linear story structures. 

Now let’s see the 11 different types of story structures in detail! 

11 amazing types of story structures 

1. Three-Act Structure 

This basic story structure is widely used in literature, film, and theater. Following is a simple explanation of all three acts: 

a. Act 1: Setup/ exposition 

Introduction: The main characters, setting, and the initial situation are established. 

Inciting incident: There is a change/event that leads to a challenge or goal. 

Plot point 1: The protagonist commits to facing the challenge/achieving the goal.

b. Act 2: Confrontation

Rising action: The protagonist faces escalating challenges.

Midpoint: A significant event occurs that raises stakes for the characters.

Plot point 2: An event leads to the climax, resulting in the greatest challenge for the protagonist.

c. Act 3: Resolution

Climax: The protagonist faces the main conflict.

Falling action: The consequences and impact of the climax on the characters are revealed.

Denouement: The final resolution occurs and the story ends.

An example of the following story structure is: 

2. The Hero’s Journey 

Given by Joseph Campbell, the Hero’s Journey is a structure seen in many myths, legends, and storytelling traditions. The following are its 12 stages: 

  1. Ordinary world: The hero’s normal life before the adventure begins.
  2. Call to adventure: The hero is faced with a challenge or quest.
  3. Refusal of the call: The hero hesitates or refuses the call to adventure.
  4. Meeting the mentor: The hero meets a mentor who provides guidance and support.
  5. Crossing the threshold: The hero leaves the familiar world and enters the unknown.
  6. Tests, allies, enemies: The hero faces challenges, makes allies, and confronts enemies.
  7. Approach to the inmost cave: The hero prepares for a significant challenge in the unknown world.
  8. Ordeal: The hero faces a major crisis or challenge, confronting their greatest fear.
  9. Reward (Seizing the Sword): The hero overcomes the ordeal and gains a reward or records a victory.
  10. The road back: The hero begins the journey back to the ordinary world.
  11. Resurrection: The hero faces a final test or challenge, emerging transformed, and reborn.
  12. Return with the elixir: The hero returns home with new knowledge, wisdom, or power that benefits their ordinary world.

In the book The Wonderful Wizard of Oz, Dorothy’s journey is a good example of Hero’s Journey. A young girl from Kansas, Dorothy is swept away by a cyclone to the magical land of Oz. She embarks on a journey to find her way back home and seek help from the Wizard of Oz. 

Along the way, she encounters various challenges and makes new friends – the Scarecrow, the Tin Woodman, and the Cowardly Lion. Through her adventures, Dorothy discovers her strength, confronts the Wizard, and realizes that the power to return home is with her all along. She finally reaches home. 

3. Dan Harmon’s Story Circle 

Dan Harmon, the creator of TV shows like Community and Rick and Morty, developed this tool. Following are the 8 stages of this story structure: 

  1. You: Introduce the protagonist in their normal world.
  2. Need: The protagonist experiences a desire or need that disrupts their comfort.
  3. Go: The protagonist enters a new, unfamiliar situation to fulfill their needs.
  4. Search: The protagonist faces challenges and learns to navigate the new situation.
  5. Find: The protagonist achieves their goal or obtains what they sought.
  6. Take: The protagonist faces the consequences or sacrifices due to their quest.
  7. Return: The protagonist returns to their original situation, often changed or enlightened.
  8. Change: The protagonist is transformed by their experiences and the journey’s lessons. 

Let’s apply this theory to the popular short story Jack and the Beanstalk to understand better! 

  1. You: Jack is a poor farmhand.
  2. Need: He desires wealth and a better life.
  3. Go: Jack trades his cow for magic beans, which grow into a giant beanstalk.
  4. Search: Jack climbs the beanstalk and explores the giant’s castle, seeking treasures.
  5. Find: Jack discovers a golden harp and a goose that lays golden eggs.
  6. Take: The giant chases Jack, who narrowly escapes down the beanstalk.
  7. Return: Jack returns home with the treasures, but the giant follows him.
  8. Change: Jack outwits the giant, becomes wealthy, and learns the value of cleverness over greed.

4. The snowflake method 

Developed by author and professor Randy Ingermanson, this story structure emphasizes the importance of gradually expanding a story. The following are its steps: 

  1. One-sentence summary: Create a concise summary of your story in one sentence.
  2. One-paragraph summary: Expand the sentence into a paragraph that outlines the story’s major events.
  3. Character summaries: Write a one-page summary for each major character, detailing their goals, motivations, and conflicts.
  4. Expanded plot summary: Expand the one-paragraph summary into a one-page outline, including key story points.
  5. Character synopses: Write a detailed synopsis for each major character, including their story arc and development.
  6. Expanded plot: Turn the one-page plot outline into a multi-page summary, detailing each major scene and event.
  7. Scene list: Create a spreadsheet or list of all scenes, including the main action and the purpose of each scene.
  8. Write the first draft: Using the detailed scene list, write the first draft of your novel.

Let’s see an example to understand this better! 

  1. One-sentence summary: A young girl discovers a magical key that unlocks a hidden world.
  2. One-paragraph summary: Jenna, a curious 10-year-old, finds a mysterious key. This key opens the door to several enchanted forests. As Jenna explores this new world, she learns that an evil sorcerer has taken control of this world. She learns about her grandfather’s connection to the world and how she’s destined to save it. Jenna defeats the sorcerer. 
  3. Character summaries 
  4. Jenna: A brave, curious girl who discovers a magical world.
  5. Grandfather: A wise old man with a mysterious past.
  6. Talking rabbit: Jenna’s guide and friend in the magical world.
  7. Evil sorcerer: The main antagonist who seeks to control both worlds.
  8. Expanded summary: Jenna learns that her grandfather was once a guardian of Sylvalia and that she has inherited his magical abilities. With the talking rabbit Finnegan’s help, Jenna embarks on a quest to find the ancient Book of Light, which holds the power to defeat Malakai. Along the way, she faces challenges such as crossing a treacherous ravine, outsmarting a cunning fox, and navigating a labyrinth guarded by a giant troll. 

As Jenna overcomes each obstacle, she grows in confidence and strength, ultimately confronting Malakai in his dark tower. Using the Book of Light and her own inner power, Jenna defeats the sorcerer, freeing Sylvalia from his grasp. 

5. The Story Spine 

Created by the playwright Kenn Adams, this story structure is widely used. The following are its 8 steps: 

  1. Once upon a time..: Establishes the setting and introduces the main character.
  2. Every day…Describes the character’s normal life and routine.
  3. But one day…Introduces an inciting incident that disrupts the normal routine.
  4. Because of that…Shows the consequences of the inciting incident, leading to a series of events.
  5. Because of that…Continues the chain of events, escalating the story.
  6. Because of that…Further escalates the story, building towards the climax.
  7. Until finally… Reaches the climax where the main conflict is resolved.
  8. And ever since then…Concludes the story, showing the new reality for the character.

Let’s see a short, interesting example of this structure! 

  1. Once upon a time, there was a hardworking ant named Archie.
  2. Every day, Archie gathered food and strengthened his ant colony.
  3. But one day, a greedy grasshopper named Greg stole the colony’s food.
  4. Because of that, Archie set out on a quest to retrieve the stolen food.
  5. Because of that, Archie faced challenges and made new allies.
  6. Because of that, Archie discovered Greg’s weaknesses and devised a plan.
  7. Until finally, Archie outsmarted Greg and recovered the colony’s food.
  8. And ever since then, Archie’s colony thrived, and Greg learned the value of honest work.

6. The heroine’s journey 

The concept of the Heroine’s Journey was notably developed by Maureen Murdock, a psychotherapist and author. The following are this structure’s 9 stages: 

  1. Separation from the feminine: The heroine starts in a world where she feels constrained by traditional feminine roles.
  2. Identification with the masculine & gathering of allies: She adopts traditionally masculine traits and gathers support to pursue her goals.
  3. Road of trials: The heroine faces challenges and obstacles that test her strength and resolve.
  4. Experiencing the boon of success: She achieves a significant victory or success.
  5. Awakening to feelings of spiritual aridity/death: Despite her success, she feels a sense of emptiness or lack of fulfillment.
  6. Initiation & descent to the goddess: She undergoes an inner transformation, reconnecting with her feminine side and deeper self.
  7. Urgent yearning to reconnect with the feminine: The heroine seeks to integrate her feminine qualities and restore balance.
  8. Healing the wounded masculine: She heals her relationship with masculine aspects of herself and others.
  9. Integration of the masculine and feminine: The heroine achieves harmony between her masculine and feminine traits, leading to true empowerment and wholeness.

The following example explains this story structure!

  1. Separation from the feminine: Alice feels trapped in her small town, where she’s expected to marry young and become a housewife.
  2. Identification with the masculine & gathering of allies: She decides to pursue her dream of becoming a writer and moves to the city, where she meets a supportive group of friends.
  3. Road of trials: Alice struggles to find a job and faces rejection from publishers. She doubts her abilities and considers giving up.
  4. Experiencing the boon of success: She finally lands a job at a magazine and her articles receive praise. She starts working on a novel.
  5. Awakening to feelings of spiritual aridity/death: Despite her success, Alice feels empty and disconnected from her true self. She realizes she’s lost touch with her creativity and passion.
  6. Initiation & descent to the goddess: Alice takes a solo retreat to reconnect with herself. She rediscovers her love for writing and begins to prioritize her own needs.
  7. Urgent yearning to reconnect with the feminine: She starts incorporating self-care and mindfulness into her daily routine. She also reconnects with her female friends. 
  8. Healing the wounded masculine: Alice learns to set boundaries at work and in her relationships, standing up for herself and her values.
  9. Integration of the masculine and feminine: She finishes her novel, which reflects her journey of self-discovery. Alice emerges as a confident, balanced woman who embraces both her ambition and her emotional well-being.

7. The spiral structure 

This structure is particularly effective for exploring complex characters, intricate plots, or thematic depth. The following are its steps: 

  1. Introduction: Establish the basic premise, characters, and initial conflict.
  2. Repetition with variation: Key events or themes recur throughout the story, each time with new insights, challenges, or stakes.
  3. Deepening conflict: With each cycle, the protagonist faces more intense versions of the original conflict or theme, leading to greater personal growth or revelation.
  4. Climax: The cumulative effect of the repeated cycles leads to a peak of tension and resolution.
  5. Resolution: The story concludes with a sense of closure, as the protagonist has undergone significant transformation through their journey.

The following is an example of the spiral structure: 

  1. Introduction: Liam, a shy teenager, dreams of becoming a singer but has severe stage fright.
  2. Repetition with variation: Liam joins the school choir and starts singing in front of others, but still struggles with solos.
  3. Deepening conflict: Liam lands the lead role in the school musical but becomes increasingly anxious during rehearsals.
  4. Repetition with variation: A voice coach teaches Liam techniques to manage his anxiety, but he still fumbles during dress rehearsals.
  5. Deepening conflict: On opening night, Liam freezes on stage, unable to sing his first note.
  6. Climax: Liam takes a deep breath, visualizes himself singing confidently, and delivers a stunning performance.
  7. Resolution: Liam realizes how much he has grown during his journey and embraces his newfound confidence to pursue his passion for singing.

Now let’s see how to structure a story using nested loops. 

8. Nested Loops

This structure helps to explore multiple perspectives related to a main theme/event. The following are its steps: 

  1. Primary narrative: The main story acts as a frame or outer layer.
  2. Secondary narratives: Within the primary narrative, one or more secondary stories are introduced. These can be flashbacks, anecdotes, or entirely separate stories.
  3. Interconnected themes: Each nested story contributes to the overall themes, character development, or plot of the primary narrative.
  4. Resolution: The secondary narratives eventually get linked to the primary narrative, enhancing the main story’s resolution and providing deeper insight.

The following example explains this technique: 

  1. Primary narrative: Sarah, a therapist, listens to her patient, John, recount a recent argument with his wife.
  2. Secondary narrative: John shares a childhood memory of his parents fighting, revealing his deep-seated fear of abandonment.
  3. Interconnected themes: Sarah realizes that John’s past experiences influence his current relationship struggles.
  4. Secondary narrative: John recalls a time when he left a previous partner during a heated argument, regretting his impulsive decision.
  5. Resolution: As John finishes sharing his stories, Sarah helps him understand how his past shapes his present behavior. Together, they work on developing healthier communication skills to strengthen his marriage.

9. In media res 

This structure of a story involves starting a narrative amid the action, often bypassing initial exposition and background details. By beginning in the middle, the story immediately engages the audience with dramatic or important action. As the plot progresses, flashbacks, dialogue, or characters recounting events help explain the backstory. 

Here is an example: 

The castle walls shook as dragon fire rained down from above. Sir Galahad, his armor battered and scorched, gripped his sword tightly. He glanced at his companions, their faces grim with determination. They had come so far, and the fate of the kingdom hung in the balance. With a rallying cry, Galahad charged forward, ready to face the dragon and end its reign of terror once and for all.

10. Beat sheet 

Created by Blake Snyder, the story structure helps writers plan their story by breaking it into different beats. Following are the 15 beats used: 

1. Opening image

A snapshot of the world at the beginning of the story is given. This sets the tone and mood for the narrative. 

2. Theme stated

In this step, a moment, often early in the story, where the central theme or message is hinted at, usually through dialogue is written.

3. Set-up

At this stage, the main characters, setting, and the initial situation are introduced. The protagonist’s status quo and life are established before the main conflict.

4. Catalyst

An event or inciting incident that disrupts the protagonist’s normal life and sets the main plot in motion is described.

5. Debate

The protagonist grapples with the decision of whether to take on the challenge presented by the catalyst. This section often highlights their fears and reservations.

6. Break into two

The protagonist makes a decisive action or choice that moves the story from Act 1 into Act 2, signaling the start of the main journey.

7. B story 

A subplot that often provides a counterpoint to the main plot. It usually involves secondary characters and themes, often providing emotional depth.

8. Fun and games

The heart of the story—this is where the main premise is explored. This section delivers on the premise’s promise with engaging and entertaining sequences.

9. Midpoint

A significant event or twist that changes the direction of the story. It often raises the stakes, shifts the protagonist’s goal, or introduces a new complication.

10. Bad guys close in

The protagonist faces increasing obstacles and challenges. The antagonist becomes stronger and more threatening.

11. All Is lost

This is a moment of apparent defeat for the protagonist. This is often a low point where things seem bleakest.

12. Dark night of the soul

The protagonist experiences doubt, reflection, and a crisis of faith. They must dig deep to find the resolve to continue.

13. Break into three

The protagonist finds a new solution or gains a new insight, leading to the final act. This marks the transition from Act 2 to Act 3.

14. Finale

The climax of the story is where the protagonist confronts the central conflict and resolves it. This section ties up the narrative threads and leads to the conclusion.

15. Final image

A closing snapshot that mirrors or contrasts with the opening image, showing how the protagonist and their world have changed.

The following is an example of this technique: 

  1. Opening image: A serene forest glade.
  2. Theme stated: “Courage lies within.”
  3. Set-up: Introduce Liam, a timid young elf.
  4. Catalyst: An ancient evil threatens the kingdom.
  5. Debate: Liam doubts his ability to make a difference.
  6. Break into two: Liam joins a quest to stop the evil.
  7. B story: Liam forms a bond with his mentor, Aria.
  8. Fun and games: Liam trains and learns new skills.
  9. Midpoint: Liam’s team suffers a major defeat.
  10. Bad guys close in: The ancient evil grows stronger.
  11. All is lost: Liam’s mentor Aria is captured.
  12. Dark night of the soul: Liam feels helpless and alone.
  13. Break into three: Liam rallies his allies for a final stand.
  14. Finale: Liam confronts the evil and saves the kingdom.
  15. Final image: Liam, now a confident hero, leads his people to rebuild.

11. Dual narrative 

A dual structure of a story involves telling two distinct but interrelated storylines concurrently. These storylines often unfold in different time periods, locations, or from different characters’ perspectives. Throughout the narrative, connections between the two stories become apparent, and they typically converge or intersect by the end. 

One of the best examples of dual narrative can be seen in Jeffrey Archer’s novel Kane and Abel. It follows the life of 2 men, William Lowell Kane and Abel Rosnovski, born on the same day in 1906. The novel expertly weaves together their separate storylines, chronicling their rises, falls, and all important events that shape their lives for 60 years. 

After understanding what is the structure of a story, let’s see exciting story structure examples! 

 Examples of story structures

Once you’ve completed writing the story, the next step is to edit it. As experts in editing and proofreading services, we’d love to help you enhance your story! PaperTrue also provides high-quality self-publishing services for authors. 

Here are some other useful resources for you: 

What Is Structural Editing? Meaning, Examples & Costs

Just as a building requires a good foundation, a proper structure is crucial for written works. This is what structural editing ensures!  In this article, learn everything, from the structural editing definition to the costs involved. 

We’ve also answered many questions you might have such as: How much time does structural editing take? When to seek structural editing?  How should I choose a structural editor? So without any delay, let’s explore structural editing in detail!

Refine your text with structural editing today!

Let’s start with the structural editing meaning. 

What is structural editing? 

Structural editing is the process of reorganizing and restructuring text to improve its overall flow, coherence, and readability. This process is usually performed for longer works, such as books, academic papers, technical documents, or any complex written material. 

Following are the aspects that editors review during structural editing: 

  1. Content arrangement 
  2. A logical progression of ideas
  3. Chapter/section structure and transitions
  4. Character arcs and character development 
  5. Narrative pacing and storyline development
  6. Redundancies and repetitions
  7. Plot structure and plot holes
  8. Consistency and continuity
  9. Readability and audience engagement
  10. Overall cohesion and unity

The following examples accurately explain the structural editing definition! 

Structural editing examples 

  1. A self-help book: The original manuscript contains a lot of valuable information but lacks a clear structure and progression. The structural editor suggests organizing the self-help book’s content into distinct sections, each focusing on a specific aspect of personal growth or development.
  2. A romance novel: The structural editor notices that the pacing of the relationship between the two main characters feels underdeveloped. They suggest adding scenes that show the characters’ back stories, and conflict. The editor also recommends restructuring the climax of the story

After seeing structural editing examples, let’s understand the steps involved in structural editing! 

6 steps of structural editing 

Following are the 6 steps of structural editing: 

  1. First reading: The structural editor reads the entire manuscript. 
  2. Structural analysis: The editor reviews the work structure and identifies areas for development. 
  3. Feedback: The editor provides detailed feedback and recommendations for improvement. 
  4. Restructuring: Based on the feedback, the author or the editor restructures the content. 
  5. Continuity check: This involves a continuity check to ensure that the restructured content maintains consistency in terms of character development, plot points, structure, and factual information.
  6. Final review: The editor performs a final review, verifying that all structural issues have been addressed.

What is the cost of structural editing? 

Typically, structural editors charge between $0.01 to $0.15 per word for their services. The actual price can vary, depending on the editor’s location, the project’s complexity, the turnaround time, and any additional services. Some structural editors may also offer project-based pricing instead of per-word rates, particularly for shorter works or specific genres. 

Now let’s quickly understand when a person should hire structural editing services. 

When do you need a structural editor? 

The following are the different scenarios when hiring a structural editor is beneficial: 

  1. After completing your first draft: A fresh perspective from a professional editor can help identify areas that need improvement in terms of organization, pacing, and overall narrative structure. 
  2. After receiving feedback from beta readers: Structural editors can help you address the concerns raised by beta readers and provide expert guidance on how to refine your manuscript based on the feedback received.
  3. Before submitting to literary agents or publishers: Seeking structural editing before submission can increase your chances of success by making your manuscript more compelling and competitive in the marketplace. 
  4. When you’re writing for a different medium or audience: If you are considering adapting your manuscript for a different medium, such as a screenplay or a graphic novel, or targeting a new audience, structural editing can be invaluable. 
  5. When you’re unsure about your manuscript’s direction: If you find yourself questioning the flow, coherence, or effectiveness of your story, a structural editor can provide valuable insights and suggestions.

Now let us answer a question that many readers have: How to choose a structural editor? 

Important pointers while selecting a structural editor

1. Experience and expertise 

First up, years of experience. How long has this editor been doing structural edits professionally? Five years? Ten? The more experience, the better. 

Also, ask about their area of specialization. If you’re working on a novel, you’ll want someone who has edited a ton of fiction, maybe even in your specific genre like fantasy, mystery, or other. 

Once you’ve zeroed in on candidates with relevant experience, analyze. Are they an active member of any professional editorial associations? Have they received training or certifications in structural editing or story analysis? 

With this, you can also request samples of their previous work. This will help you evaluate their true mastery of the craft

2. Understanding of your genre and target audience

A great structural editor needs to intimately understand the conventions and reader expectations for your specific type of book. They will also have good knowledge about all the tropes and archetypes readers are looking for in your genre. 

So how can you gauge this? A good idea is to look for editors who are genuine fans and students of your genre themselves. Maybe they’re active in a writing community related to your genre or frequently teach workshops on narrative structure for the genre you love. 

You can understand this from their online presence on social media platforms and their website. This will also give you an idea of whether they are a part of book review clubs related to your genre. 

3. Communication and Collaboration 

To understand their communication style, set up a phone or video call with them and discuss your project. Observe: do they listen attentively and ask insightful questions? 

Notice their responsiveness too. Do they reply to your emails or calls promptly? Or do they leave you hanging for days without a response? 

You also need to analyze: Do they explain their approach and editorial process in a way that makes sense to you? Are they able to give you concrete examples to illustrate how they would provide feedback? This will help you understand whether the editor is a good fit for your project. 

4. Availability and turnaround time 

After being upfront with them about completion deadlines, evaluate their response. If they seem overbooked, hesitate, or don’t give a clear response, you may want to keep looking. 

It’s essential to ask about the time taken for different types of editing like structural editing, line editing, copy editing, etc. 

Pay attention to how book editors discuss scheduling as well. Do they seem enthusiastic and agree to set aside dedicated time blocks for your project? Or do they give wishy-washy answers about fitting your book in “when they can”? Choose an editor who prioritizes your deadlines.

5. Pricing and contract terms 

Reach out to 3-5 potential candidates and get detailed quotes from each of them. This allows you to get a sense of the normal pricing range. 

During the quoting process, provide all the key details like your manuscript’s word count, genre, whether it’s fiction or non-fiction, and your ideal turnaround time. The more context you give, the more accurate the quotes will be. 

Before signing anything, carefully go through the contract’s details like quoted pricing, services included, billing schedule, revision terms, copyright clauses, deadlines, etc. Openly communicate, negotiate (if required), and hire legal services to understand all contract details. 

6. The X factor 

This X factor is personal fit and rapport. At the end of the day, you’re going to be working really closely with the editor you select. Hence, it’s important to choose an editor you genuinely vibe with. 

When you first chat with potential editors, observe: Do they make you feel at ease just casually talking about your ideas? Or is there this awkward stiffness where you can’t quite open up? Do they actually seem engaged and excited by your concepts? Or are they just kind of nodding along? This will help you analyze whether they are a good personal fit. 

Many people also get confused with structural editing vs. developmental editing. Let’s clear the difference between these terms once and for all! 

Structural editing vs. developmental editing 

While structural editing focuses on the text’s organization, flow, and coherence, developmental editing typically involves a more comprehensive and in-depth content analysis. This includes character development, plot structure, and themes, while also providing detailed feedback and suggestions for improvement. 

This concludes our guide about what is structural editing! After understanding the structural editing meaning, you can decide if your text requires this in-depth editing. At PaperTrue, our trained structural editors improve your text’s overall structure and organization.

If you’ve written a book, our expert editors also give further suggestions to develop the plot, character, and setting. Feel free to reach out if you require expert editing and proofreading services

Here are some other useful resources for you: 

Creating a Dissertation Title Page (Examples & Templates)

Creating a title page for a dissertation is a crucial step in presenting your research professionally. In this article, we explained everything about creating and formatting a dissertation title page. 

With this, we’ve also given practical dissertation title page examples and templates. So without wasting time, let’s begin! 

Polish your dissertation with specialized editing!

Firstly, let’s learn the elements of a dissertation title page. 

What to include in a dissertation title page? 

A dissertation title page contains important details such as the dissertation title, the author’s name, the university name, the submission date, and the degree type (eg M.A., Ph.D., or other). 

Some of the other details it can also include are: 

  • Names of committee members and supervisor 
  • University or department logo
  • A statement indicating that the dissertation is submitted in partial fulfillment of the requirements for the specified degree
  • Copyright notice, if applicable
  • Candidate number or student ID, if required
  • University/college location 

You can crosscheck your institution’s guidelines or consult your supervisor if you have any doubts about what to include in the dissertation’s title page. 

Now let’s learn more about formatting a dissertation title page

Dissertation title page formatting guidelines 

While it’s important to refer to the institution’s formatting guidelines, here are some general guidelines for formatting. 

  1. Margins: Maintain consistent margins throughout the title page. Generally, a 1-inch margin on all sides is recommended, but check your institution’s specific guidelines.
  2. Font: Use a clear, readable font and keep the font size should be 12pt for the main text, though it can be larger (e.g., 14pt or 16pt) for the dissertation title.
  3. Spacing: The title page is usually single-spaced, with double spaces between certain elements like the title and your name. Follow your institution’s guidelines for spacing.
  4. Alignment: Center all the elements on the title page vertically and horizontally, unless otherwise specified by your institution.
  5. Title: The dissertation title should be in all capital letters, bolded, and positioned at the top of the page, about 2 inches from the top margin. Crosscheck your institution’s guidelines for the title. 

Depending on your field, the institution can also ask you to create an APA dissertation title page, an MLA title page, a Chicago-style title page, or another. You can consult your supervisor if you have any doubts about the style guidelines. 

Now, let us see an example of a dissertation title page to understand better! 

Dissertation title page examples 

1. The first example is about a dissertation on the topic “The Impact of Social Media on Adolescent Mental Health: A Longitudinal Study” by Andrew Burnett. 

This image shows the first dissertation title page example.


2. The second example is about a dissertation on the topic “Exploring the Intersection of Art and Technology in Contemporary Museums” by Emily Davis. 

This image shows the second dissertation title page example.


While this example demonstrates a dissertation title page, the format of this page can vary, depending on your university’s guidelines. Let’s see some sample dissertation page templates to help you create the perfect title page! 

Dissertation title page templates 

Browse through the following document to view dissertation title page templates! 

Dissertation page templates

Now let us see some essential pointers to create a dissertation title page! 

Important pointers to create a dissertation title page 

The following are 5 important pointers to ensure while creating a dissertation title page: 

  • Avoid using obscure abbreviations, jargon, or unnecessary words in the title.
  • Ensure that you use the full, official name of your degree on the title page (e.g., “Doctor of Philosophy” instead of “Ph.D.”).
  • Double-check the accuracy of all information on the title page, including your name, the degree name, the department and university names, and the date.
  • Ensure that the formatting of your title page is consistent with the rest of your dissertation (e.g., font type, font size, and line spacing).
  • If your university allows or requires it, consider including a copyright notice at the bottom of the title page to protect your work.
  • Ask your advisor, committee members, or a trusted peer to review your title page and provide feedback on its clarity, formatting, and adherence to guidelines.

Now that you know how to create a dissertation title page, you can start making your own. 

Once you’ve completed writing your dissertation, the next step will be to edit it. As trusted experts in dissertation editing services, we’d love to help you enhance your dissertation! 

Here are some other useful resources for you: 

What are the Parts of a Sentence? An Easy-to-Learn Guide

Ever feel like a sentence is a jumbled puzzle? We’ve all been there. But guess what? Understanding the parts of a sentence is like finding the key to unlock clear, confident communication. Together, we will decode what are the parts of a sentence, the meaning of each part, and some insightful examples! 

Eliminate all grammatical and punctuation errors!

A sentence structure has mainly 5 important parts. So, what are the parts of a sentence exactly? Let’s break it down:

1. Subject

The subject is the who or what the sentence is about. It’s the noun, pronoun, or phrase that acts as the verb. 

To identify the subject in a sentence, ask yourself, “Who or what is doing the action in this sentence?”

Examples:

The dog barked. (Who barked?)

She loves to read. (Who loves to read?)

2. Predicate

The predicate tells you what the subject is or does. It always includes the verb and any words related to the verb’s action.

To find the predicate in a sentence, look for the verb first. Everything else that helps complete the meaning of the verb is part of the predicate.

Examples:

The dog barked loudly. (What did the dog do?)

She loves to read. (What does she love?)

To make things easier, here are two examples of subject and predicate as parts of the same sentence:

She (subject) laughed (predicate). 

The mischievous puppy (subject) chewed on the furniture (predicate).

3. Object

Objects receive the action of the verb. They add more information to the action of the verb. There are two types of objects:

  • Direct object: Receives the action of the verb directly.  To find the direct object in a sentence, ask “What?” or “Whom?” after the verb.

Example:

The chef chopped vegetables. (Chopped what? Vegetables)

He broke the chair. (Broke what? The chair)

  • Indirect object: Tells to whom or for whom the action is done. It often comes before the direct object.

Example:

She gave me a book. (Gave to whom? Me)

He danced with her. (Danced with whom? Her)

To find the objects, identify the verb and ask “what?” or “whom?” If you get an answer, it’s a direct object. If you can then ask “To whom?” or “For whom?” about that action, you’ve found the indirect object.

For example:

My sister baked a cake. (Direct object. What did she bake? A cake.)

My sister baked me a cake. (Me = indirect object, cake = direct object)

3. Complement

Complements provide more information about the subject or object. They “complete” the meaning of the sentence.

  • Subject complement: Follows a linking verb (like “is,” “am,” “are,” “was,” “were”) and describes or identifies the subject.

Examples: 

The soup is delicious. (Delicious describes the soup)

The book is interesting. (Interesting describes the book)

  • Object complement: Follows and describes or renames the direct object.

Examples:

They painted the fence blue. (Blue describes the fence)

We elected her class president. (Class president describes her)

4. Phrases and clauses

Sentences can be short and sweet, but they can also be long and complex. That’s where phrases and clauses come in:

  • Phrase: A group of words that work together but don’t have a subject and verb.

Examples:

With a smile, she accepted the award.

She sat under the old oak tree.

  • Clause: A group of words that contains a subject and a verb.

Independent clause: Can stand alone as a sentence.

Examples:

The sun was shining and the birds were singing.

She enjoys reading books, but she rarely has the time.

Dependent clause: Cannot stand alone as a sentence; it needs an independent clause to make sense.

Examples:

Because it was raining, we decided to stay indoors.

Although he was tired, he continued to work on the project.

Along with these important 5 parts of a sentence, there is one more important aspect. Let’s have a look at what it is:

5. Modifiers

Modifiers describe or modify other words or phrases in the sentence. While not always listed as a core part of a sentence, modifiers are essential for adding detail and clarity. Modifiers include:

Examples:

It’s a beautiful day. (Beautiful describes the noun, day)

What a tall building! (Tall describes the noun, building)

  • Adverbs: Describe verbs, adjectives, or other adverbs.

Examples:

They ran quickly. (Quickly describes the verb, ran) 

She sings extremely well. (Extremely describes the verb, sings)

  • Prepositional phrases: A group of words that begins with a preposition and ends with a noun or pronoun. 

Examples:

She woke up suddenly in the middle of the night.

They found shelter underneath the old bridge during the storm.

To look for modifiers in a sentence, look for words or phrases that provide more information about other words in the sentence.

Examples:

The small, fluffy kitten slept soundly. (Adjectives)

He walked slowly and carefully across the ice. (Adverbs)

The book on the table is mine. (Prepositional phrase)

By understanding these parts of a sentence, you can build stronger, clearer sentences. Remember, most sentences have at least two parts of a sentence: a subject and a verb. But by adding objects, complements, phrases, and clauses, you can create more interesting and complex sentences.

If you need help polishing your writing to make those sentences shine, PaperTrue provides expert editing and proofreading services to help you communicate with confidence.

Keep reading for more useful articles:

What Is Line Editing? Examples & How to Hire a Line Editor

Line editing stands out as one of the most crucial stages in this editing process. It transforms raw manuscripts into polished texts. 

This comprehensive guide delves deep into what line editing is and provides practical examples and rates. It also offers insights on how line editing is done and how to select top-notch line editing services!

Elevate your content with expert editing services!

Let’s get to know what is line editing with an easy line editing definition.

What is line editing?

Line editing is the process of enhancing the style, clarity, tone, and readability of a text. It aims to clarify meaning, eliminate jargon, and polish diction without altering the author’s intended voice. A line editor focuses on the way the language engages, persuades, and entertains.

Line editing scrutinizes each sentence and paragraph, ensuring they flow logically. This form of editing addresses the artistry of writing, refining word choice and sentence structure.

Line editing examples

To better understand the concept, let’s look at some line editing examples with a before and after:

Line editing example 1

Before line editing:

“The protagonist exhibited very unusual behavior, which was exceedingly strange and peculiar.”

After line editing:

“The protagonist’s behavior was bizarre.”

This example shows how line editing streamlines the text, enhancing clarity and impact by removing redundancy and improving word choice.

Line editing example 2

Before line editing:

“Despite the fact that she was tired, she decided that she would not go to bed, and instead she would stay up late watching old movies.”

After line editing:

“Although exhausted, she chose to stay up late watching old movies.”

This example shows how line editing refines and simplifies the sentence. It improves its readability and emotional impact while maintaining the original intent.

We now know what line editing means, but how is it done? Let’s have a look.

How to do line editing: Step-by-step guide 

1. Review the manuscript

The editor reads the manuscript without making any changes, focusing on the story, structure, and style. This initial read-through allows the editor to immerse themselves in the author’s world and understand the intended audience and message.

Authors:

  • Communicate any particular issues you’re worried about, such as character development, plot coherence, or thematic consistency.
  • Let your editor know if there are specific parts of the manuscript you want them to pay extra attention to, like the climax, dialogue authenticity, or pacing in certain chapters.

Editors:

  • Jot down your first thoughts and reactions as you read. These can be valuable for understanding the overall impact of the piece.
  • Keep an eye out for any clear contradictions or errors in the story, such as character actions that don’t align with their established traits or plot points that don’t add up.
  • Note sections where the story slows down too much or where explanations feel excessive. These areas may need tightening to maintain reader interest.

2. Line-by-line analysis

The editor examines each line of the manuscript. They look for opportunities to enhance word choice, tighten phrasing, and ensure clarity and tone are consistent with the author’s intent. This includes looking at syntax, eliminating redundancy, and improving rhythm and flow.

Authors:

  • Be receptive to the edits and ready to discuss any adjustments that could change your original meaning or style.

Editors:

3. Feedback loop

The editor provides detailed comments and suggestions alongside the edits. This might include explanations for major changes, queries about unclear text, or suggestions for further revisions by the author.

Authors:

  • Take the time to understand the editor’s suggestions fully before reacting.
  • If any feedback is unclear, don’t hesitate to ask the editor for more details.
  • If you disagree with some feedback, discuss it with the editor and explain your perspective.

Editors:

  • Avoid technical jargon and explain your suggestions in plain, understandable terms.
  • Point out exact sections that need improvement and explain why.
  • Start with what the author did well before offering suggestions for improvement.
  • Show how a sentence or paragraph can be rephrased for clarity.

4. Revisions

The manuscript often goes back and forth between the author and the editor. This stage may involve several rounds of editing, focusing on resolving queries raised by the editor and refining any sections that need more work.

Authors:

  • Maintain open and clear communication.
  • Address each query from the editor thoroughly. If a query requires more discussion, consider setting up a meeting or call to resolve it effectively.
  • Save different versions of the manuscript at each stage to ensure you can always revert to a previous version if needed. You can save them in different formats like Doc, Txt., PDF, etc.

Editors:

  • Create a system for organizing feedback, such as categorizing comments by type (e.g., grammar, structure, content).
  • Use management tools like Trello, Atlassian, etc. to make things more systematic.
  • Agree on deadlines for each round of revisions to keep the process on track.

5. Final review

The editor conducts a final thorough review of the manuscript to ensure that all edits have been properly incorporated. They make sure that no new issues have been introduced during the revisions. This includes a final check for minor typos, punctuation, grammar errors, and consistency in style and formatting.

Authors:

  • Reviewing a physical copy can make it easier to notice typos and formatting issues that might be missed on a screen.
  • Reading the text aloud can help you catch awkward phrasing, run-on sentences, and other issues that affect readability.
  • If possible, have another person review the manuscript. A fresh pair of eyes can catch errors you might have missed.

Editors:

  • Create a checklist of common issues to look for, such as typos, punctuation errors, consistent use of font and style, and proper citation format.
  • Use spell checkers, punctuation checkers, and grammar checkers to catch minor errors, but don’t rely solely on them. A manual review is essential.
  • Cross-reference the edited manuscript with the original version to ensure all suggested changes have been correctly incorporated.
  • Ensure consistent use of terminology, capitalization, citations, and formatting throughout the document.

Line editing rates

Typically, line editors charge anywhere from $0.02 to $0.10 per word. Some may offer hourly rates ranging from $30 to $60. Line editing rates can vary widely based on the editor’s experience, the manuscript’s length, and the complexity of the subject matter. Authors need to request detailed quotes and understand what services are included in these rates.

Top 3 line editing services

1. PaperTrue

PaperTrue is renowned for its personalized editing approach and expertise across various genres. They ensure your manuscript is not only free of errors but also engaging for your target audience.

Pricing: The pricing for editing a 1000-word text in 24 hours is US$42.

2. Scribendi

Scribendi is celebrated for its rapid turnaround times, making it ideal for authors who are on tight deadlines. Services include manuscript editing, academic editing, business editing, and more.

Pricing: The pricing for editing a 1000-word text in 24 hours is US$42.

3. ProofreadingPal

Known for its two-editor system, ProofreadingPal offers a unique approach where two sets of expert eyes review your manuscript, ensuring a thorough edit. They provide a variety of turnaround times, from quick 6-hour edits to more economical 72-hour options.

Pricing: The pricing for editing a 1000-word text in 24 hours is US$41.80.

When to use line editing 

Here are key points when line editing is most appropriate:

  1. After finishing your manuscript: Once you’ve completed writing and done some self-revision, line editing should come next before moving on to copy editing or proofreading.
  2. Post-developmental editing: If you’ve made structural changes with developmental editing, follow up with line editing to improve language and readability.
  3. Before copy editing: Line editing should happen before copy editing. This ensures the style and flow are polished before focusing on grammar and punctuation.
  4. Preparing for publication: Before submitting to publishers or self-publishing, a line edit can make your writing more professional and engaging.
  5. Feedback on style issues: If feedback highlights problems with pacing, tone, or clarity, line editing can effectively address these issues.
  6. Enhancing voice and tone: Use line editing to ensure a consistent voice and refine the tone to better suit your audience.
  7. For non-native English writers: Authors writing in English as a second language can benefit from line editing to use idioms, slang, and colloquialisms correctly.
  8. Improving readability and engagement: If your manuscript is dense or hard to read, line editing can help improve flow and make it more engaging.
  9. Transitioning between genres: When writing in a new genre, line editing can adjust the style and tone to fit genre conventions and reader expectations.
  10. For scripts and screenplays: In scriptwriting, line editing can sharpen dialogue, improve scene descriptions, and ensure the screenplay reads smoothly.

How to select and hire a line editor

1. Define your needs

  • Assess the stage of your manuscript: Determine whether it needs basic proofreading, comprehensive line editing, or perhaps a developmental edit before line edits.
  • Identify key aspects: Consider aspects such as clarity, style, voice, and consistency that you want the editor to focus on.

2. Research and assess potential editors

  • Search platforms: Use platforms like Reedsy, Upwork, or professional networks like LinkedIn to find editors.
  • Check genre experience: Look for editors who specialize in your genre. This is crucial as they will have a better sense of market trends and reader expectations.
  • Read reviews and testimonials: These can provide insights into the editor’s reliability and quality of work. You can get help from review websites like Trustpilot, Sitejabber, etc.
  • Ask for samples: Request sample edits to assess how they edit and whether their style complements your writing.

3. Communicate clearly

  • Initial consultation: Discuss your project in detail, including your goals, the audience, and what you hope to achieve with the editing. Prepare a list of questions to ask during your initial discussions.
  • Clarify scope of work: Make sure both parties are clear about what the editing service will entail and what will be delivered.
  • Discuss timeline: Ensure your schedules align and that the editor can meet your publishing deadlines. You can ask questions like, “How frequently will the feedback be given?”, “Feedback will be given in person or through some online tools?”, etc. 

4. Budget appropriately

  • Understand pricing models: Editors may charge by the word, by the page, or by the hour. Understand these models to predict the potential cost accurately.
  • Request detailed quotes: Ask for an itemized quote that explains what each charge covers. If budget is a concern, consider negotiating a payment plan or prioritizing key sections of your manuscript for editing.
  • Consider the return on investment: Remember that a skilled editor adds considerable value to your work, potentially increasing your book’s success. 

5. Finalize the agreement

  • Draft a contract: Include details such as confidentiality, deadlines, payment terms, and the scope of editing work. 
  • Review terms: Ensure both parties agree on how revisions and feedback will be handled. If possible, have a legal professional review the agreement, especially if it involves large sums or sensitive material.

Line editing vs. copy editing

The difference between copy editing and line editing is that line editing focuses on improving the overall flow, structure, and language while copy editing is about fixing smaller details like grammar, spelling, citations, and punctuation.

Line editing example:

Changing “He was very happy because the weather was really good” to “He was elated by the beautiful weather.”

Copy editing example:

Correcting “Their going to the park with there friends” to “They’re going to the park with their friends.”

Line editing vs. proofreading

The difference between line editing and proofreading is that line editing focuses on creative content, writing style, and reader engagement while proofreading identifies typographical errors, misspellings, grammatical mistakes, and issues with page layout or typeset.

Line editing example:

Changing “The presentation was boring and many people were not paying attention.” to “The dull presentation left many people disengaged.”

Proofreading example:

Spotting and correcting “teh” to “the,” or ensuring all headings are consistently formatted.

Line editing vs. developmental editing

The difference between line editing and developmental editing is that line editing focuses on polishing sentences, enhancing vocabulary, and correcting phrasing, while developmental editing addresses bigger-picture issues such as plot holes in fiction, argument strengths in non-fiction, character development, pacing, and overall content organization.

Line editing example:

Changing “They decided to take a short trip to the mountains for a few days.” to “They planned a brief getaway to the mountains for a few days.”

Developmental editing example:

Suggesting an author rework a novel’s climax to enhance suspense or advising an expansion on a chapter that feels lacking in detail.

Line editing requires a deep understanding of language and a keen eye for detail, traits that seasoned editors bring to the table. By investing in professional editing and proofreading services like those offered by PaperTrue, you ensure that your work is not only error-free but also compelling and memorable!

Read more editing-related articles below:

The Only Editing Checklist You Will Need in 2024

Do you wish to develop engaging content but find it challenging to do so? If yes, do not be disheartened. With the right editing strategy, you can create content that attracts and inspires readers. With this in mind, we introduce you to editing checklists. They act as a helpful tool that strengthens writing by simplifying editing. 

Whether you are writing a novel, an essay, or a blog, make a writing and editing checklist when your first draft is ready. This will be your first step to self-editing your content piece. 

Improve your content with professional editing services!

Here are 7 ways to help you develop an editing checklist that suits your writing style and meets your editing needs:  

  • Set rules for grammar, tone, and vocabulary 
  • Check for consistency across the content 
  • Focus on improving content accuracy and search results
  • Check if your POVs are clear and direct
  • Include checks for improving clarity and readability 
  • Eliminate repetitive content through editing checks
  • Check for content flow and transition words or phrases 

Let us study them in detail. 

7 easy ways to create an editing checklist

1. Set rules for grammar, tone, and vocabulary 

Incorrect grammar and a vocabulary that does not acknowledge the target audience will hamper your chances of connecting with them. So, the importance of correcting grammar mistakes and improving the vocabulary of the write-up cannot be overstated. Here are some other things you should consider: 

  • Sentence structure: To ensure clarity of thoughts and improve coherence, a good sentence structure is necessary. 
  • Vocabulary: Your choice of words depends on your target audience. A good vocabulary makes a content piece sophisticated and interesting.
  • Subject-verb agreement: Subject-verb agreement refers to the rule that the subject of a sentence must agree with the verb—singular or plural. This ensures grammatical accuracy, making the read enjoyable by promoting clarity in communication.
  • Commas: Good punctuation can make a huge difference to engagement. With the right commas, you can establish an easy reading rhythm. 
  • Dangling modifiers: Dangling modifiers refer to phrases that when inserted do not modify the intended part or phrase of the sentence, which may lead to confusion. Eliminating them helps maintain clarity. Assigning the right modifiers to the appropriate subject helps retain its intended meaning. 
  • Tone: Adjusting the tone is important, as it will ascertain how your audience receives your message and whether it resonates with them in the manner you intended. For this, consider working with a writing and editing checklist. 

2. Check for consistency across the content 

Maintaining consistency is key while editing. Hence, an essay editing checklist or an editing checklist for any other content type must have points that help check the content’s consistency. You should include checks for consistent voice. 

The terminology used across the document must remain constant, especially for characters in novels or concepts in academic writing. Verify the use of the following to ensure the reader’s comfort: 

  • Fonts: Good fonts enhance readability and help incorporate stylistic elements in the content well. 
  • Spacing: A well-organized content piece with text arranged in a logical order will attract and retain a reader’s attention. 
  • Headings: Proper headings allow readers to distinguish between various sections and read the content piece thoroughly without feeling overwhelmed by the vastness of information included. 

Checklist points for formatting and citation adherence are important if you are following a specific style guide like APA, MLA, or Chicago. Depending on your content, you might need checklist points to verify historical accuracy, technical terms, or other jargon. 

A writing editing checklist for a novel or creative writing must look out for errors that affect character sketches or the plot, which may result in the readers losing interest in your content. This is important while creating a novel editing checklist. 

3. Focus on improving content accuracy and search results

Before editing, give yourself some time to read through your first draft to ensure content accuracy, particularly facts and statistics. Ensure they fit into the overall picture well. You can also create a self-editing checklist from scratch to suit your editing needs. 

When you’re sure about the quality of your content, you can begin editing in earnest. It is important to note that by frequently revising and editing your checklists, you can deal with the following: 

  • Evolving content needs
  • Search engine optimization (SEO) best practices
  • Fact-checking 
  • Sources, references, and citations 
  • Keyword relevance, internal links, and backlinks
  • Meta information 

4. Check if your POVs are clear and direct

Nobody likes a blog or essay that sidelines the primary audience or beats around the bush. As readers typically have access to several online sources, establishing the right point of view (POV) at the beginning of the article is necessary. Hence, add a check for determining the effectiveness of your POVs in your editing checklist for writing. For this, add points for verifying the clarity, relevance, and suitability of your POVs. 

Once your POV is set, stick with it and allow your narrative or story to revolve around the central theme or idea. Portray emotions, feelings, and thoughts in a powerful yet subtle manner, particularly when editing a novel. 

A novel editing checklist can be very helpful here. Also, consider supporting your POV with dialogues and expressions that create an impact. For example, we all remember the iconic line from the celebrated novel The Godfather, “I’m going to make him an offer he can’t refuse”. 

5. Include checks for improving clarity and readability 

Imagine reading a piece of literature or a blog where the content looks interesting but the style is off-putting. The voice and words play key roles in boosting engagement. They also make the content clear, cohesive, and logical. While revising and editing checklists, ensure you pay attention to these aspects of writing. 

Further, formatting ensures visual appeal and improves the readability of a blog or novel. For content that’s published online, proper formatting also facilitates SEO. 

6. Eliminate repetitive content through editing checks

An editing checklist for writing must promote originality and novelty. But even more important is cutting out parts that seem repetitive and, as a consequence, boring. Using different words to structure sentences and writing unique introductory paragraphs will, in all likelihood, feel refreshing to the reader. 

To do this, remove redundant ideas or sentences, rephrase similar-sounding concepts whenever possible, or change the language wherever needed. We understand repetition is needed for emphasis sometimes. So, when it cannot be avoided, paraphrasing the content without adversely affecting its essence can help retain your readers’ attention. 

7. Check for content flow and transition words or phrases 

By including points for flow and transition checks in your editing checklist, you can ensure a logical progression of ideas. This helps connect the various sections, chapters, or paragraphs in a sequence that’s easy to follow. 

A cohesive narrative will bring more traffic to your website or interest more readers in your essay or research work. Read your draft multiple times to see if transitions look good. 

Here is a sample editing checklist that you can use for documents, articles, blogs, or essays.

Sample Editing Checklist

Personalizing your editing checklist

While editing and revising checklists is a recommended method of ensuring good content creation, personalizing your checklist enhances the output. 

This is because every content piece comes with its independent requirements, including target audience and purpose. This means generic checklists will not work for such content. A one-size-fits-all approach may not help. Keep the following in mind: 

  • Depending on the content being generated, modify the checklist to incorporate specific writing requirements like varying language and tone. 
  • For technical documents developed in various fields, fact-checking is inevitable. 

We hope that this article will enable you to write your content piece with confidence. An editing checklist can transform your rough draft into a tasteful content piece. Personalize the editing process and save valuable time using editing checklists. 

If you need help editing your essays, articles, or novels, consider professional assistance with PaperTrue’s editing and proofreading services

Here are some other relevant articles for you:

How to Copyright Your Book?

If you’ve thought about copyrighting your book, you’re on the right path.

Explore more