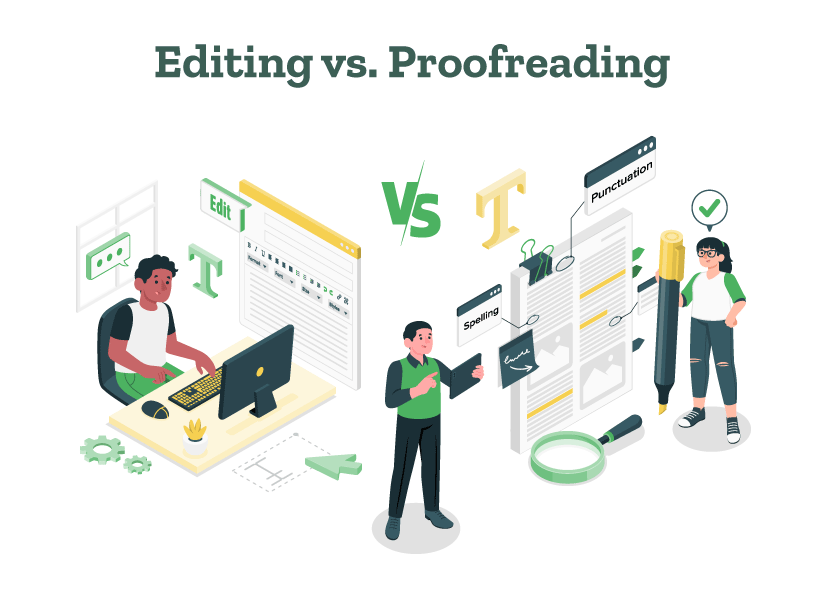
When you write something, whether it’s a novel, a report, or an article, it’s super important to make sure it’s clear and accurate. That’s where editing and proofreading come in.
But what exactly distinguishes editing from proofreading? Although both are crucial, they serve different purposes and are employed at different stages of the revision process. Let’s find the difference between editing and proofreading, and explore when to use each service!
Get high-quality editing and proofreading today!
What is editing?
Editing is a deep dive into the substance and structure of your text. It goes beyond just fixing mistakes and looks at aspects of writing such as language use, expression, overall structure, and coherence.
An editor helps make sure everything in your writing fits together nicely, making changes to the structure of a sentence or words to make them clearer and better. With the ever-evolving world of AI, content editing tools have also become a useful editing resource for writers.
What is proofreading?
Proofreading is the final polish of your document; it focuses mostly on catching surface errors in grammar, punctuation, spelling, and formatting. Think of proofreading as the last check for typographical and grammar errors. Proofreaders also check for minor inconsistencies that could detract from the professionalism of your final manuscript. Along with professional proofreaders, proofreading tools are also widely used by writers these days.
Editing is essential in the early stages of writing, ideally after you’ve finished your first draft. Various types of editing can help you. You should use editing when:
You want to improve the quality of your writing.
You want to make sure your writing flows well and is organized logically.
You want to change the tone to fit the people who will be reading it.
You want to make the writing clearer and easier to understand, making a bigger impact.
Proofreading should be the last step you perform before a document is published or submitted. You should use it when:
You’ve finished making all your edits.
Before you format and design the document.
As a final check to catch small mistakes like typos, punctuation errors, and formatting inconsistencies.
Understanding the difference between proofreading vs. editing is vital for everyone who writes. Effective editing improves the quality of your writing, making it more engaging and coherent, while careful proofreading refines and perfects the final result. For professionals, students, authors, and anyone seeking to make a significant impact with their writing, both proofreading and editing are essential.
Are you looking to elevate your document’s quality with expert editing and proofreading services? Look no further than PaperTrue, where our dedicated professionals ensure your writing is not only error-free but also impactful and tailored to your audience. Let PaperTrue help you make the right impression with every word!
College essays have become an important part of your college application process. Many students have great college essay topics, written immaculately but organizing them properly is a challenge most of them face. If you’re here, and are wondering about how to format a college essay, you’re at the right place.
A good college essay format is essential to make your essay presentable and readable. In this article, we will take you through the college application essay format guidelines, the structuring of the essay, and an example and free template that will help you craft the best college essay for your application!
Make your essay stand out with top-notch editing!
First of all, let us just get to know about the basic college essay format rules or guidelines that one should follow.
College essay format rules and guidelines
Make sure to follow these guidelines while formatting your college application essay to ensure that it has good readability and is also visually appealing.
General formatting rules
1. Font type and size
Use a standard, easy-to-read font like Times New Roman, Arial, or Calibri. The font size should generally be 12-point, although some schools may specify a different size.
2. Margins and spacing
Set your margins to 1 inch on all sides. Use double spacing throughout the essay, that is select 2.0 in the line spacing option; this makes it easier for the admissions officer to read and make notes.
3. Text color
Always use black text. Colored text can be distracting and can make your essay harder to read.
4. Alignment
Align your text to the left margin. Right-aligned or justified text can disrupt readability.
5. Paragraphs
Indent the first line of each paragraph by about 0.5 inches. Alternatively, if you encounter formatting issues when copying text into an application form, use a single line space between paragraphs instead of indentation.
Most college essays do not need a title. However, if you choose to include one, make sure it adds value and is not just decorative. It should reflect the main themes and subject of the essay.
2. Header
Include a header on each page with your name, the date, and possibly the title of your essay if it fits and adds value. This helps to identify your essay if the pages get separated.
3. Page numbers
While not always necessary, adding page numbers can be helpful for longer essays to keep everything in order. Usually, the page number can be included in the header or footer.
Content guidelines
1. Length
Adhere to the word limit specified by the college. Commonly, the main personal statement should be no more than 650 words, as specified by platforms like the Common Application.
2. Structure
Like standard academic essays, a personal statement can follow the structure of an essay introduction, body, and essay conclusion. However, it should have a logical flow and present your ideas clearly.
3. Language and tone
Use a tone that reflects your personality and is also appropriate for a formal document. Avoid overly casual language, slang, and text-speak. Ensure your spelling and punctuation are correct and there are no grammar mistakes.
When pasting your essay into a text box, formatting like bold, italics, or underlines might be lost. Rely on strong writing rather than formatting to convey emphasis.
2. Attachments
If you’re attaching a document rather than pasting text, follow the same rules above, and ensure the file format is one commonly accepted, like PDF, to avoid compatibility issues.
3. Review and proofread
Always have someone else review and proofread your essay. A fresh set of eyes can catch errors you might have overlooked and provide feedback on how effectively your essay conveys its message.
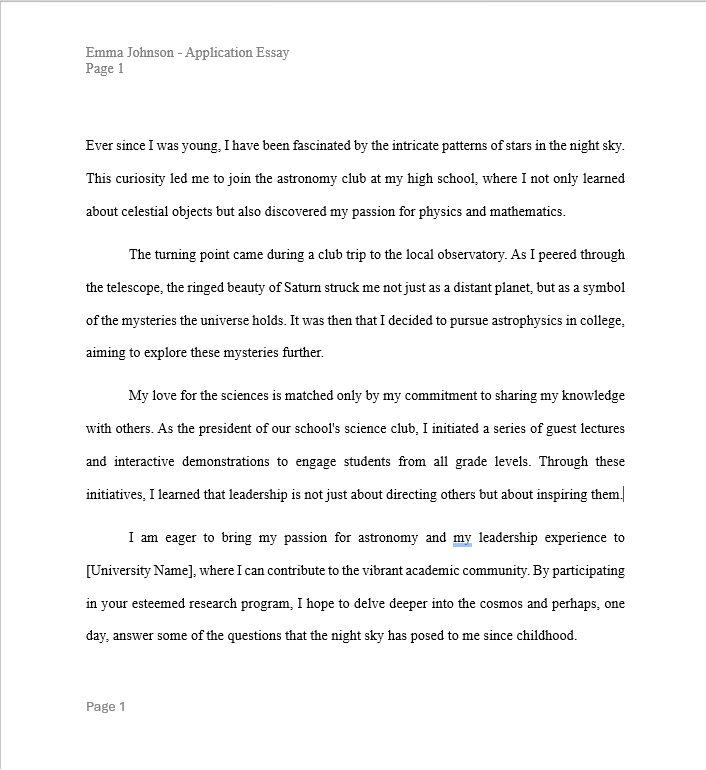
Here’s an example of how a college application essay might be formatted, adhering to common standards. Remember, always adhere to the college application essay format guidelines, if provided, by the college you are applying to.
To make your essay writing process easier, here’s a free college essay format template for you:
Even though you can use AI writing tools like AI essay writers, formatting your essay is a necessary part of the process! To help ensure that your college application essay is well-crafted and formatted correctly, here is a checklist you can use:
College essay format checklist
After writing your essay, return to this checklist to verify that you’ve adhered to all the essential guidelines and best practices:
Formatting and presentation
Font and size: Is the essay written in a standard, readable font such as Times New Roman, Arial, or Calibri, and is the font size 12-point?
Margins: Are all margins set to at least 1 inch?
Spacing: Is the essay double-spaced, making it easier to read?
Text color: Is the text in standard black without any unnecessary color usage?
Alignment: Is the text left-aligned to avoid irregular spacing issues?
Paragraphs: Are paragraphs clearly defined either by indenting the first line or by inserting a space between paragraphs?
Structural elements
Title (if used): Does the title add value and is it centered and appropriately spaced from the margin?
Header: Does the header include your name and optionally, the page number and essay title?
Page numbers: If the essay exceeds one page, are page numbers included?
Feedback and revision
Feedback: Have you sought feedback from trusted teachers, mentors, or peers?
Revisions: Have you made revisions based on the feedback to strengthen the essay?
Perfecting the format of a college essay can be just as crucial as the content itself. By adhering to the established norms of college admission essay format, your essay will stand out not only for the story it tells but also for its superior presentation.
If you want to perfect your essay, PaperTrue’s expert editing and proofreading services are just a click away, ensuring that your essay is not only flawlessly formatted but also impactful and error-free. Get ready to impress your dream college with a perfectly formatted, compelling essay!
When you’re aiming for your dream job, having the perfect resume is really important.It’s not just about listing your experiences and skills—it’s about presenting them in the most effective way possible.
With various types of resume formats available, picking the right one can be a game-changer. In this blog, we’ll explore 7 types of resume formats, providing tips, examples, and insights on how to craft each one effectively. As a bonus, we have also provided many types of resume templates for free!
Stand out from the crowd with a perfect resume!
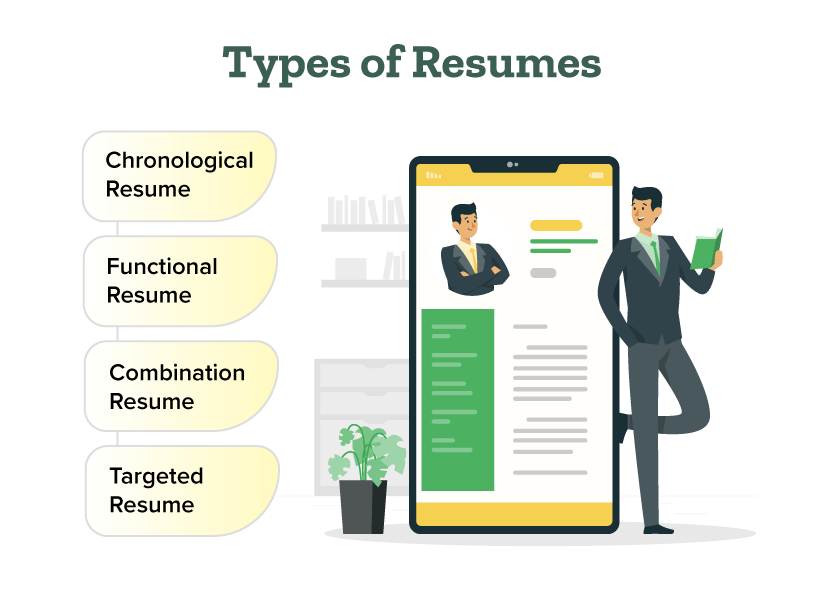
So, here are the top 7 types of resumes:
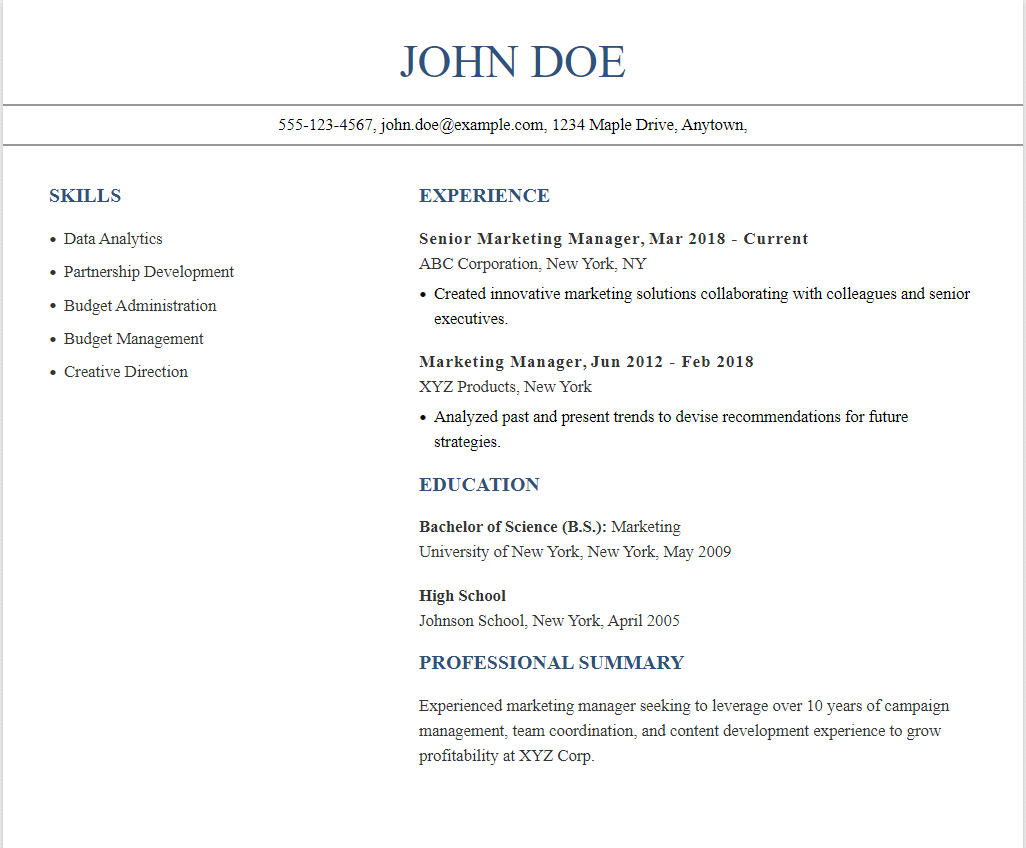
1. Chronological resume
The most traditional of the types of resume formats, a chronological resume lists your work history in reverse chronological order. A chronological resume emphasizes your work history and is great for highlighting steady career progression. This format of resume writing is ideal for those with a strong work history and clear career progression. It allows employers to see your growth within your field at a glance.
How to write a chronological resume
Start with your contact information at the top.
Then, list your work experience, starting with your most recent job and working backward.
Include your job title, company name, location, and dates of employment for each position.
Under each job, briefly describe your responsibilities and achievements.
After your work experience, add sections for education, skills, and any additional relevant information.
Keep the layout clean and easy to read, using clear headings and bullet points for each section.
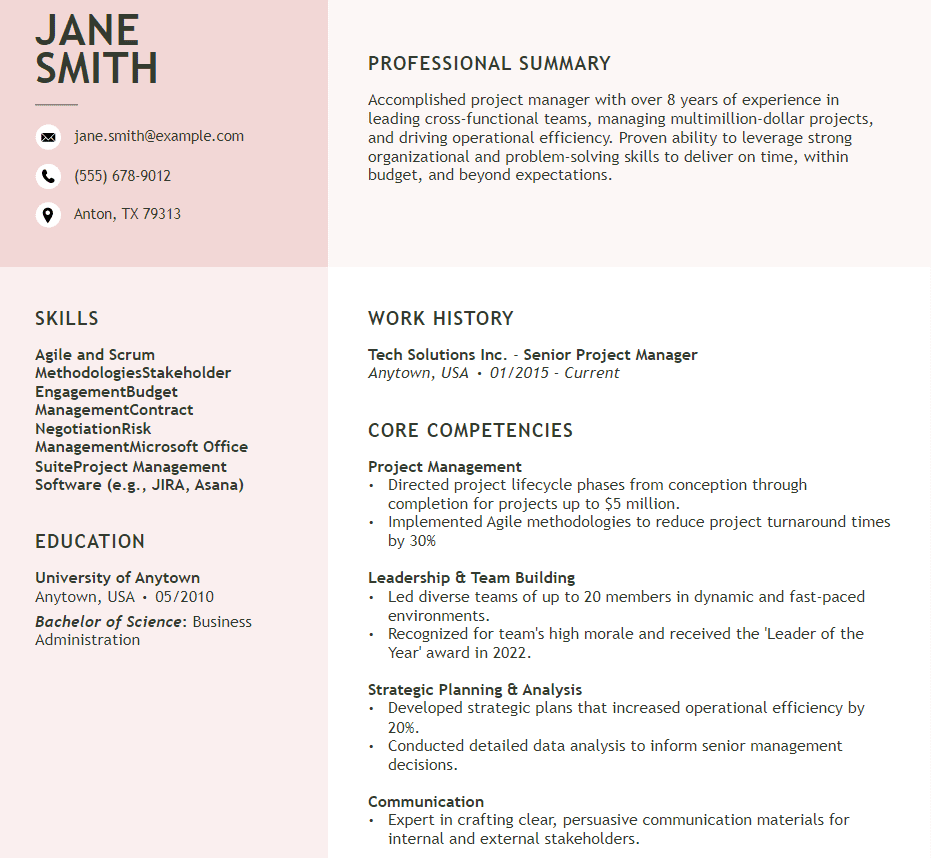
Functional resumes focus on your skills and experiences rather than listing your work history in order. This is one of the types of resumes that works well for people changing careers or those with gaps in their work history.
How to write a functional resume
Start with a strong summary or objective statement highlighting your skills and qualifications.
Organize your resume by functional categories, such as “Professional Skills” or “Technical Proficiency,” rather than listing jobs in chronological order.
Provide specific examples of your achievements and experiences within each skill category.
Include a brief section at the end for your work history, listing job titles, company names, and dates, but without providing extensive details.
Tailor your resume to the job you’re applying for by emphasizing relevant skills and experiences.
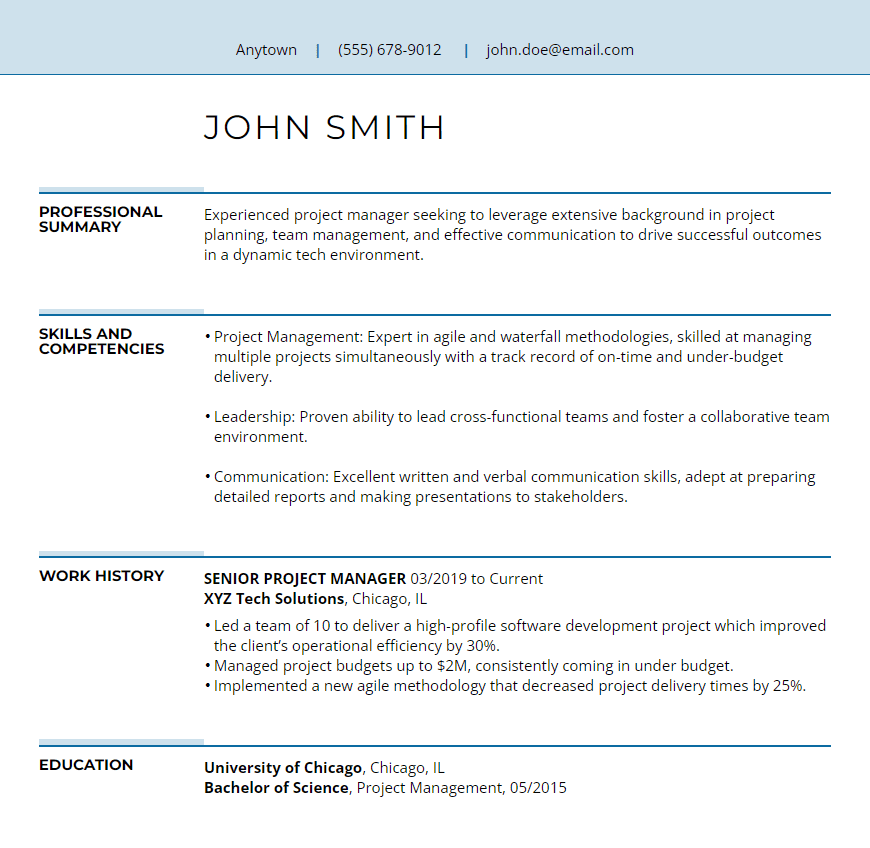
Combination resumes, as the name implies, blend the chronological and functional formats. They’re versatile and highly effective resume templates for individuals looking to emphasize particular skills alongside their work experience.
How to write a combination resume
Start with a header containing your contact information.
Write a professional summary or objective statement highlighting your key skills and career goals.
List your relevant work experience, focusing on accomplishments rather than just job duties.
Include a skills section showcasing your key abilities related to the job you’re applying for.
Optionally, add an education section detailing your academic background.
Tailor your resume to the job by emphasizing the most relevant experiences and skills.
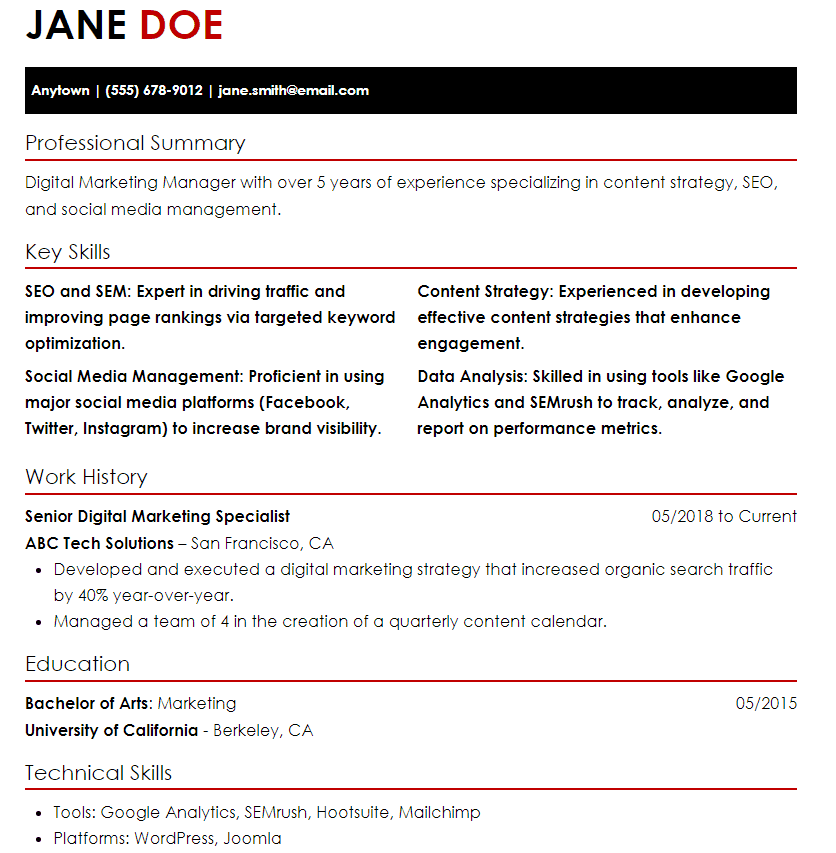
A targeted resume is customized to highlight the experience and skills that are directly relevant to the job being applied for. It requires more work but is highly effective, increasing the chances of catching the employer’s attention and landing the desired position.
How to write a targeted resume
Understand the specific job you’re applying for and the skills and qualifications required.
Tailor your resume to highlight the skills and experiences that directly relate to the job description.
Adjust sections such as “Summary,” “Skills,” and “Work Experience” to emphasize relevant achievements.
Incorporate keywords from the job posting to ensure your resume gets noticed by applicant tracking systems.
Provide specific examples of how your skills and experiences have contributed to past successes.
Double-check for any errors in grammar, spelling, or formatting to ensure a polished final product.
A video resume lets you demonstrate your personality and communication skills through a video. It’s suitable for roles in media, communication, or design. Your video resume should be professional and brief, ideally under two minutes.
How to create a video resume
Decide what information you want to include in your video resume, such as your introduction, skills, experiences, and achievements.
Prepare a script outlining what you’ll say in each section of your video. Keep it concise and engaging.
Find a quiet and well-lit space to record your video. Make sure the background is professional and not distracting.
Use a good-quality camera and microphone to record your video. Make sure you test the equipment beforehand to ensure everything is working properly.
Follow your script and record each section of your video resume. Speak clearly and confidently.
Use editing software to trim any unnecessary footage and add any additional graphics or text to enhance your video.
Watch your video resume and make any necessary edits. Once you’re happy with it, save and export the final version.
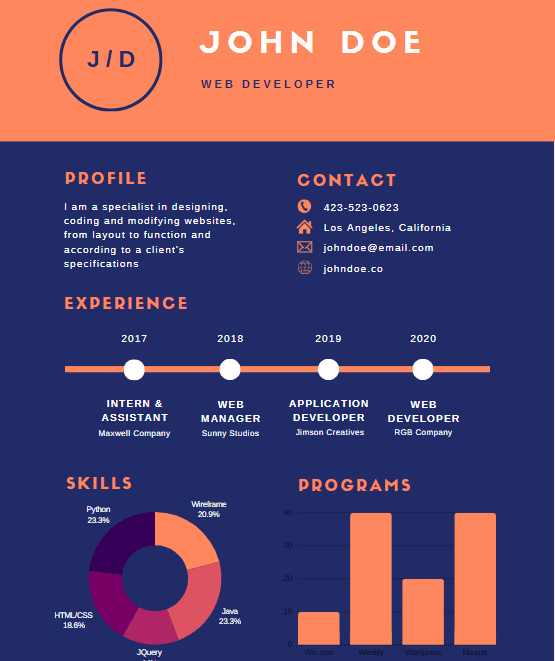
An infographic resume creatively displays your work history, using images and graphics to highlight key achievements and skills. This format is particularly popular among professionals in creative fields such as graphic design, marketing, and public relations, as it allows them to showcase their talents and stand out from traditional resumes.
How to create an infographic resume
Decide what information you want to include and how you want to visually represent it.
Select an infographic resume template that fits your style and preferences.
Collect your professional information, including education, work experience, skills, and achievements.
Use design software or online editing tools to lay out your information in a visually appealing way.
Personalize your infographic resume with colors, fonts, and graphics that reflect your personality and profession.
Double-check your infographic resume for accuracy, clarity, and consistency.
An online resume is like having your own website where you can share not just your resume, but also your portfolio of work and even a blog. It’s a great way to give people a full picture of who you are professionally.
How to create an online resume
Select a website or platform to create your online resume, such as LinkedIn, Canva, or a dedicated resume builder website.
Choose a resume template that suits your style and profession from the available options.
Input your personal information, educational background, work experience, skills, and any other relevant details into the template.
Tailor your resume by adjusting font, writing styles, colors, and layout to make it visually appealing and professional.
Proofread your resume carefully, checking for any errors or inconsistencies. Make necessary edits to ensure accuracy and clarity.
Choosing the right type of resume format can significantly impact your job search success. Each of these 7 types of resume offers unique benefits and can be tailored to suit different career needs and stages.
If you want to make sure your resume looks professional and flawless, consider using PaperTrue’s expert editing and proofreading services. Our team can improve your resume, making it clearer, more impactful, and highly professional, so you leave the best impression on your potential employer!
Your business may be great but how do you convey that to the clients? A business proposal is what you need! It is an instrument that can guide you to new partnerships, secure funding, and expand your company’s horizons. Whether you’re pitching services to a potential client or seeking financial backing from an investor, understanding how to make a compelling business proposal is quintessential.
This article will take you through the essentials of what a business proposal is, and its different types. It also has a step-by-step guide on how to create a business proposal, complete with practical tips, examples, and templates!
Ensure your business proposal is polished and professional!
Let’s begin with an easy business proposal definition:
What is a business proposal?
A business proposal is a formal document that is created to communicate a specific offer or intention to a potential client to secure their business. In simpler words, it is a document designed to offer specific goods or services to a potential client or buyer.
A proposal in business is different from what a business plan is. While a business plan is all about how you run your company, a business proposal is more about convincing others to work with you. It outlines what you can offer, how you plan to deliver your services or products, and why you are the best choice.
Types of business proposals
Business proposals can generally be classified into three types:
Solicited business proposals
These are written when a potential client asks for specific information about your services. The clients are already interested in what you offer and want more details.
Unsolicited business proposals
These proposals are sent out on your own initiative. They’re like a marketing brochure and need to be persuasive to catch the interest of potential clients who might not be actively searching for your services.
Informal and formal proposals
Informal proposals are less structured while formal proposals are structured, outlined, and formal. Informal proposals may look more like a letter. Formal proposals follow a clear outline and are usually more detailed often involving contracts.
Let’s move on to the most interesting part: how to write a business proposal.
How to write a business proposal
Follow this step-by-step guide with practical tips to understand how to write an effective proposal for your business.
Step 1: Understand what the client needs
Clearly understand what the client needs to solve or achieve.
1. Review the Request for Proposal (RFP) if provided, to understand the specific requirements and criteria.
2. Conduct research to gather information about the client’s business, industry trends, competitors, and previous solutions they’ve tried.
3. Communicate directly with the client to clarify any uncertainties about their needs and expectations.
Tip: Make a checklist of what the client wants so you can refer to it as you write your proposal.
Step 2: Create a Title Page
Design a title page that is both informative and visually appealing. Create the title page according to the business proposal format.
1. Include the proposal title, which should be clear and concise, directly addressing the proposal’s purpose.
2. Add the name of the recipient or the company the proposal is addressed.
3. List your company’s name and contact information, including address, phone number, email, and website.
4. Date the proposal to keep track of when the offer was submitted.
5. Incorporate a logo and design elements that reflect your company’s brand.
Tip: Keep the design simple and professional. Avoid cluttering the title page with too much information or overly flamboyant designs.
Step 3: Define what your services will cover
Explain in detail what exactly will your services provide.
1. Start with an executive summary, outlining the key points of the proposal. Include the benefits of how your services will help the client.
2. Write the problem statement, and mention what needs of the client require to be catered to.
3. Specify the solution and deliverables including what services/products will be delivered, and the end results that the client can expect.
4. Set clear boundaries to avoid misunderstandings about your scope, which can lead to unmet expectations and disputes.
Tip: Use bullet points to ensure clarity and that all the deliverables are understood distinctly.
Step 4: Detail your company’s qualifications and experience
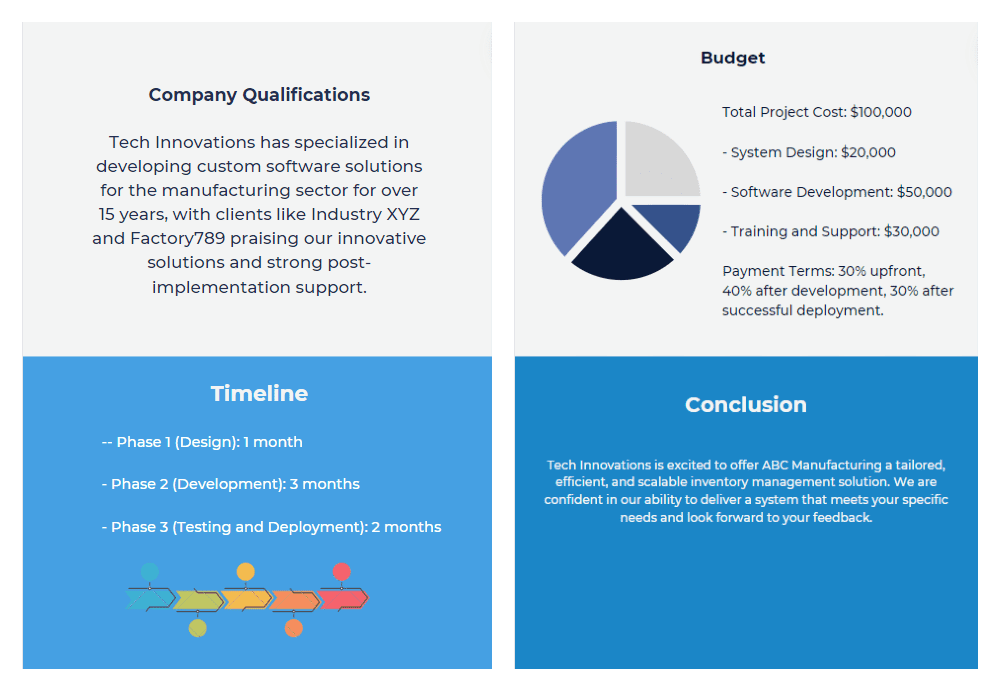
Convince the client that your company is the best choice for the project by showcasing your expertise and successful track record.
1. Introduce your company and highlight the achievements to showcase how you are the right choice for the job.
2. Showcase your team’s expertise by briefly introducing key team members who will be involved in the project. Include their roles, experience, and any specific skills or certifications that are relevant to the proposed work.
3. Include testimonials or case studies from similar projects to build credibility.
Tip: Incorporate visuals such as graphs or charts to demonstrate past successes or testimonials in a more engaging way.
Step 5: Make a timeline for the project
Establish a realistic timeline for project completion.
1. Break down the project into smaller phases or milestones.
2. Assign estimated durations to each phase and mark down important dates.
3. Consider potential obstacles that might come up and have a plan for dealing with them.
Tip: Use a Gantt chart to visually represent the timeline, phases, and dependencies.
Step 6: Pricing and budget
Provide the client with a detailed and transparent cost breakdown.
1. List all costs associated with the project, including direct costs, labor, and materials.
2. Offer pricing options if applicable (e.g., tiered pricing for different levels of service).
3. Explain your terms of payment such as due dates for payments, acceptable payment methods, and any payment plans.
4. Add an appendix if necessary for any supporting documents or detailed technical specifications.
Tip: Follow a proper financial statement format to ensure better understanding and record-keeping.
Step 7: Review and edit
Ensure the proposal is polished and free of errors. Also, check and ensure that the business proposal outline has been properly followed throughout.
2. Review for clarity and flow, ensuring that the document logically progresses from one section to the next.
3. Get feedback from a colleague or mentor who can provide a fresh perspective.
Tip: Consider using professional proofreading and editing services to refine the proposal further. You can also use proofreading tools such as grammar checkers and content editors if you want to do it yourself. Additionally, you can opt for a proposal writing course to gain structured guidance and enhance your professional writing skills for greater impact.
Step 8: Follow up with the client
Stay in contact with the client even after you send the proposal.
1. Confirm receipt of the proposal with the client.
2. Offer to discuss any questions they might have after reviewing the document.
3. Be proactive about contacting the client to provide additional information and remind them why your proposal is the best choice.
Tip: Set a reminder to follow up if you haven’t heard back within a timeframe that respects the client’s decision-making process.
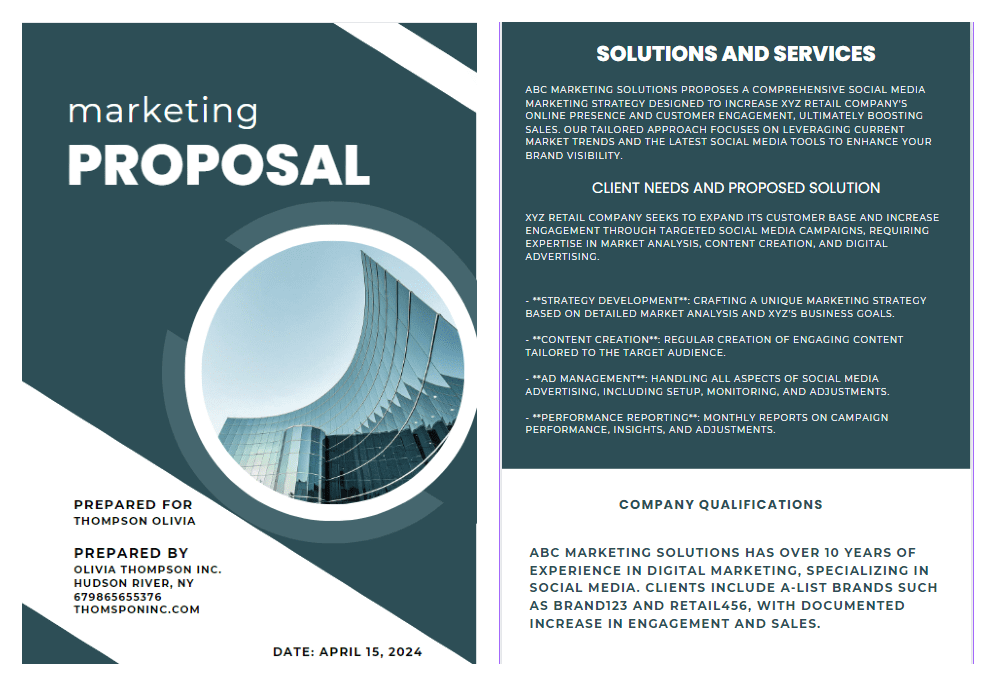
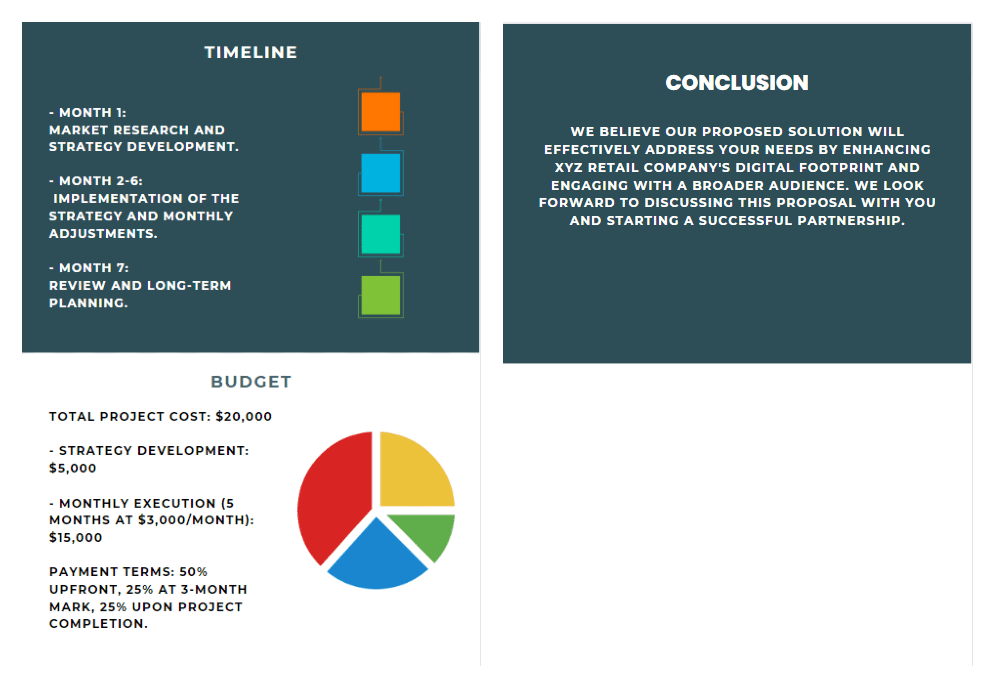
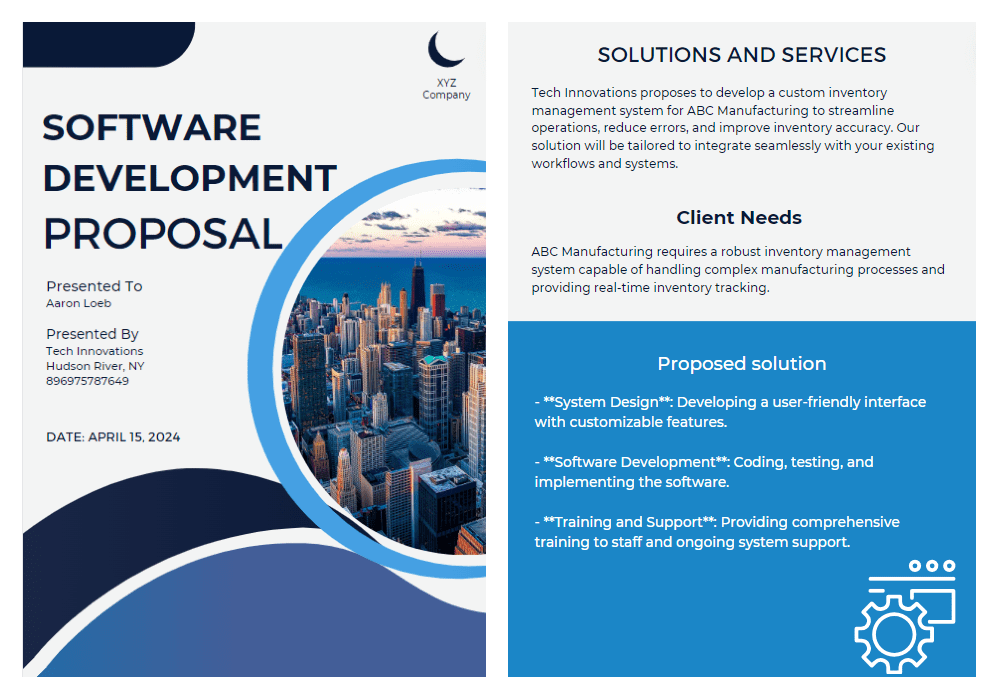
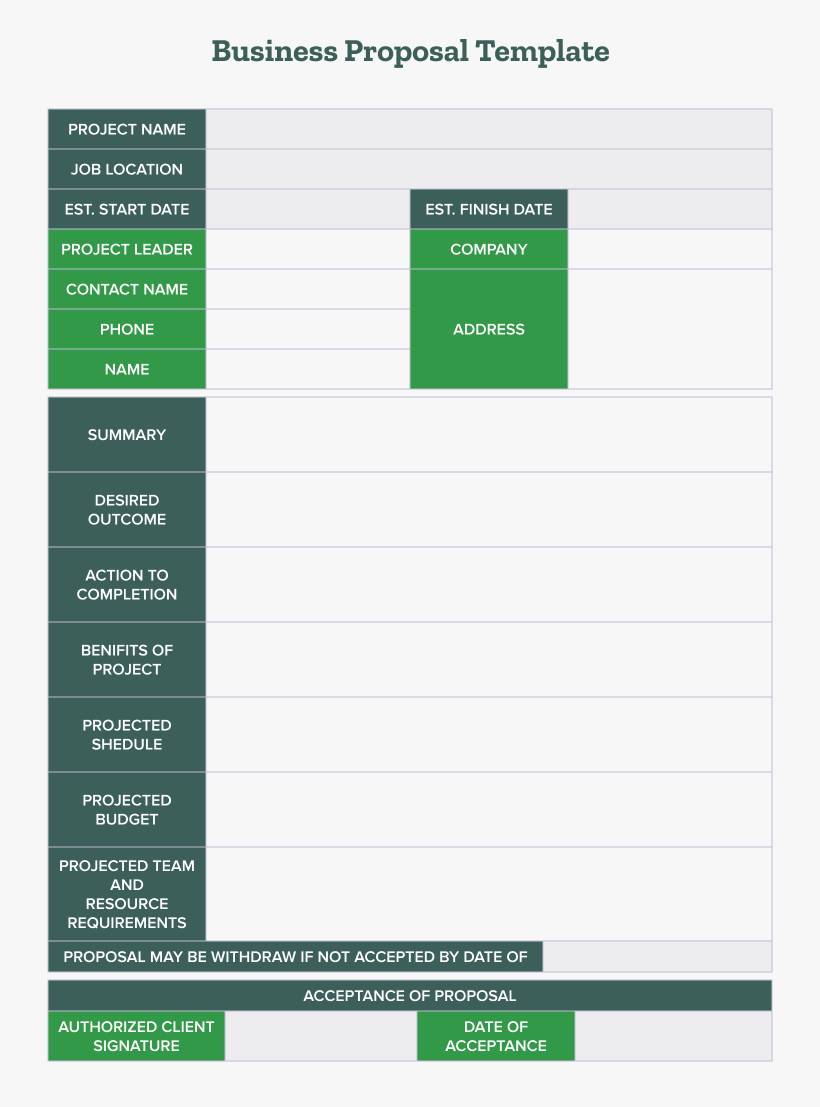
Now let’s look at some examples of business proposals for a better understanding of the business proposal format and outline.
You can use the given free business proposal template as a starting point for your business proposal. Incorporating the steps mentioned in the guide, you can create a winning proposal for yourself!
Creating a business proposal doesn’t have to feel overwhelming. By knowing what your client wants and organizing your ideas well, you can write a proposal that not only shows the value of your solution but also lays the groundwork for a successful partnership.
To ensure your business proposal is polished and professional, consider leveraging expert editing and proofreading services offered by PaperTrue. Our team of professionals can help refine your document, ensuring clarity and impact to make the best possible impression on your prospective clients!
Welcome to the vibrant world of screenplay writing! Whether you’re a budding screenwriter or a curious enthusiast, understanding how to write a screenplay is a journey that blends creativity with a structured approach.
In this blog, we will dive deep into the essentials of screenplay writing, offering you expert screenplay writing tips, a step-by-step guide, and compelling examples to empower your scripting journey. So without further ado, let’s begin!
Enhance your screenplay with top-tier editing!
What is a screenplay?
A screenplay is a document that tells the story through visuals, dialogue, and action while adhering to a specific format. Often referred to as a script, it’s the foundational blueprint for any film or television show. It details everything from dialogue and action to settings and transitions.
Unlike a novel or short story, a screenplay focuses on showing, not telling. Mastering the screenplay writing format and learning how to write a screenplay properly is crucial for success.
Now that we’ve understood what a screenplay is, let’s move on to the steps to writing a screenplay:
How to write a screenplay
This guide encapsulates the steps needed to craft a screenplay that is not only structurally sound but also engaging and marketable. Here’s how to start writing a screenplay that will stand out:
Step 1: Conceptualizing the idea
Start by defining the core idea of your screenplay. This could be a plot, a character, a setting, or a specific conflict.
Brainstorm freely: Allow your creativity to flow without judgment. Use tools like mind mapping to explore different aspects of your initial idea.
Focus on the ‘What If?’ question: Great stories often start with a compelling ‘what if?’ scenario. For instance, “What if an archaeologist discovers an ancient artifact that everyone wants to steal?”
Logline development: Try to formulate a logline early. This is a one or two-sentence summary of your film that introduces the main character, their goal, and the primary conflict.
Step 2: Understand the types of scripts
Spec scripts: Spec scripts are written without a commission, purely based on the writer’s speculation that they will be sold. Write with universal appeal in mind, as these scripts are often used to showcase a writer’s skills and sell their screenplay on the basis of their potential.
Shooting scripts: Shooting scripts include technical details like camera angles and are used during production. Learn the technical jargon and formatting including camera moves and editing cues, though typically this is used in later revisions.
Step 3: Outlining the story
Develop an outline that maps out the major events of your screenplay, often referred to as beats.
Use a Beat sheet: Tools like Save the Cat or the Hero’s Journey can offer a structured way to outline your story.
Scene cards: Write each major scene on an index card or use digital tools like Trello or Final Draft. This helps in visualizing the story’s flow and rearranging scenes as needed.
Pacing: Ensure your plot outline includes rising action, a climax, and a resolution. Keep the audience engaged by placing turning points at strategic intervals.
Step 4: Ensure proper formatting
Even if you’re just writing for enjoyment, sticking to the standard format is really important. It makes your script easier to read and makes you look more professional.
Screenwriting software: Always start with a screenwriting software preset (like those in Final Draft or Celtx) to ensure your formatting is automatically aligned with industry standards without manual adjustments.
Standard font and size: Always use 12-point Courier font. This monospaced font ensures that one page of your screenplay approximately equals one minute of screen time, a standard metric in the industry.
Element formats:
Scene headings (sluglines): Always in CAPS. E.g., INT. HOUSE – DAY
Action: Descriptive text, written in the present tense.
Character name: Before the dialogue, centered, in CAPS.
Dialogue: Directly below the character name, with narrower margins than action.
Parentheticals: Directions for actors (how they should say a line, actions they should perform while speaking), placed within dialogue block.
Convert your outline into a full screenplay format, focusing on creating a strong narrative and dialogue. Each scene should serve a purpose, either pushing the plot forward or revealing something crucial about the characters.
The front page: Includes the title, writer’s name, and contact information.
The first page: Sets the stage with the opening scene.
Scene headings: Indicate the location and time of day.
Action: Describe what happens visually in each scene.
Dialogue: Characters’ spoken words centered on the page.
Parentheticals: Brief directions for how dialogue should be delivered.
Transitions: Instructions for the editor, typically minimal in spec scripts.
Montages: Sequences showing events over time, condensed into brief scenes.
Feedback: Get feedback from trusted peers or mentors who understand screenplay writing.
Editing: Screenplays often require multiple drafts and screenplay editing. Refine dialogue, strengthen the plot, and ensure pacing is consistent. You can use content editing tools like ProWritingAid or QuillBot.
Step 7: Be original
Bring a unique perspective and voice to your screenplay. Originality stands out in a crowded market. Draw from personal experiences or unique observations to find fresh stories or perspectives that stand out.
Step 8: Final polish
The final polish of your screenplay is where you focus on the finer details. This includes checking the screenplay writing format, fixing any lingering grammar mistakes and typos, and ensuring that every line of dialogue serves the story.
Expert tips for writing a screenplay
Here are some expert screenplay writing tips to keep in mind throughout the process:
1. Show, don’t tell: When writing a screenplay, it’s important to use pictures to tell the story instead of just explaining it with words. Instead of having characters describe their feelings or situations, use visual elements to convey this information. For example, show a character’s loneliness by depicting them dining alone in a large, empty house, rather than having them say they feel lonely. Incorporate symbolic elements that represent larger themes or emotions in the story. For example, a wilting flower might symbolize a dying relationship.
2. Engaging dialogue: Good dialogue is short and makes a big impact. It should show what kind of person a character is and move the story forward. Every piece of dialogue should serve a purpose. Avoid including dialogue that merely fills silence without adding any value. Use dialogue rhythm strategically to enhance the mood and pacing of your scenes.
3. Character development: Each character in your screenplay should have a clear reason for being there and should help tell the story. Everything they do and say should match their role in the story. Create characters that are memorable and unique. Develop their strengths and weaknesses that will tell a story about how their presence affects the screenplay.
4. Adequate pacing: Keep the story moving fast. Each part of the story should make sense and lead to the next part, keeping people interested. Structure your story effectively with varying scene lengths and emotional pace.
5. Interesting conflict: Conflicts are what make stories interesting. Make sure there’s enough conflict in your screenplay to keep people excited about what’s going to happen next. You can develop rich backstories for your characters to ensure that the conflicts they encounter are deeply personal and emotionally resonant. Also, avoid static conflicts. Instead, allow the conflict to evolve as the story progresses. Revealing unexpected twists keeps the audience engaged and maintains tension.
Below are two examples showcasing different aspects of a screenplay for a fictional movie titled “Edge of Tomorrow’s Shadow”:
Example 1: Opening scene
EXT. RAINY CITY STREET – NIGHT
Rain pours down in sheets over a dimly lit street. The neon lights reflect off the wet asphalt.
A black sedan pulls up near a rundown diner. The sign “Joe’s Diner” flickers intermittently.
INT. JOE’S DINER – NIGHT
The door swings open. MARY SHELTON, 30s, wearing a trench coat and a determined look, steps inside. She shakes off her umbrella, scanning the room.
The diner is nearly empty except for an OLD MAN at the counter and a WAITRESS wiping down tables.
Mary approaches the waitress and lowers her voice.
MARY
(whispering)
I’m looking for Joe. Is he in?
The Waitress nods towards the back without making eye contact.
WAITRESS
Back office. But he ain’t seeing anyone tonight.
Mary nods, slips her a $20 bill, and heads towards the back.
Example 2: Dialogue scene
INT. ABANDONED WAREHOUSE – DAY
A large, echoey warehouse. Sunlight streams through broken windows, casting long shadows. TOMAS REYES, 40s, tough, stands facing VICTOR SANTOS, 50s, more refined but equally tough.
TOMAS
You think you can just walk away from what you owe?
VICTOR
The deal changed the moment you brought my family into this.
They circle each other like wolves, the tension palpable.
TOMAS
Business is business. You know how it works, Victor.
VICTOR
(smiles coldly)
And betrayal is betrayal, old friend.
Suddenly, Victor pulls out a gun. Tomas freezes, his hand inching towards his belt.
Screenplay writing is an art form that combines creativity with discipline. By understanding the steps to writing a screenplay and applying the given screenplay writing tips, you can transform your vivid imagination into compelling scripts.
If you’re serious about your screenplay, consider getting it professionally edited and proofread. This can not only polish your work but also enhance its clarity and impact. PaperTrue offers expert editing and proofreading services that can elevate your screenplay from good to great, making it ready to pitch to studios and agents with confidence!
Navigating the college application process can be daunting. An admissions essay is a part of your introduction to the academic institution you’re hoping to join. Knowing how to write a college admission essay that stands out is a key step that can increase the chances of your application being accepted.
In this article, we will help you with the process of writing the best college admissions essay. So get your pens ready and let’s begin!
Achieve academic excellence with expert essay editing services!
What is a college admission essay?
A college admission essay is a personal statement or a written commitment that reflects your personality, achievements, and aspirations. This essay gives a voice to your application and is a chance for you to highlight what numbers and formal achievements can’t fully convey.
What essay to write for college admission?
When deciding on which essay to write for your college application, it’s important to select a college essay topic that not only captures attention but also offers enough space to highlight your strengths. Whether it’s a personal hurdle you’ve overcome, a notable achievement, or a memorable experience, opt for a college writing prompt that lets you express yourself genuinely and thoughtfully.
Typically, colleges will specify a word limit, usually around 500-650 words. This means you’ve got to be really careful with your writing, making sure each word helps tell your story or make your point.
How to write a college admission essay
How to write an admission essay begins with brainstorming and creating an essay outline. Jot down ideas, anecdotes, or experiences that capture your best qualities. Organize these into a coherent structure for the essay before you start writing.
1. Make your starting strong
When starting an essay, you want to engage the reader right from the first line. To make your hook strong, you can start with a compelling anecdote or a thought-provoking question. Aim for a balance between professionalism and a conversational tone, which can make your essay feel genuine and inviting.
2. Write a clear and concise narrative
A college admissions essay is all about your story. It’s about delving deep into your experiences and sharing the moments that have shaped you into who you are today. And here’s the secret – embrace the full spectrum of your journey, even the tough parts!
Before you begin writing, spend time reflecting on your life experiences. Select experiences that highlight growth, resilience, and self-awareness. Show, don’t tell – use vivid descriptions and specific details to bring your story to life.
The essays that leave a lasting impact are the ones that are authentic, raw, and reflective, offering a glimpse into the real you. So, don’t hold back – let your story unfold, and watch as it captivates and resonates with those who read it.
3. Follow the guidelines
Review the essay prompt or instructions given by the college or university. Make sure your essay adheres to all specified requirements, including length, format, and any particular questions that need to be answered.
4. End your essay compellingly
Now, you should be focusing on how to end the college admission essay. The conclusion of your admission essay should echo the core message of your essay and leave the admissions officer thinking about you as a candidate. In your conclusion, circle back to the key themes or qualities you discussed throughout the essay, but offer a fresh insight or reflection that you haven’t previously mentioned. Concluding an essay is your final moment to reinforce why you deserve a place at their institution.
5. Review and refine your essay
After your first draft, it’s time to proofread your essay. Read your essay aloud, and have others review it. and ensure that it’s. Editing your essay will ensure that your essay is error-free and flows well. A well-polished essay demonstrates your dedication and attention to detail—qualities that every college appreciates. There are many essay editing services that can help you with this.
Admissions officers are looking for the authentic you. They want to see your ability to think critically and express yourself clearly. They are also on the lookout for your personality traits that could contribute to their campus community. Be honest, be yourself, and let your genuine interests and passions shine through. The types of essays that resonate most are those that are honest and reflective.
In our digital age, AI essay writers can be a starting point for inspiration, offering prompts and ideas to get your creative juices flowing. But remember, the real work is deeply personal and cannot be outsourced. Use essay graders, grammar checkers, essay checkers, and language correctors to polish your prose, and consider a content editor to help you refine your voice.
AI essay writing tools can help you in many ways but to ensure that your college admission essay is perfectly polished and refined, you can take the help of editing and proofreading companies. PaperTrue provides expert editing and proofreading services that have helped thousands of students with their admission essays.
When you’re delving into research, you’ll come across two main types of materials: primary and secondary sources. Understanding the difference between primary and secondary sources is really important for in-depth data analysis or for making a strong argument based on facts.
In this blog, we’ll explore the definitions, importance, and practical methods of identifying and utilizing both primary and secondary sources. We will also look at examples of primary and secondary sources and the differences between them!
Ensure high-quality editing for your research!
Primary sources
Let’s begin with an easy primary source definition:
What are primary sources?
Primary sources are the original, firsthand sources of information or data. These are the initial documents or artifacts produced by individuals who experienced or witnessed an event or collected data at the time it happened. The primary sources offer an unfiltered glimpse into the past or the subject of study.
Examples of primary sources
Diaries and personal journals.
Correspondence and letters.
Manuscripts of literary pieces or scientific papers in their original form.
Visual creations like photographs, paintings, and artworks.
Contemporary newspapers and magazines (first-hand accounts)
Speeches and verbal accounts captured by witnesses or participants.
Authentic paperwork such as governmental records, birth certificates, and treaties.
Artifacts and relics.
Conversations held with eyewitnesses or participants of past events.
Audio or video recordings documenting live happenings or presentations.
Why are primary sources important?
Primary sources are key in research, offering a direct link to the past and allowing for a deep grasp of historical and cultural backgrounds. They play a crucial role in lending credibility to historical research and validating theories and narratives. Additionally, they empower researchers to form their own conclusions independently, making them especially valuable in fields like history, literature, and anthropology, where the accuracy of accounts is paramount.
Finding primary academic sources may seem tricky, but it’s a crucial skill for academic research. Libraries and archives are great places to start your search for primary source material. Nowadays, many institutions have online archives where you can find digitized versions of documents and artifacts.
You can also check out online databases and academic journals for original research articles, especially in fields like science and social sciences. Government websites often have official documents available for access too. And if you’re looking for historical documents, repositories like the National Archives or Library of Congress have extensive collections online.
Types of primary sources
Written records: These are things like letters, diaries, and official documents written by people who saw or were part of the events.
Visual material: This includes pictures, paintings, maps, and posters that show what things looked like in the past.
Audio recordings: These are the interviews, speeches, and sound recordings that let you hear what people say about the events.
Audiovisual material: These are films, documentaries, and TV shows that let you see and hear what happened.
Artifacts and objects: These are physical items like tools, clothes, and artworks that give us clues about how people lived in the past.
Archaeological finds: These are things like ancient artifacts and ruins that help us understand ancient civilizations.
Digital sources: These are websites, social media posts, and blogs that give us modern perspectives on events as they happen.
How to tell if a source is primary?
A source is primary if:
Created during the time period being studied.
Provide firsthand accounts, original data, or direct evidence.
Examples include diaries, letters, speeches, photographs, interviews, and artifacts.
Now, we will move on to learning about secondary sources in detail!
Secondary sources
Let’s begin with an easy secondary source definition:
What are secondary sources?
Secondary sources help analyze or critique primary sources. Their main purpose is to provide interpretation, commentary, or scholarly analysis. They gather information to give a summary of a subject, making conclusions or talking about patterns using original data.
Examples of secondary sources
Books for study
Articles summarizing research
Magazine stories
Life stories written by others
Information books
Newspaper pieces discussing events or research
Summaries of research in literature
Shows or films explaining history or science
Evaluations or discussions about books
Opinions or breakdowns from field experts.
Why are secondary sources important?
Secondary sources provide context for original data, giving us a better understanding of how experts view research findings or historical occurrences. They help researchers grasp the importance of primary documents and assist in shaping their secondary research questions or main arguments.
Finding secondary sources is generally easier than finding primary materials. Most academic libraries offer access to a vast array of secondary literature through digital databases such as JSTOR, Google Scholar, or specific publisher databases. Secondary materials are also widely available in bookstores and libraries.
Types of secondary sources
Journal articles: Peer-reviewed articles published in journals present research findings, analyses, and interpretations of historical topics or phenomena.
Encyclopedias and dictionaries: Reference works such as encyclopedias and dictionaries compile summaries, explanations, and definitions of historical events, concepts, and figures.
Historical reviews and surveys: Historical reviews and surveys give wide-ranging looks at particular historical times, topics, or places. They summarize existing scholarship, provide historical context, and identify key themes and trends.
Documentary films and television programs: Documentaries and television programs present visual interpretations of historical events. They offer narrative explanations, expert commentary, and archival footage to engage audiences and convey historical information.
Literature reviews:Literature reviews summarize and analyze existing research and scholarship on a particular topic or question.
Textbooks: Educational textbooks provide structured overviews of historical periods, events, and themes designed for classroom use.
Historical websites and online resources: Websites, blogs, and online resources dedicated to historical topics offer a wide range of secondary source material. They include articles, essays, and multimedia content.
How to tell if a source is primary?
A source is secondary if:
Created after the period being studied.
Offer analysis, interpretation, or commentary on primary sources.
Examples include textbooks, articles, documentaries, biographies, and scholarly analyses.
Now that we’ve understood the primary and secondary sources, you must be thinking about when to use primary vs. secondary sources. To get that answer, you’ll have to learn the difference between primary and secondary sources!
What is the difference between primary and secondary sources?
The main difference between primary and secondary sources is that primary sources are firsthand accounts or original records of events, while secondary sources are interpretations or analyses of those events by others.
When to use primary vs. secondary sources?
When to use primary sources
You want to examine firsthand accounts or original documents related to your topic.
You need to analyze raw data or evidence to form your own interpretations.
You’re conducting historical research and need to access documents created during the period you’re studying.
You want to explore multiple perspectives or experiences directly from the source.
When to use secondary sources
You’re looking for expert analysis, interpretation, or summaries of primary sources.
You need background information or context on a topic before delving into primary sources.
You want to compare different scholarly interpretations or viewpoints on a subject.
You’re conducting preliminary research and need an overview of existing research findings.
Each type of source brings something important to the table, helping you get a full picture of whatever you’re looking into. By getting good at using both primary and secondary sources, researchers can really level up their work with depth, context, and factual evidence.
Also, if you ever need an extra set of eyes to make sure your research is polished to perfection, don’t forget about PaperTrue’s expert editing and proofreading services! Our team is here to help your work shine. Our team is here to help your work achieve its full potential.
One of the coolest developments in this ever-evolving world is the rise of open-access journals. But hold up—what exactly are these open-access journals, and why should they matter to all you students, professors, and researchers out there?
Buckle up as we dive into the fascinating realm of open-access publishing, uncovering the myths of open-access publishing and shedding light on the costs involved in this innovative model!
Want a precisely edited journal article? We can help!
Let’s start by understanding what does an open-access journal means:
What is an open-access journal?
An open-access journal is a type of scholarly journal that makes all its content freely available to readers without any subscription fees. This model allows anyone with internet access to read, download, and distribute the published research without financial, legal, or technical barriers, apart from those inseparable from gaining access to the internet itself.
The philosophy behind open-access
The big idea behind open-access journals is all about spreading knowledge far and wide, making sure everyone has access to the latest research. This idea goes along with the big aim of pushing science and education forward by spreading information to more people and getting everyone involved in research.
Gold open-access journals: the gold standard?
When discussing open access, you may come across the term “gold open-access journal.” What is a gold open-access journal, exactly? Well, gold open-access journals are the journals where the articles are available for free right away. The author, their school, or a sponsor usually pays for this. These journals guarantee that their articles are always free to read and go through the same tough review process as regular journals.
Open-access journal cost: who pays?
One of the most debated aspects of open access is the open access journal cost. Traditionally, the reader or the reader’s institution would pay to access journal content. However, open-access journals often shift the cost burden to the authors, who may have to pay an Article Processing Charge (APC) upon acceptance of their work. This fee covers the costs of the journal article editing process, peer review, and the technology needed to host and disseminate the articles.
A hybrid open-access journal offers authors the choice to make their journal articles open-access in an otherwise subscription-based journal. This model provides flexibility, allowing authors to comply with open access mandates from funders or institutions when required or choose traditional publishing otherwise.
Specialized open-access journals
The open-access model extends across disciplines, from the Open Access Journal of Sports Medicine to the Open Access Journal of Clinical Trials. Each specialized journal serves the particular needs of its research community, offering tailored platforms for sharing findings. For example, the IEEE Open Access Journal of Power and Energy provides a forum for cutting-edge research in electrical engineering.
The arts and humanities also benefit from this model, with publications like the Arts and Humanities Open Access Journal making cultural and literary research available to a broader audience. Meanwhile, an open-access philosophy journal can facilitate discussions on metaphysics, research ethics, and other philosophical inquiries without the barrier of subscription fees.
How to start an open-access journal?
If you’re thinking about starting your own open-access journal, there are a few things you’ll need to do. First, you’ll need to put together an editing team to oversee things, then set up a system for reviewing submissions and proofreading the journal articles. It’s also important to choose a sustainable financial model. Building a reputation and attracting high-quality submissions takes time, but the result can be a reputable platform for sharing academic resources.
Ten common myths about open access journals: busted!
Myth #1: Publishing my article in an elite journal is sufficient to increase readership and citation counts.
Busted: Every year, millions of authors use recognized open-access journals to cite previously published articles and to publish their articles anticipating increased readership nationwide.
But the fact is, a well-written research article including concise descriptions, authentic discussions, coherent conclusions, and accurate research metrics can eventually reach the target readers irrespective of the journal’s fame. So, centering on good research content is ideal for increasing readership, and remember, it doesn’t necessarily depend on top-tier journals.
Myth #2: Publishers add no or little value to the open-access systems.
Busted: It’s a myth that publishers add no value to the journal publishing process. But the truth is, that scholarly publishing is a complicated process, and publishers lie at the core of the peer-review process and its management workflow.
Since the peer-review process deals with numerous stages viz. proofreading, copy-editing, article linking, typesetting services, etc., Every phase has its own challenges and limitations (majorly time-taking and inducing high production costs) that publishers need to manage. So, publishers are responsible for the effective management of journal publications both financially and technically.
Myth #3: Case reports have no value.
Busted: Most of the original research is based on case reports and case series findings. It is an utter misconception that there is no value for case reports. If you have a clinically relevant unique case report that is unpublished, you can publish it for sure. That way, you are introducing a new concept to the respective industry.
Myth #4: One should give up on publication after manuscript rejection.
Busted: One should never give up on the publishing desire at the cost of manuscript rejection. There are multiple reasons to reject the manuscript. And, it is solely the journal’s editorial team who decides whether to approve or reject the manuscript.
Also, keep in mind that the journal’s rejection is certainly not the end. You can improve and edit your manuscript based on the feedback and re-submit it or approach other journals to get it published. Remember, being consistent and persevering is the key to success.
Myth #5: Indexed journals will not accept my article.
Busted: It is a common myth that most new researchers or authors believe that high-quality scientific journals (indexed journals) will reject their manuscripts. So, the best way to combat this myth would be to visit the desired journal platform and fetch all possible information on journal indexing and abstracting. It not only helps you get well-versed with their indexing policies but also enhances the manuscript quality in line with the journal guidelines.
Busted: Publishing in open-access journals does not necessarily mean you have to make a hole in your pocket. Only about one-third of the open-access journals charge publication fees – article processing charges (APC).
Also, if the author cannot afford the publication fee, most journals reduce the publication cost through funding, sponsorships, or membership dues. If you want to self-archive the peer-reviewed manuscript instead of publishing it on open access, you can cut down on the publication fees.
Myth #7: Open-access journals are not copyrighted.
Busted: Many open-access journals allow authors to retain the copyrights of the materials. Unlike traditional publishing, the authors do not require any permission to use the research metrics or content of the article.
Besides, they allow authors to re-use the materials under Creative Commons licenses that ensure supreme visibility of the article.
Myth #8: Open-access journal helps only readers and not authors.
Busted: It is true that open-access benefits the readers by providing free access to the articles. As a result, the rate of readership increases. However, the increased readership is directly proportional to the higher citation counts, therefore boosting the impact factor.
As a result, it benefits the researchers or authors to gain credibility for their research work and helps them secure grants and funding for future projects. To sum it up, open-access models are beneficial for both the author and the readers.
Myth #9: Open-access journals are not peer-reviewed and of poor quality.
Busted: You might find non-peer-reviewed journals on the internet today. However, it depends on the journal’s policy whether to follow the peer-review process or not. But, most of the open-access journals follow a peer-review process that is similar to traditional journals. Post-approval of peer-reviewers and editors, they publish the article ensuring high quality.
Here are a few examples of credible open-access journals that ensure a high-quality article publication:
DOAJ
SpringerOpen
PubMed Central
JSTOR
SAGE Open
Elsevier
Myth #10: Submitting my article to open-access journals is the only way to provide open-access articles.
Busted: There are two ways to make your article digitally available. The first one is submitting to OA journals, while the other one is self-archiving or archiving your articles in digital repositories. So, the myth that publishing solely in open-access journals provides open access to your article does not hold any truth.
As explained before, you can also submit and publish your article in the journal of your choice and still make your work available online by archiving in digital repositories.
Archiving articles in a digital repository is the publishing standard that every author or publisher should follow to preserve the content for the long term. To simplify the archiving process and store rich metadata, JATS XML is in practice.
Open-access journals are changing how academic publishing works, making it easier for everyone to access knowledge. To make sure your research stands out in these journals, it’s crucial to have it expertly edited and proofread.
With PaperTrue’s professional editing and proofreading services, your work will shine, helping you make a real impact in the world of open-access publishing!
Here are some other articles you might find useful:
Want to create a professional title page within seconds? Use a title page generator! Explore all features of the best title page generators in detail. We’ve included both free and paid title page generators.
Whether you want to create a title page in APA, MLA, Chicago, Turabian, ASA, Harvard, Oxford, IEEE, AMA, ACS, Bluebook, and APSA formats, we’ve got you covered. So without further delay, let’s begin!
Created a title page? Let our editors polish your paper!
Here are the top 10 title page generators:
1. IvyPanda
IvyPanda is a simple and free title page generator. Students can create a title page in Harvard, Chicago 9, APA 6, APA 7, and MLA 9th edition styles using IvyPanda.
Pros
Its APA title page maker and other title page creators have the option to add the subtitle and course details.
It can download the title page and sample template for an academic paper as a Word document.
It allows you to add multiple authors if required.
Cons
It doesn’t have options to create a template in ASA, IEEE, and Oxford styles.
The APA format title page generator doesn’t provide the option of adding a running head.
There is no feature to add an author’s note.
2. Writing-Services.org
Using this tool, students can create a title page in APA 7, APA 6, MLA 9, Chicago 17, and Harvard referencing styles. This tool allows you to fill in details such as the submission date, the university name, and other details.
Pros
It provides an option to add the subtitle, course name, and more authors if required.
If your title has incorrectly capitalized letters, it rectifies those errors.
Using this tool, you can easily download the title page in Word format.
Cons
There is no option to add a running head in its APA title page generator.
It has no option to create a title page in IEEE and Turabian style guides.
Its Chicago title page creator doesn’t have separate options like Chicago Style (Author-Date) 17th edition and Chicago Style (Notes and Bibliography) 17th edition like other title page generators.
3. Citefast
Citefast provides an MLA, Chicago, and APA 7th edition title page generator. To create a title page, you need to add details such as the author’s name, title, institution, course name, instructor’s name, date, etc.
Pros
A user-friendly interface where you can easily add details.
An option to add more authors and an author note if required.
A video guide to create a title page in APA format.
Cons
No options for other citation styles like Harvard, ASA, and IEEE.
It doesn’t bold the title and correct any wrongly capitalized words.
It doesn’t provide the option to download the title page in Word format.
4. PapersOwl
PapersOwl provides a free AI title page generator that has an easy-to-use interface. Whether you want to create a title page for theses or dissertations, PapersOwl can help.
Pros
It provides the option to create a title page in the following 10 citation styles: APA, AMA, MLA, Chicago, ACA, ASA, IEEE, Bluebook, APSA, and Harvard.
Its APA format title page generator includes the option of a running head.
Using PapersOwl, you can easily download the title page and format it in MS Word.
Cons
This research paper title page generator doesn’t provide options to add more authors, the instructor’s name, and an author’s note.
If you’ve wrongly capitalized any letter in the title, it doesn’t automatically correct the words.
It doesn’t provide the option to create a title page in Turabian citation style.
5. EduBirdie
Edubirdie’s free title page maker can be used by humanities, engineering, and social science students.
Pros
EduBirdie can create a title page in APA, MLA, Chicago, AMA, ACS, ASA, IEEE, Bluebook, APSA, and Harvard styles.
The APA style title page generator provides a word count for the title (12 words), running head (50 symbols), and institution details (up to 12 words).
It has a user-friendly interface.
Cons
There is no option to add the instructor’s name.
EduBirdie doesn’t have the feature to add an author’s note.
It doesn’t have separate options to create a title page in Turabian style.
6. StandoutEssay
StandOutEssay’s free title page generator can create a title page for MLA, Chicago, APA, Turabian, and Harvard citation styles. You can easily download the title page in Word format.
Pros
It can create a title page for APA 6, APA 7, MLA 9, Chicago 17, Turabian 9, and Harvard 10th edition.
For Turabian and Chicago styles, it has separate options to generate a title page with notes and a bibliography.
It has the option to add more authors.
Cons
The APA title page generator doesn’t provide the option to add a running head.
There is no option to add an author’s note if required.
It doesn’t give an option for a sample template for an academic paper in the chosen citation style like other title page generators.
7. StudyCrumb
StudyCrumb has an APA, Chicago, and MLA title page generator. This generator is free to use.
Pros
A simple interface where you can easily enter details.
It has an option to download the title page in Word format.
It can create a title page at a fast pace.
Cons
No options to add an author’s note or details for multiple authors.
This Chicago title page generator doesn’t have a separate option like “Chicago Style, Notes and Bibliography,17th edition’ like other title page generators.
It doesn’t have options to create a title page in styles like ASA, Harvard, IEEE, or Turabian style.
UniPapers is a reliable service that can create a title page for APA, MLA, Chicago, and Harvard styles quickly and efficiently. It has a simple interface that allows you to add the university name, course name, and other details.
Pros
The Chicago-style title page generator has two options that users can choose from, one with notes and bibliography (N-B), and one with author and date (A-D).
UniPapers gives you the option to download the title page and a template for the paper (as per the citation style guidelines) in Word format.
It provides detailed steps on how to create a title page along with relevant information about the ASA style.
Cons
There is no option to add a running head in the APA title page generator.
UniPapers doesn’t give you the option to add an author’s note if required.
There are no options to create a title page in Turabian, and IEEE styles.
Whether you wish to create a title page for APA, MLA, Chicago, Harvard, or Turabian citation styles, Custom-Writing.org can do it for you. It also provides a detailed guide about how to craft a title for your paper.
Pros
It has options to add the paper’s subtitle, and course details.
It provides separate options to create a title page with notes and a bibliography in Chicago and Turabian styles.
It corrects any wrong capitalization.
Cons
There is no option to add a running head in the APA 7 title page generator.
It doesn’t offer an option to add an author’s note if required.
It doesn’t have the option to create a title page in ASA and IEEE formats.
Now let us see the next title page creator!
10. StudyCorgi
StudyCorgi’s title page creator can create a title page for APA 7, APA 6, MLA 9, Chicago 17, and Harvard referencing styles. This tool is free to use.
Pros
StudyCorgi has detailed options to add the institution, course, paper title, subtitle, author, and instructor’s names.
Using StudyCorgi, you can download the title page and a sample research paper template in Word format.
It provides a detailed guide about how to create a title page in APA format.
Cons
There are no detailed academic resources on how to create a title page in MLA, Chicago, Harvard, and Turabian styles.
There are no options to create a title page in IEEE, ASA, AMA, or APSA style guides.
StudyCorgi doesn’t have an option to add an author’s note if required.
Now that you know the best title page generators, you can select the perfect one for your paper. Once you create the title page and complete your paper, the next step will be to edit it. As trusted experts in editing and proofreading services, we’d love to help you perfect your paper.
Here are some other articles you might find interesting:
Get carefully curated resources about writing, editing, and publishing in the comfort of your inbox.
[contact-form-7 id="12723" title="Subscribe Form"]
How to Copyright Your Book?
If you’ve thought about copyrighting your book, you’re on the right path.